Create a location on 7shifts to map it with venue
-
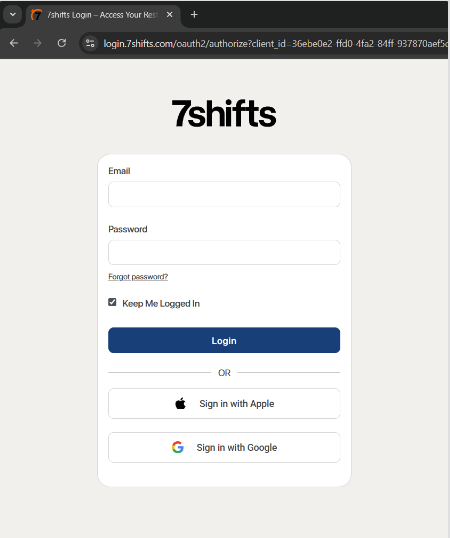
Go to 7shifts admin
Use credentials provided by 7shifts per merchant – login & password to access 7shifts admin
-
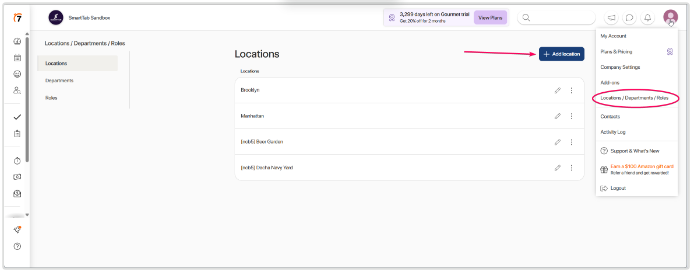
Open the Drop-down in the upper-right corner under the user picture.
-
Go to Locations / Departments / Roles.
-
Add a new location which we will map with the existing venue during enabling integration on the Third Party Settings page.
Enable integration in Smarttab
-
Follow the link to generate your personal GUID
-
Use credentials provided by 7shifts per merchant – login & password to access 7shifts admin. Copy your token (GUID)
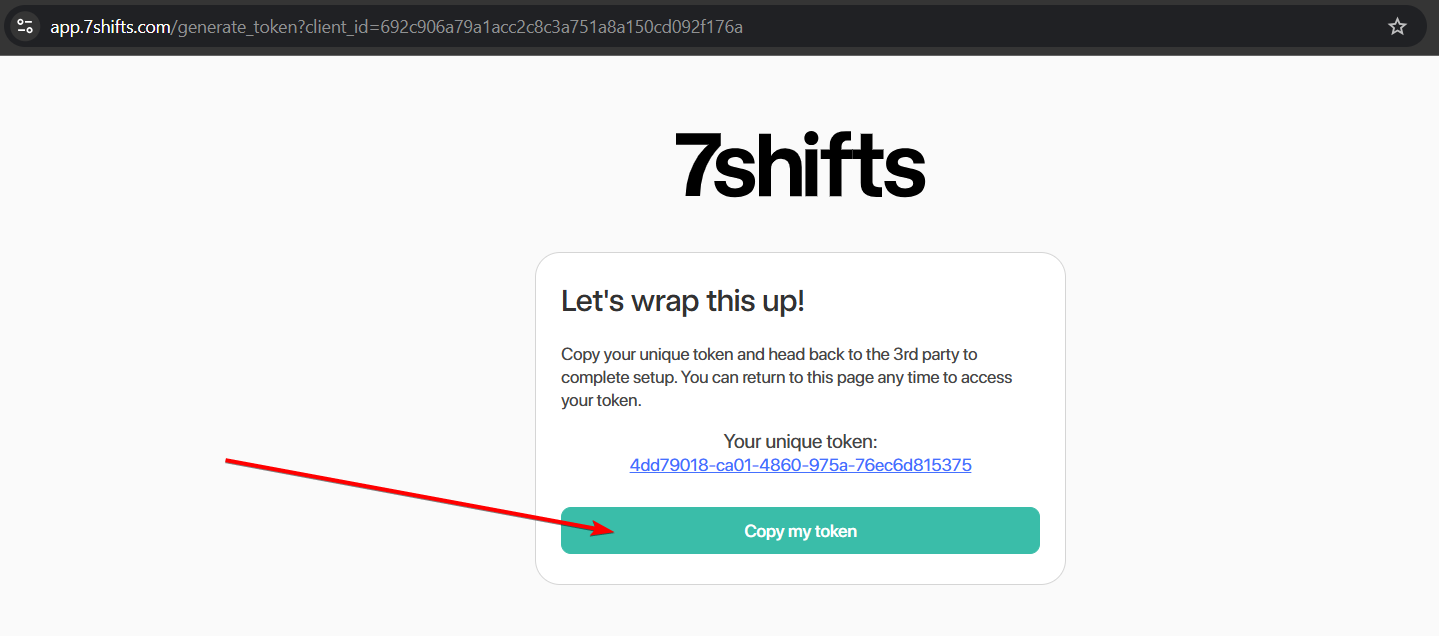
You will generate GUID once. When you follow the link again, you will see the same GUID. You can use it to enable the integration on multiple venues.
-
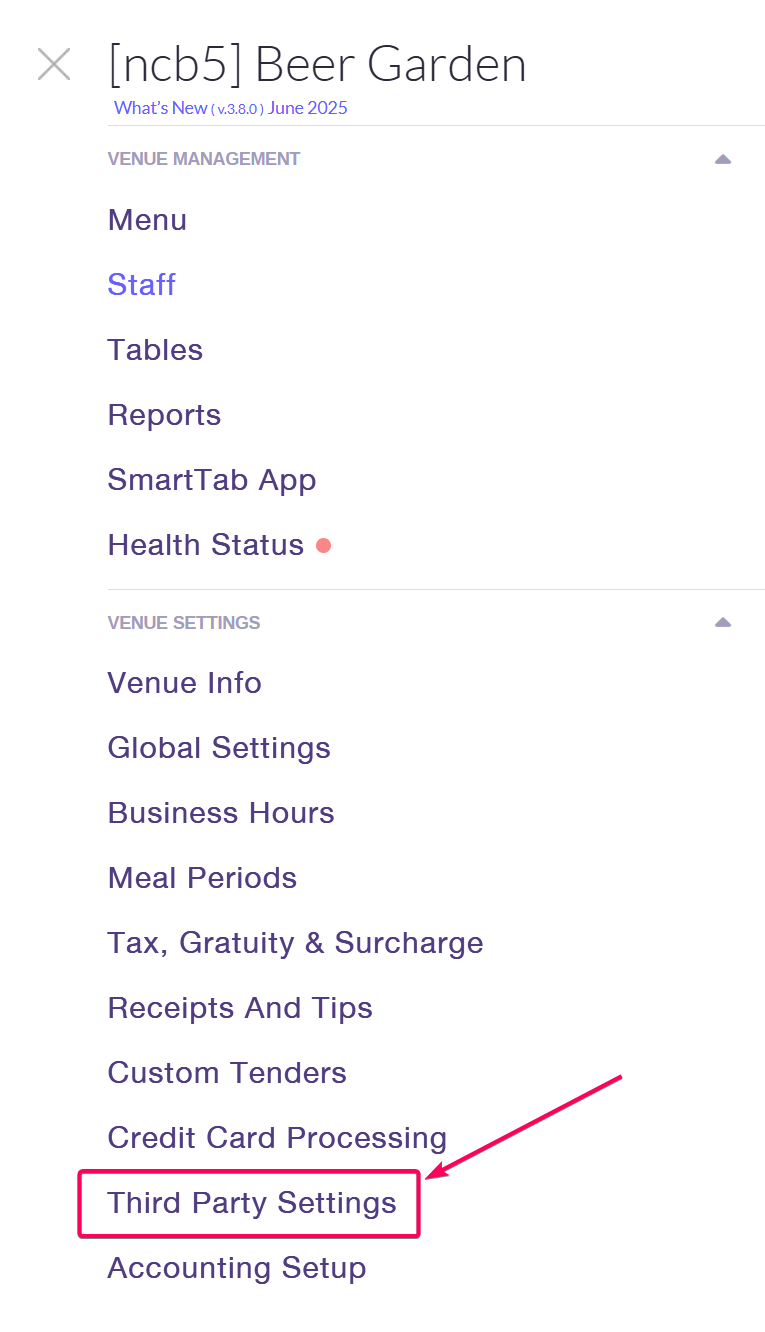
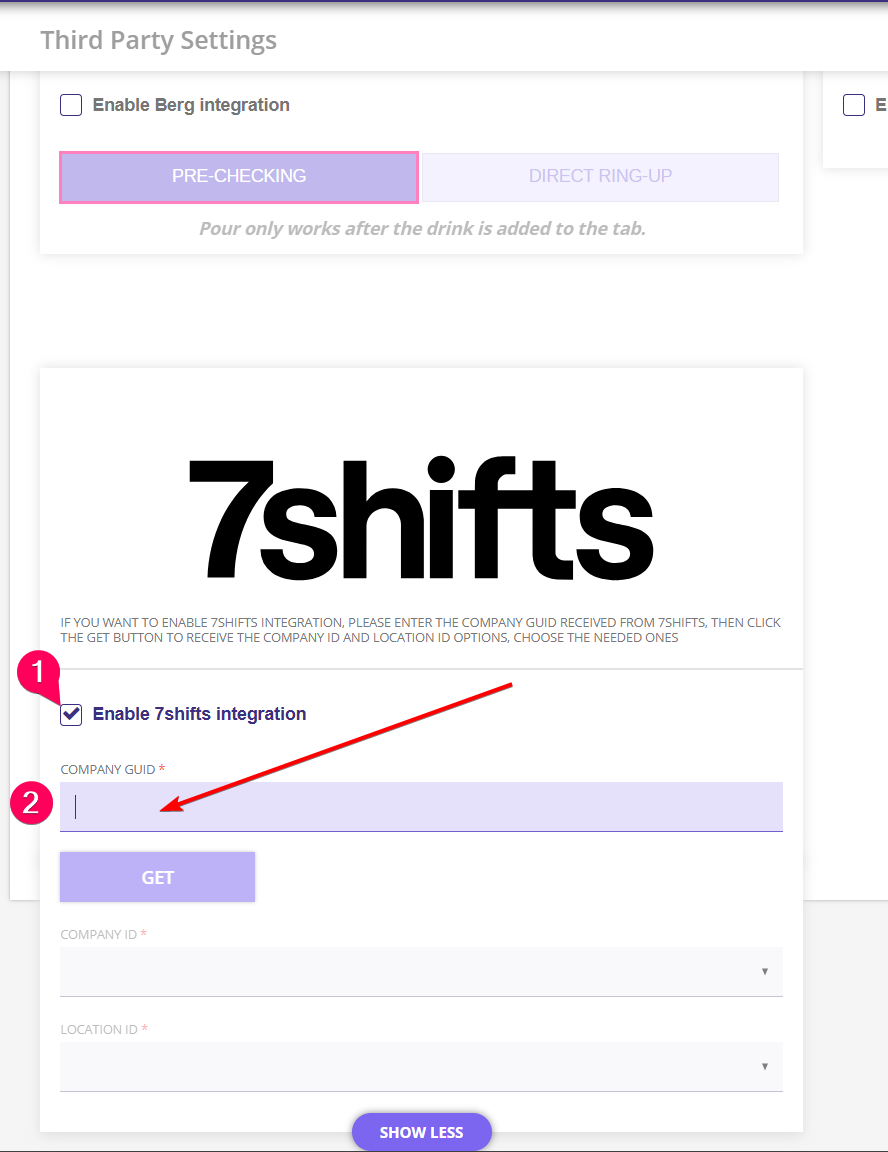
Go to Smarttab Third Party Settings page.
-
Enable 7Shifts integration. Enter the Company GUID copied from 7shifts and click the GET button to load the list of available companies and locations.
-
Wait until the Company ID and Location ID load, and select from the drop-down your Company – SmartTab Sandbox and Location.
-
Click SAVE in the upper right corner of the page.
Create deptartments on 7shifts
-
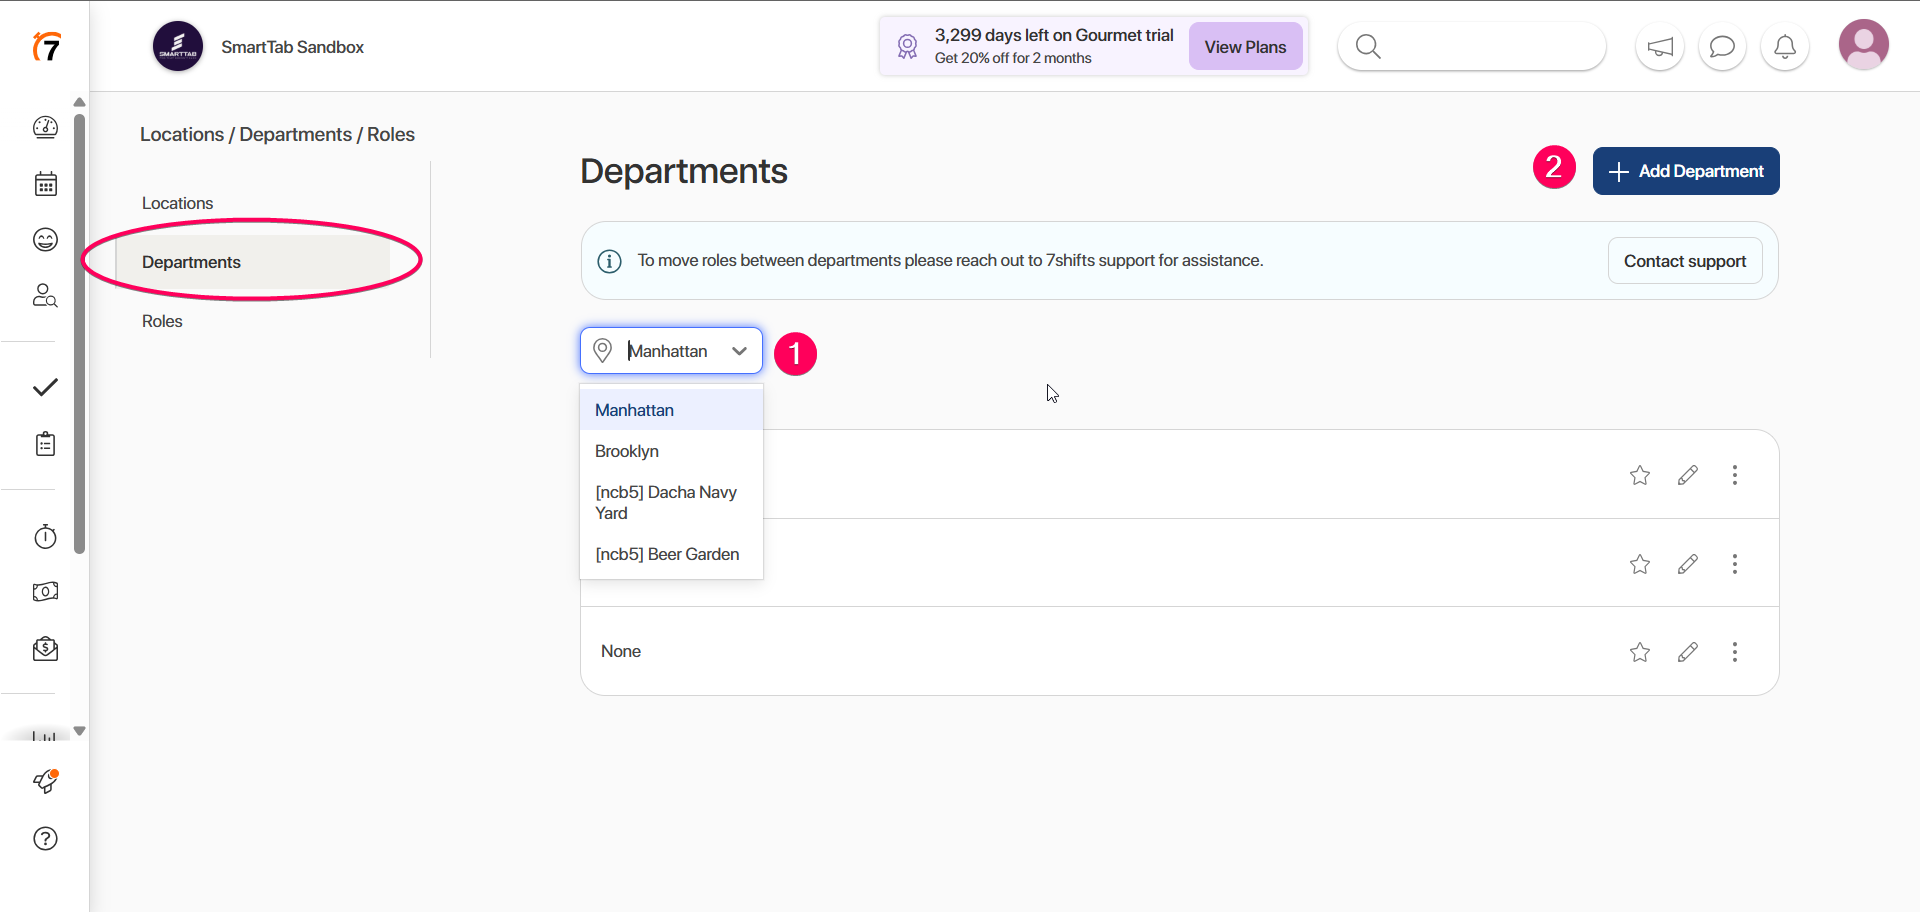
Go to the Departments page in the Locations/Departments/Roles tab.
-
Select your location from the drop-down and click +Add Department.
-
Enter the Department name and save.
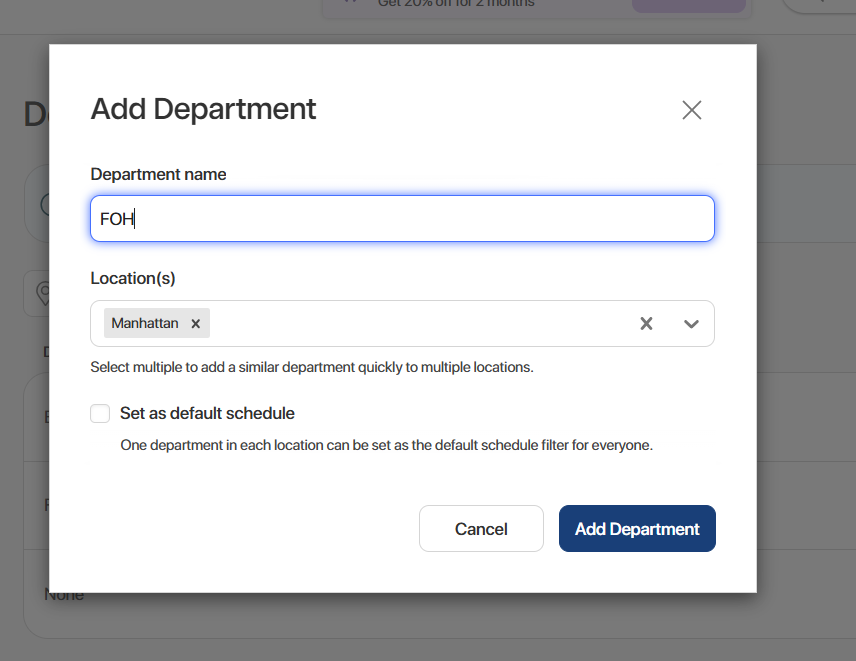
Note: we will map 7shift departments with SmartTab role types – FOH, BOH, None. It makes sense to create three departments with same names – FOH, BOH, None
-
Departments will be sent to SmartTab via webhook and reflected on the Accounting Setup page, in the list of departments in the drop-down.
Sync SmartTab Departments with 7shifts
-
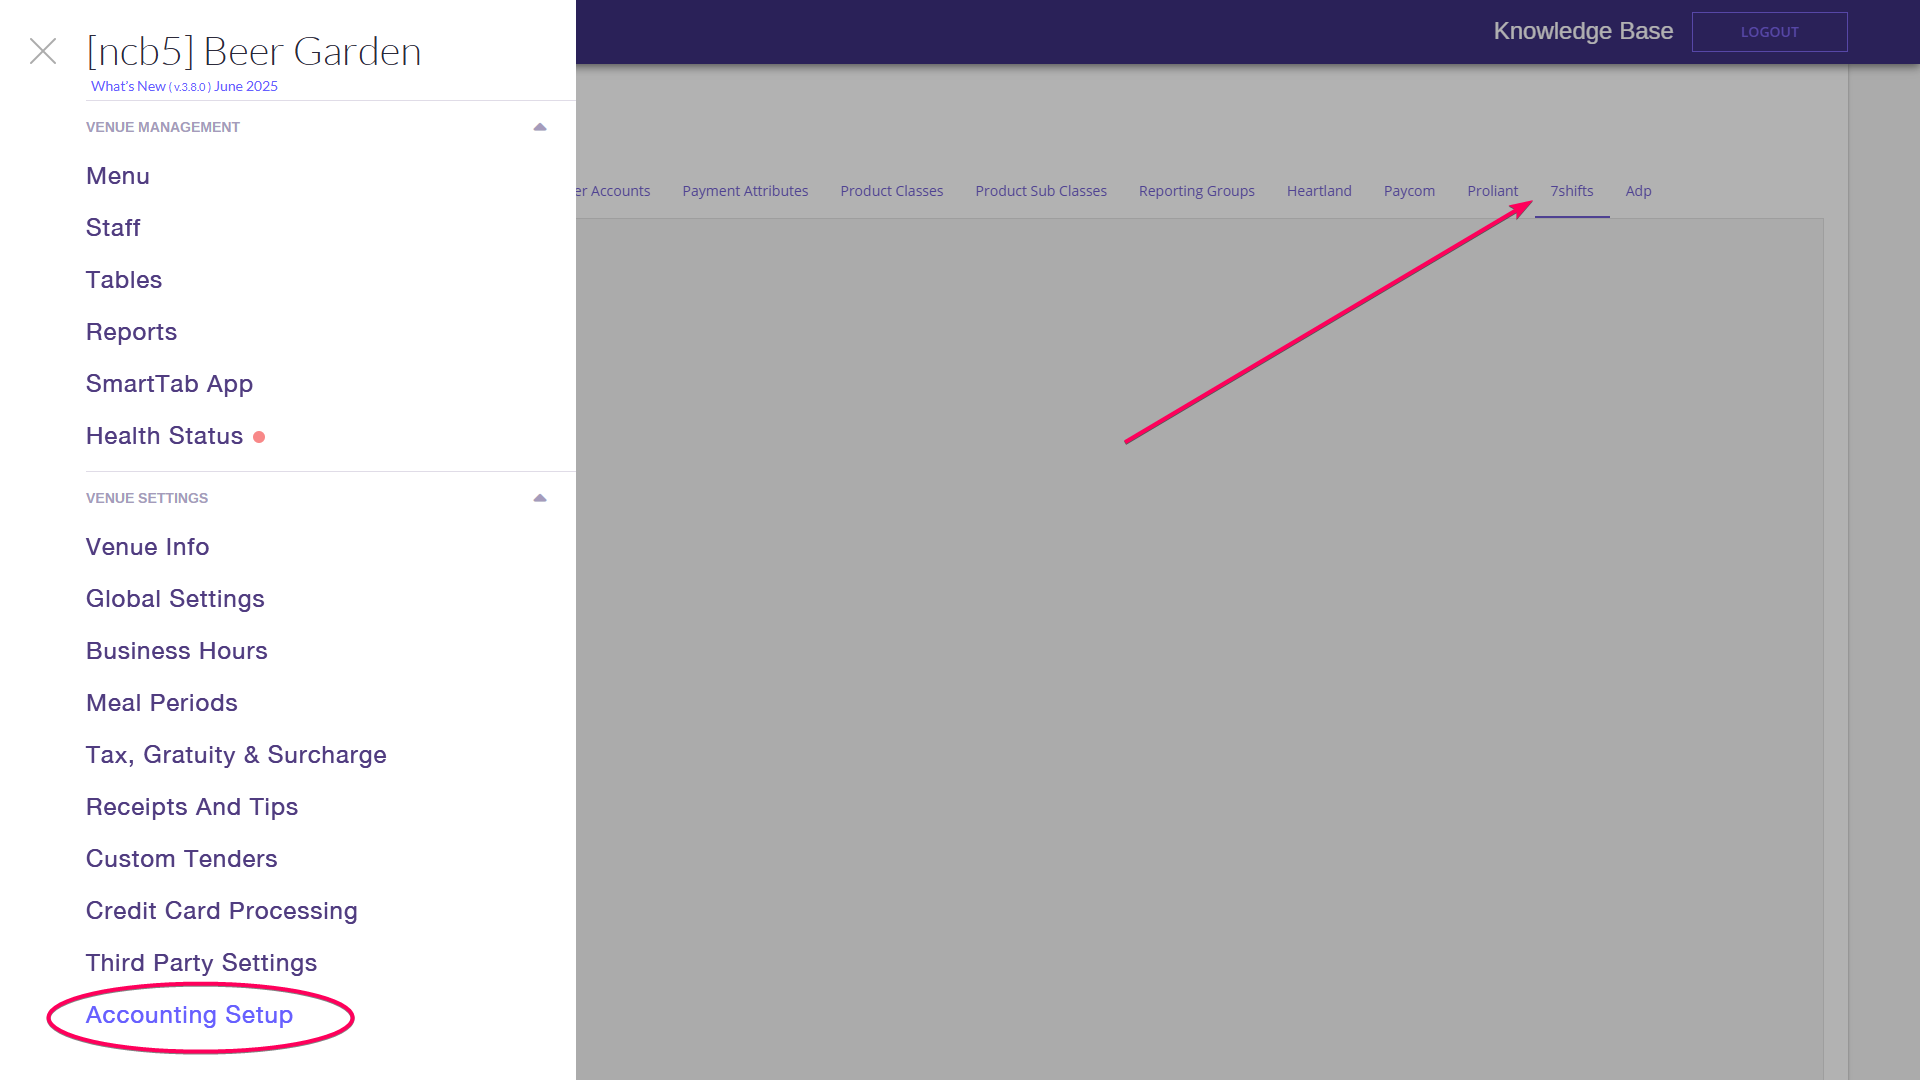
Go to the Accounting Setup tab.
-
Open the 7shifts page.

-
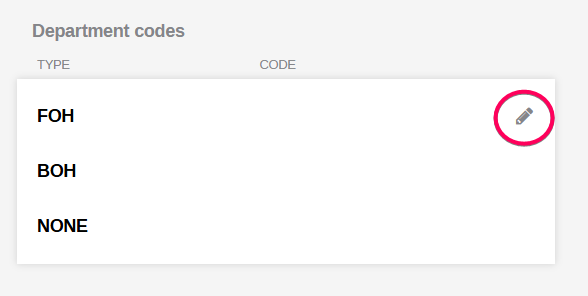
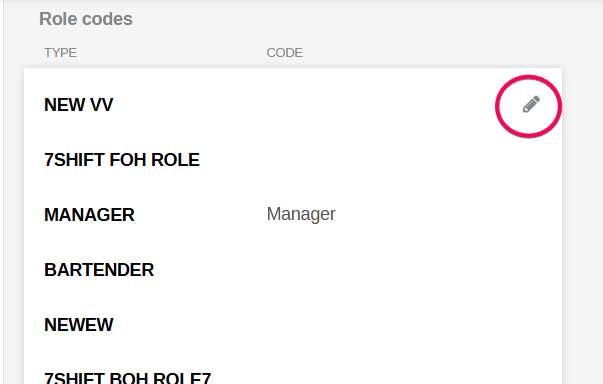
Edit the Department list by clicking the pencil button.
-
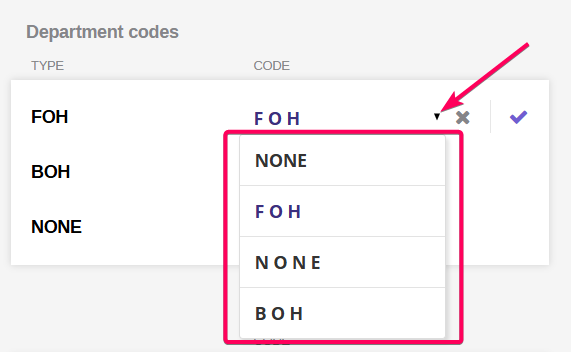
Select from the drop-down the Role created on 7shifts that SmartTab role will be mapped with.
-
To verify that departments are mapped, we can update it:
-
Rename department on SmartTab – updated name is reflected in 7Sifts;
-
Rename department on 7Sifts- updated name is reflected in SmartTab.
Create roles on 7shifts
-
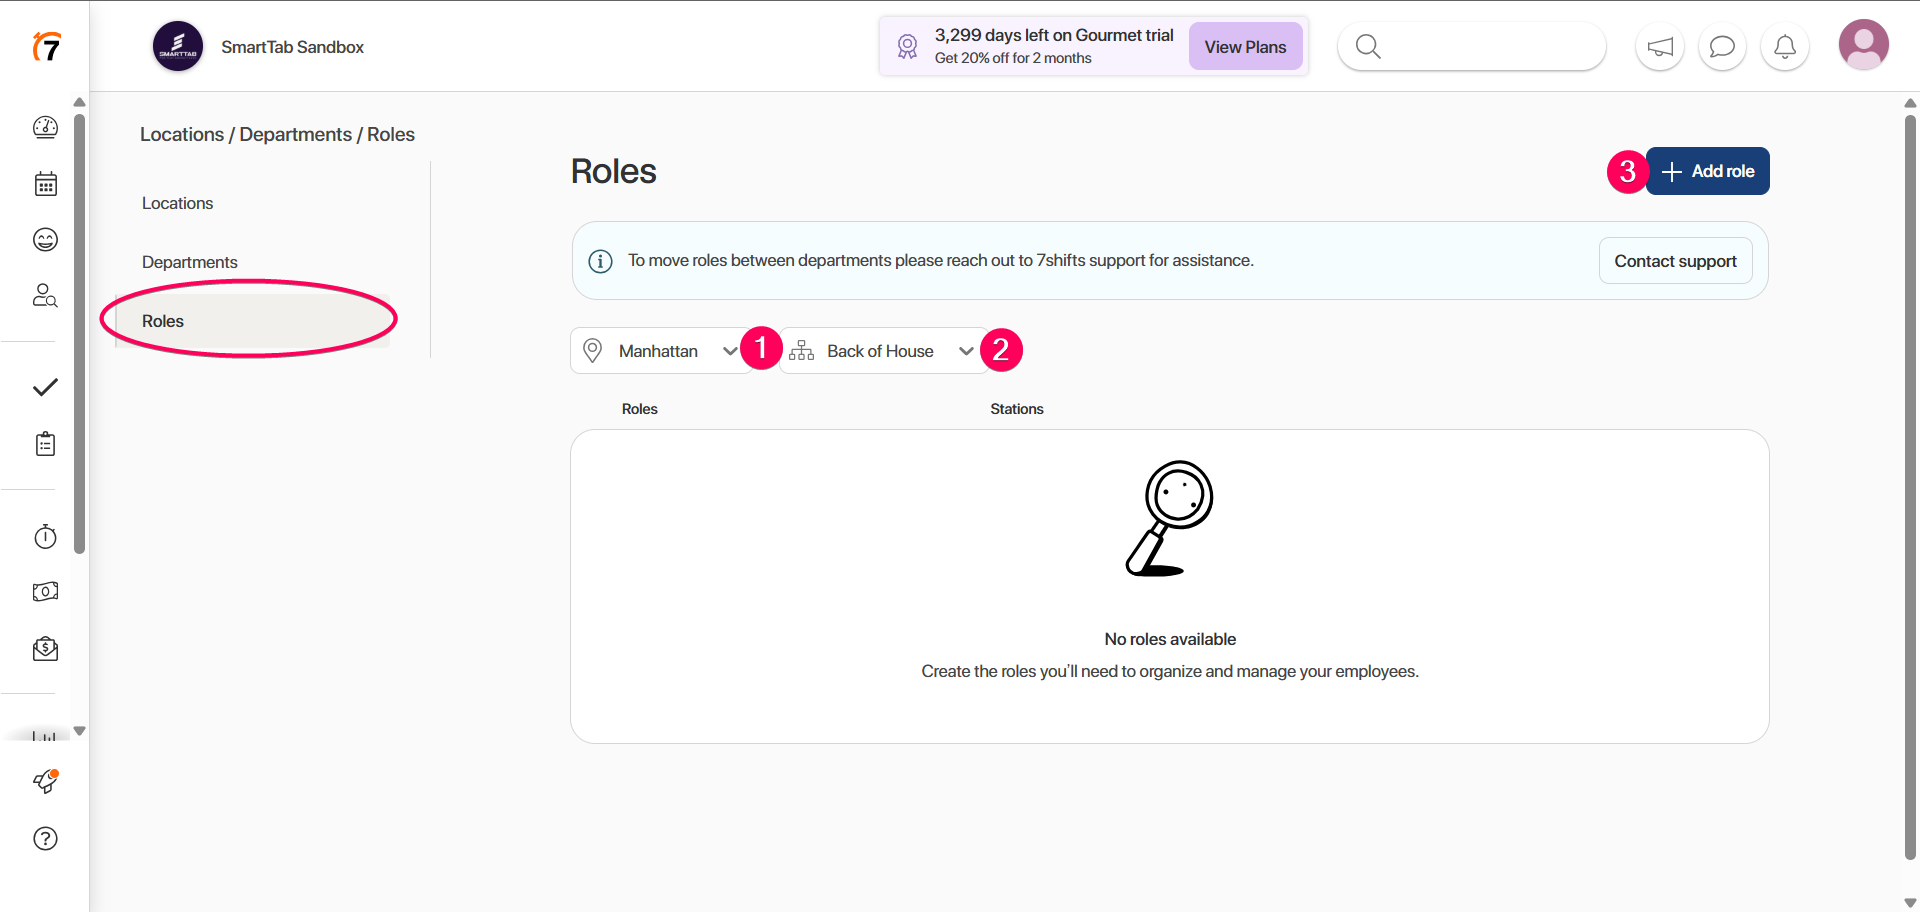
Go to the Roles page in the Locations/Departments/Roles tab.
-
Select your Location and the needed Department that the Role will belong to, and click +Add role.
-
Via webhook, Roles are sent to SmartTab and reflected on the Accounting Setup page, in the roles list in the drop-down.
Sync SmartTab roles with 7shifts
-
Go to the Accounting Setup tab.
-
Open the 7shifts page.
-
Edit list of Roles by clicking the pencil button.
-
Select from the drop-down the Role created on 7shifts, that SmartTab role will be mapped with.
-
Rename role on SmartTab – updated name is reflected in 7Sifts.
-
Rename role on 7Sifts- updated name is reflected in SmartTab.
Create a new employee on SmartTab
-
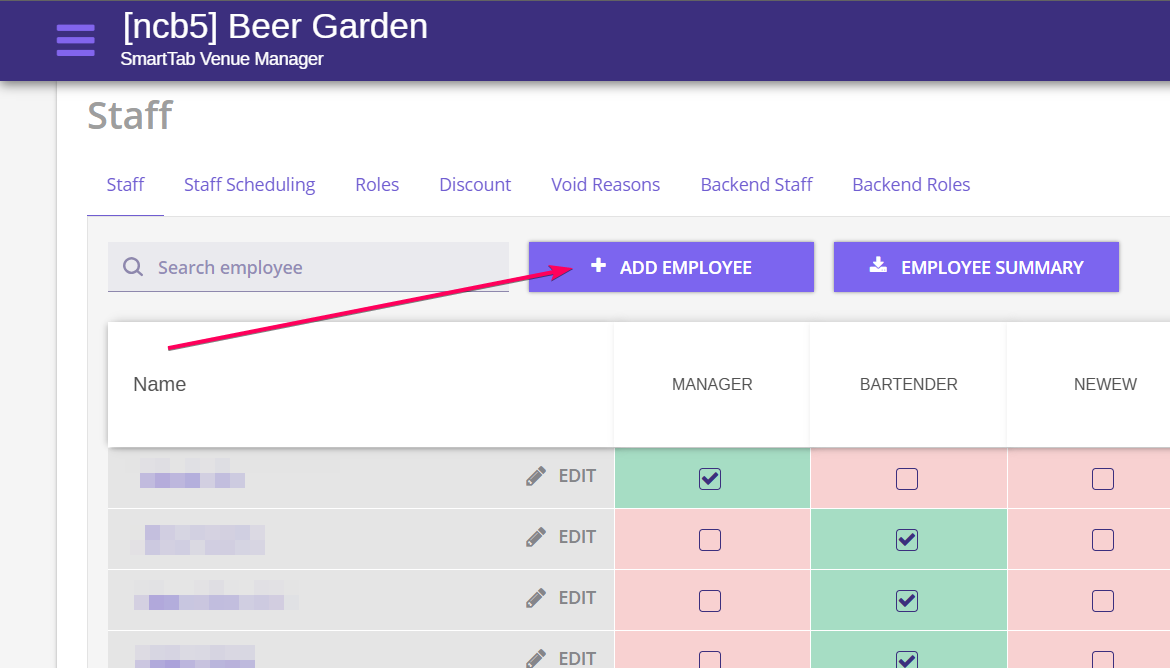
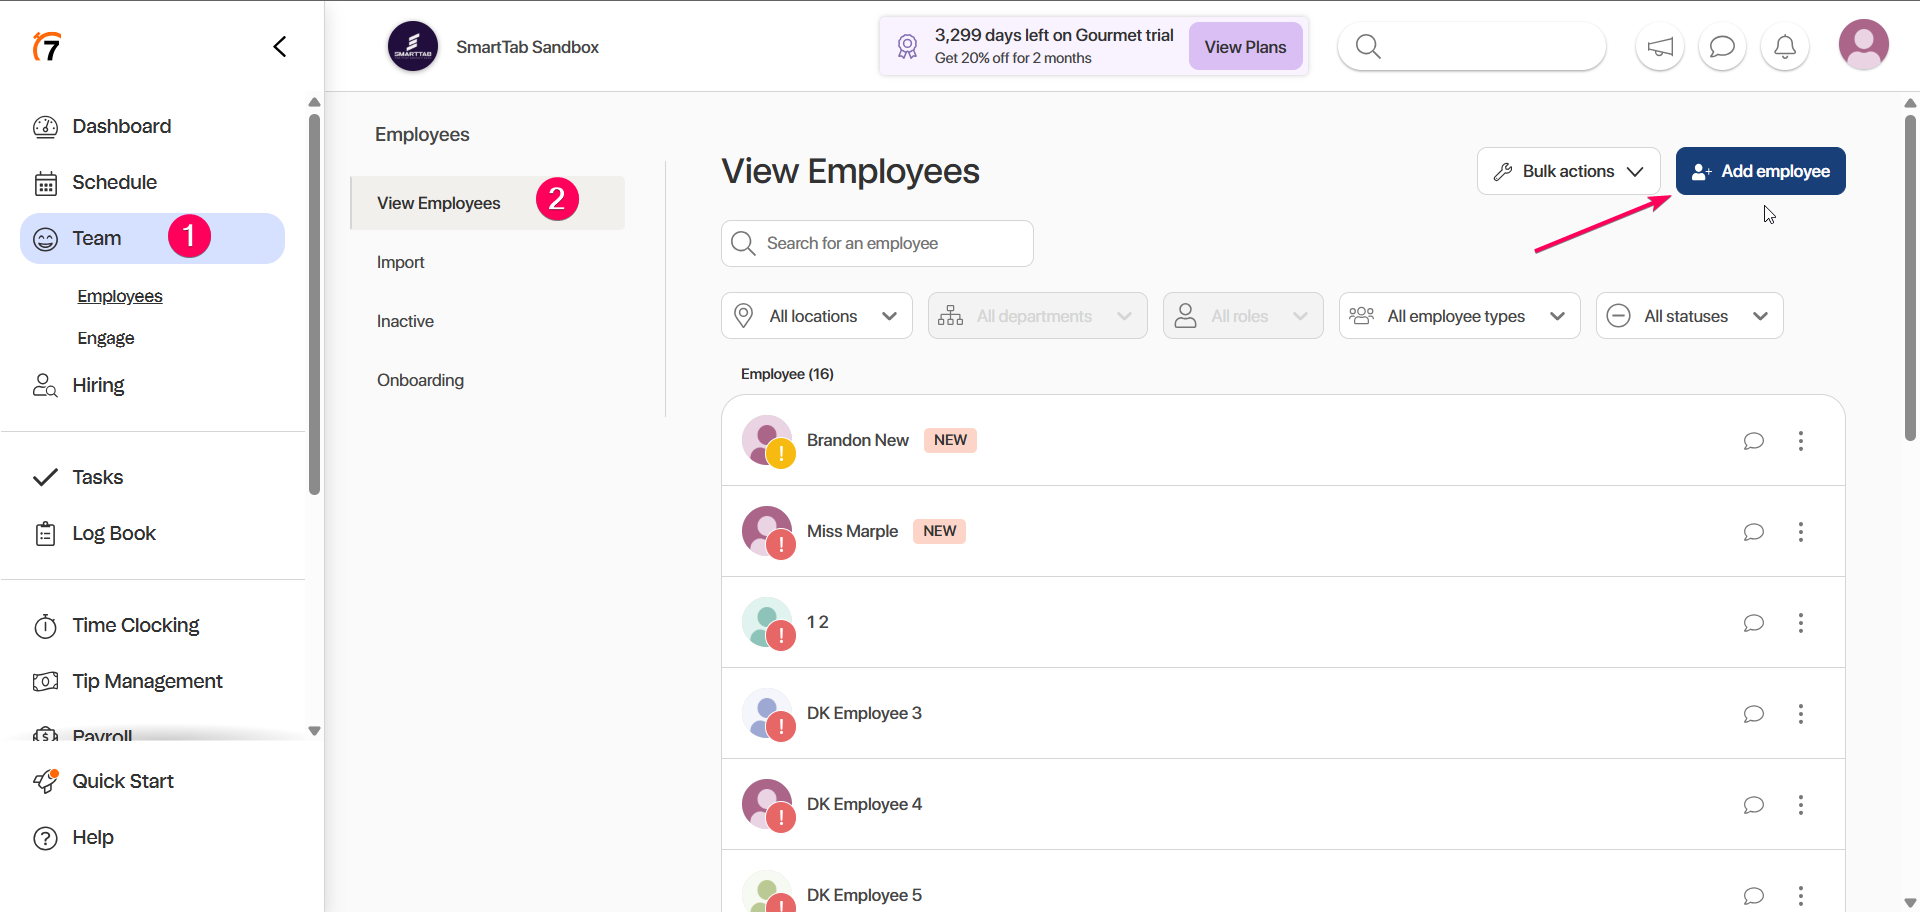
Go to the Staff page on the Staff tab.

-
Click the +ADD EMPLOYEE button.
-
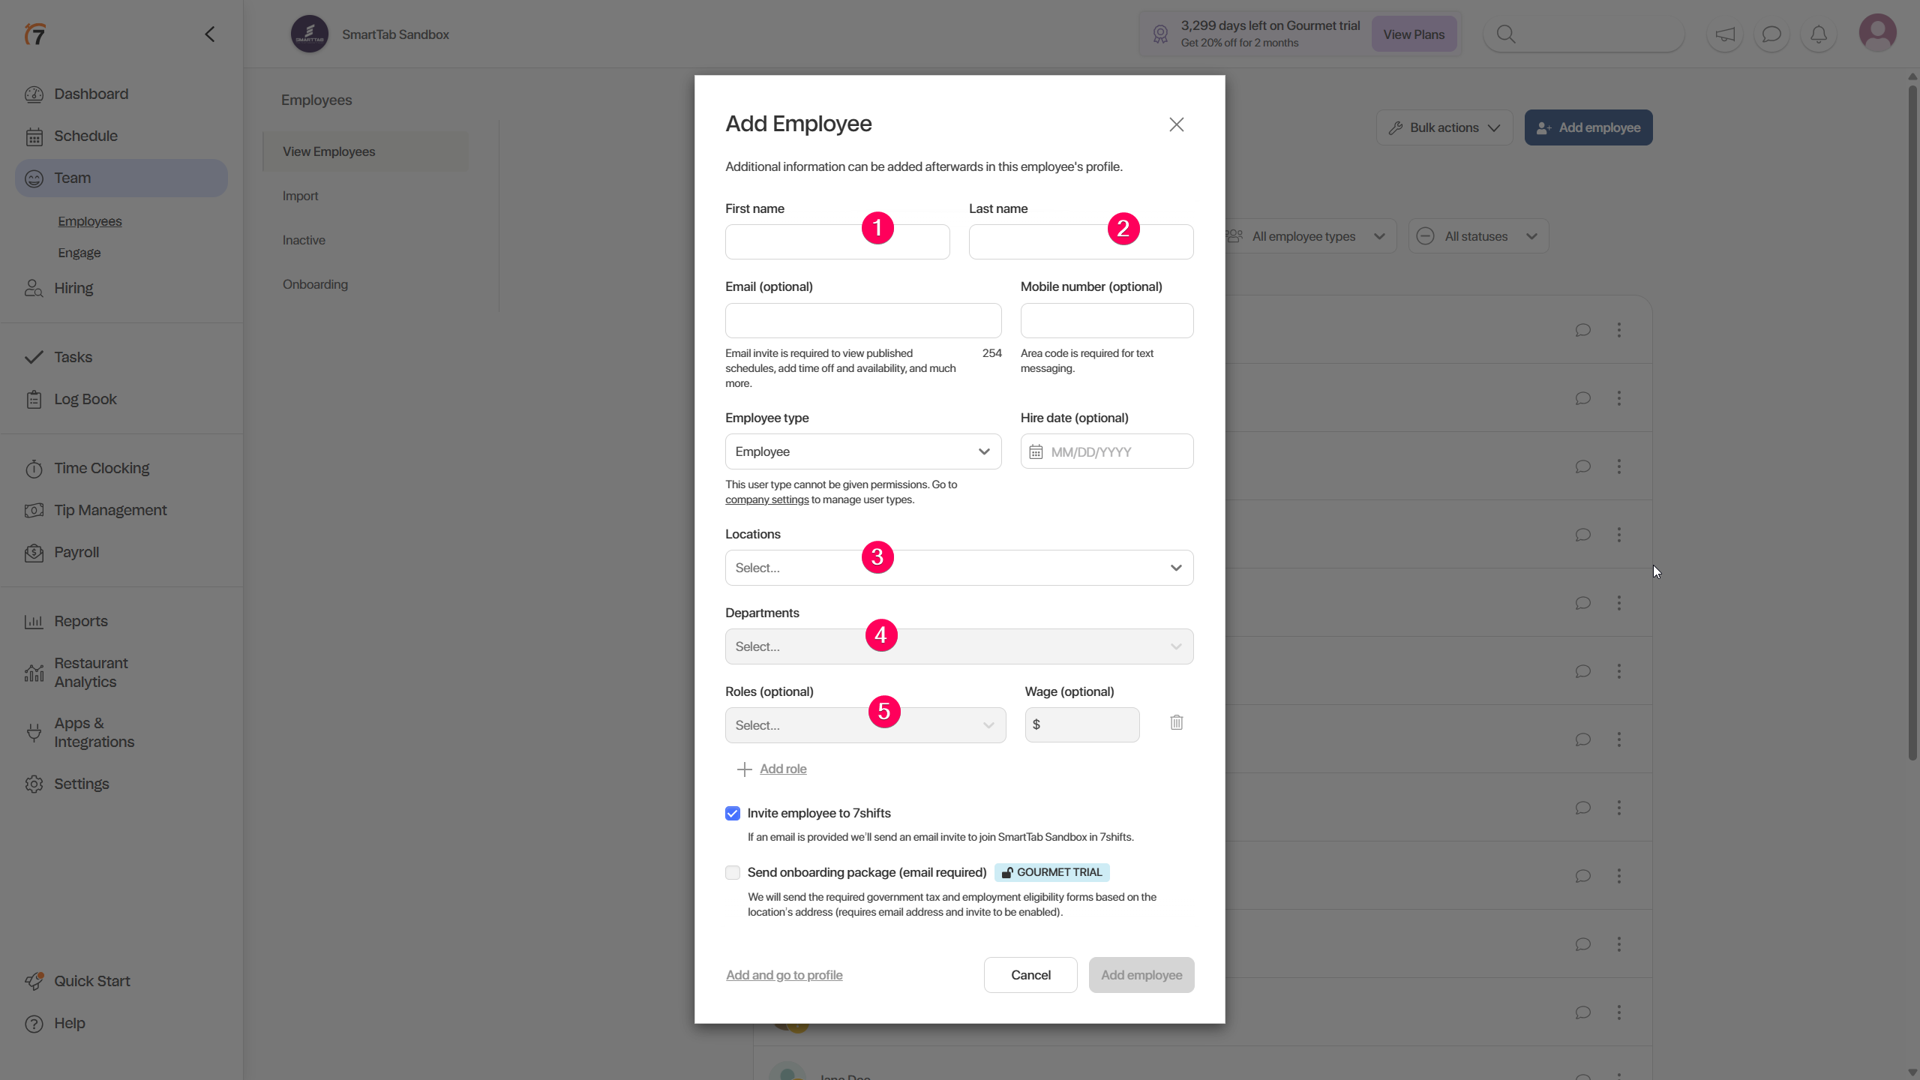
Fulfill required fields in the employee profile:
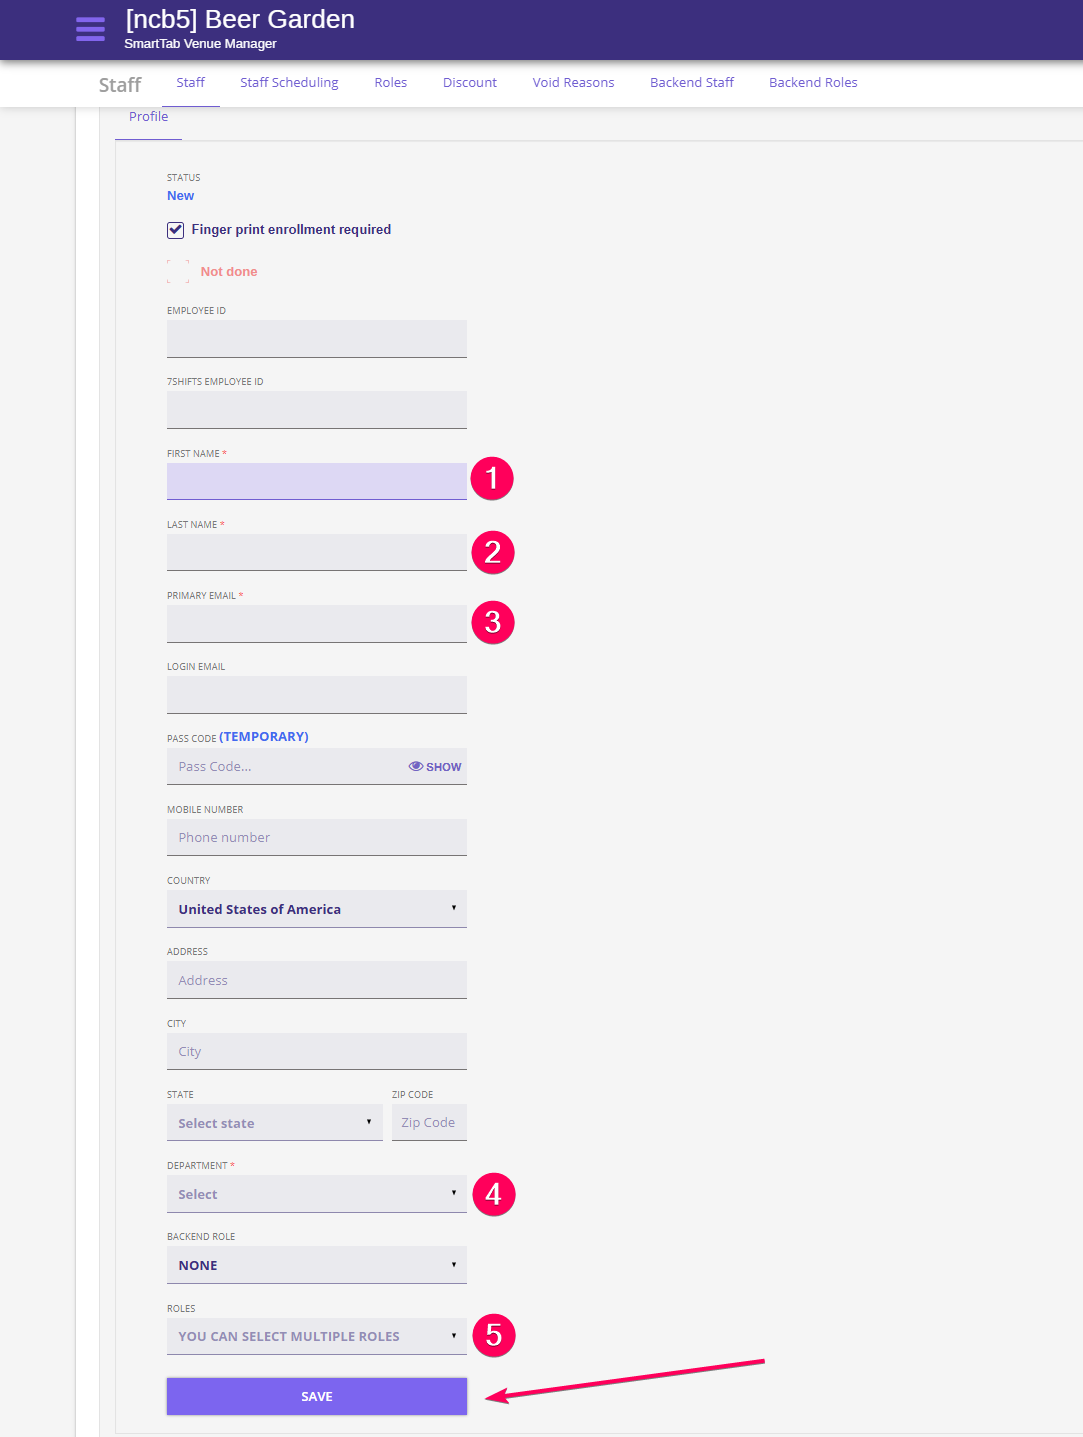
To map a new employee with 7shifts, we need to select the mapped role and the appropriate department
-
The employee is created and displayed in the Employee list.
-
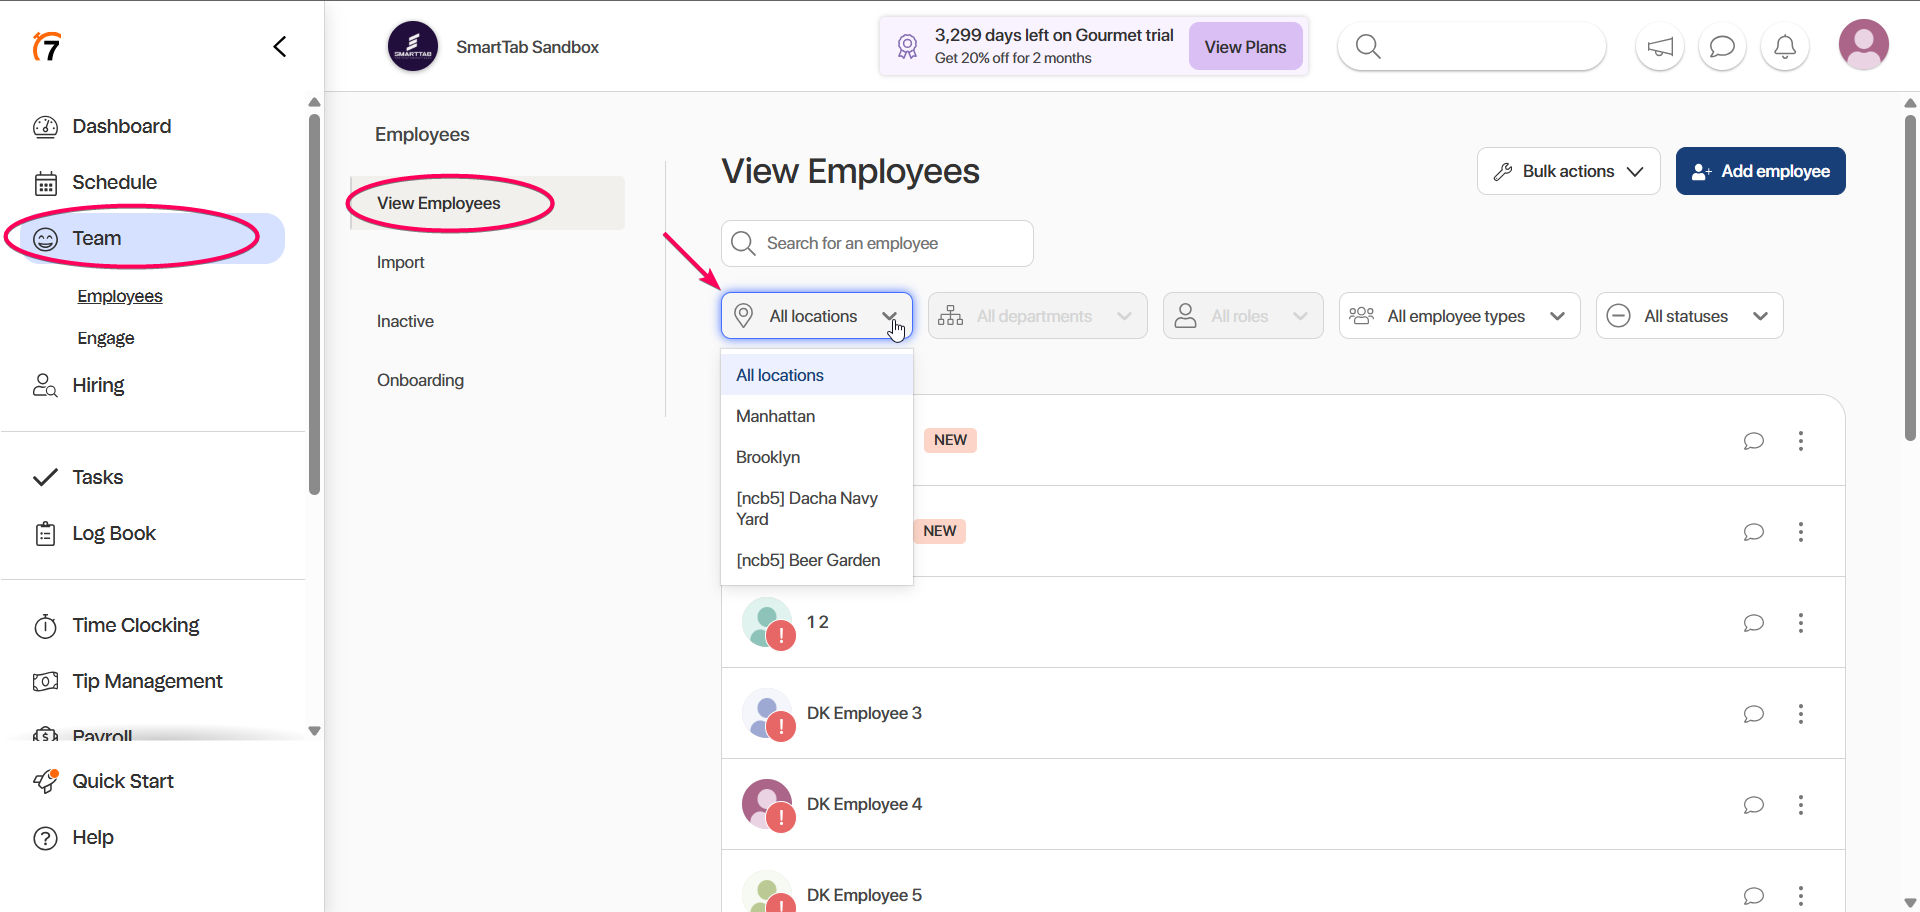
On 7shifts, we can find the employee created on the Team tab, on the Employee page. For more convenient viewing, we can filter reflected employees by location:
Sync the existing SmartTab employee with 7shift
-
To sync the existing SmartTab employee with 7shifts, first we need to create the Employee on 7shifts.
-
Go to the Team tab, View Employee page, and click the +Add employee button.
-
Fulfill First, Last name, Location(s), Department (s), and Role(s).
-
Now, go to the SmartTab Accounting Setup page.
-
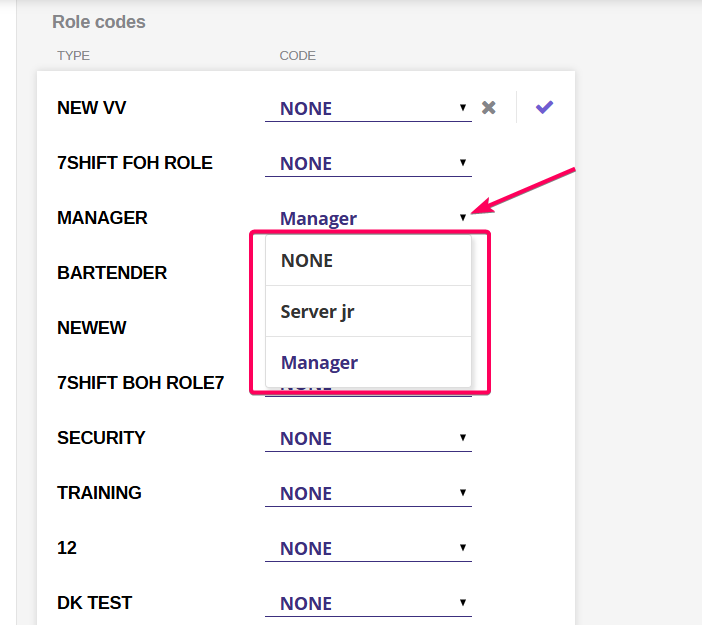
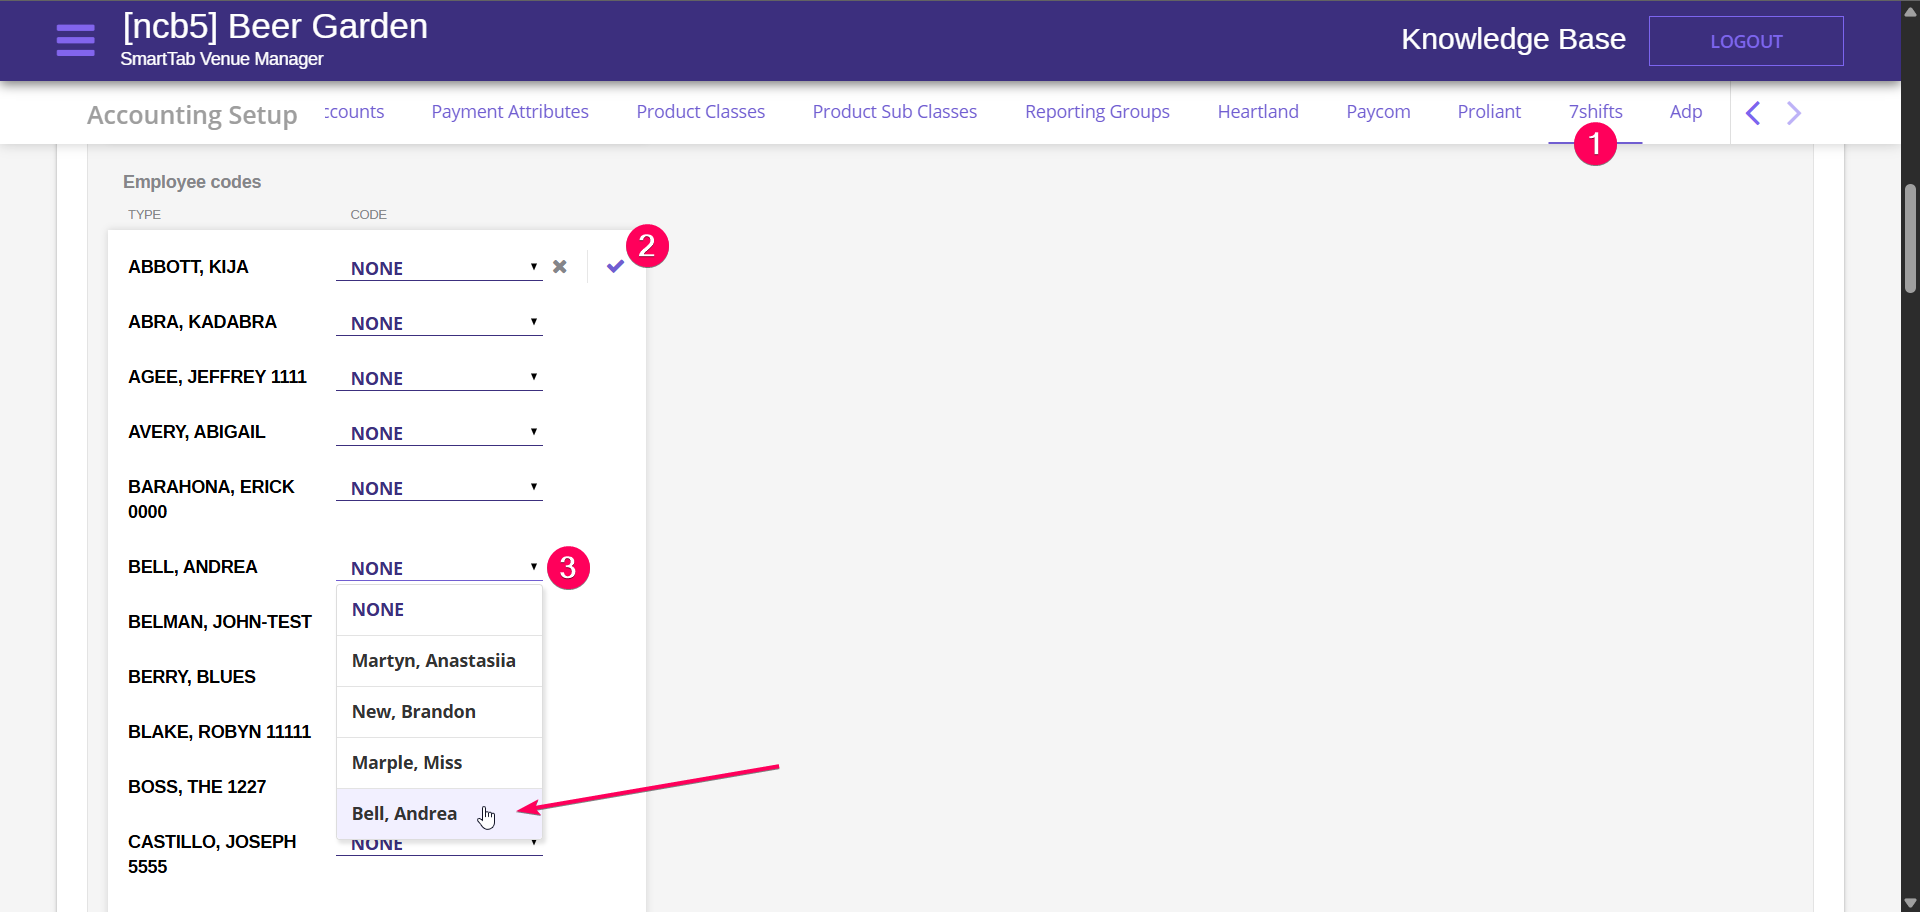
Open the 7shifts page, edit Employee codes by clicking the pencil button.
-
Select from the drop-down the employee created on 7shifts, that the SmartTab employee will be mapped with.
Create new shift in a SmartTab Staff Scheduling
-
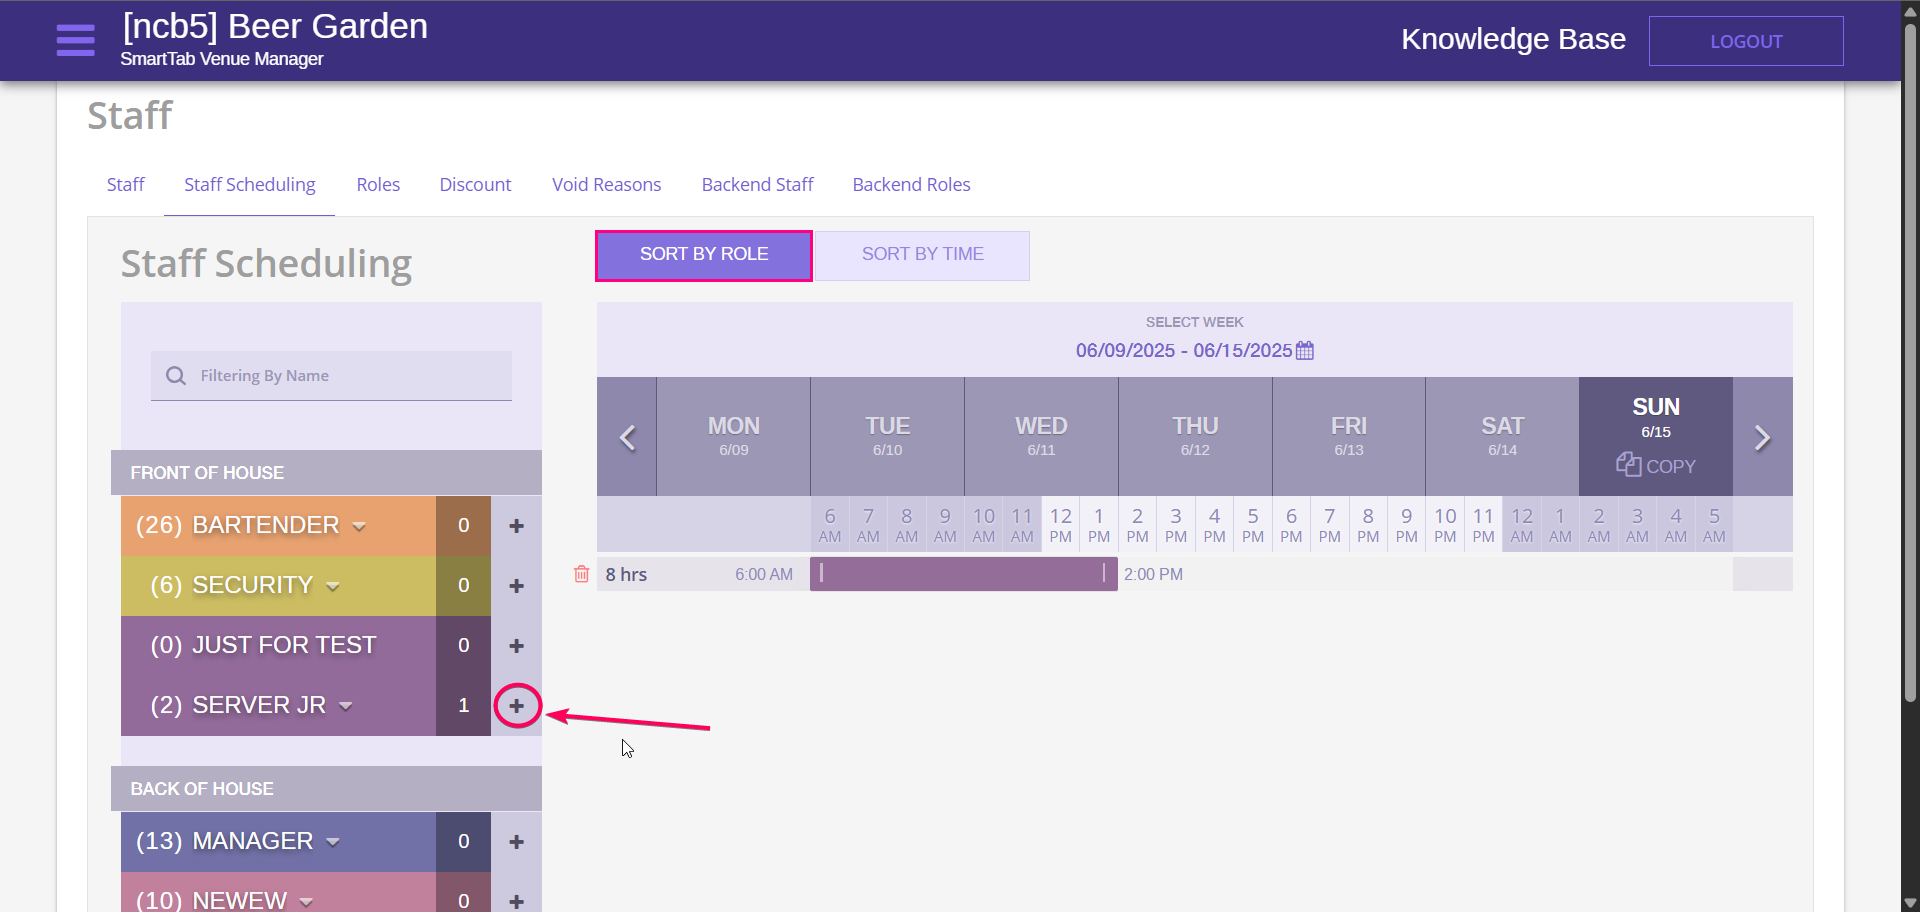
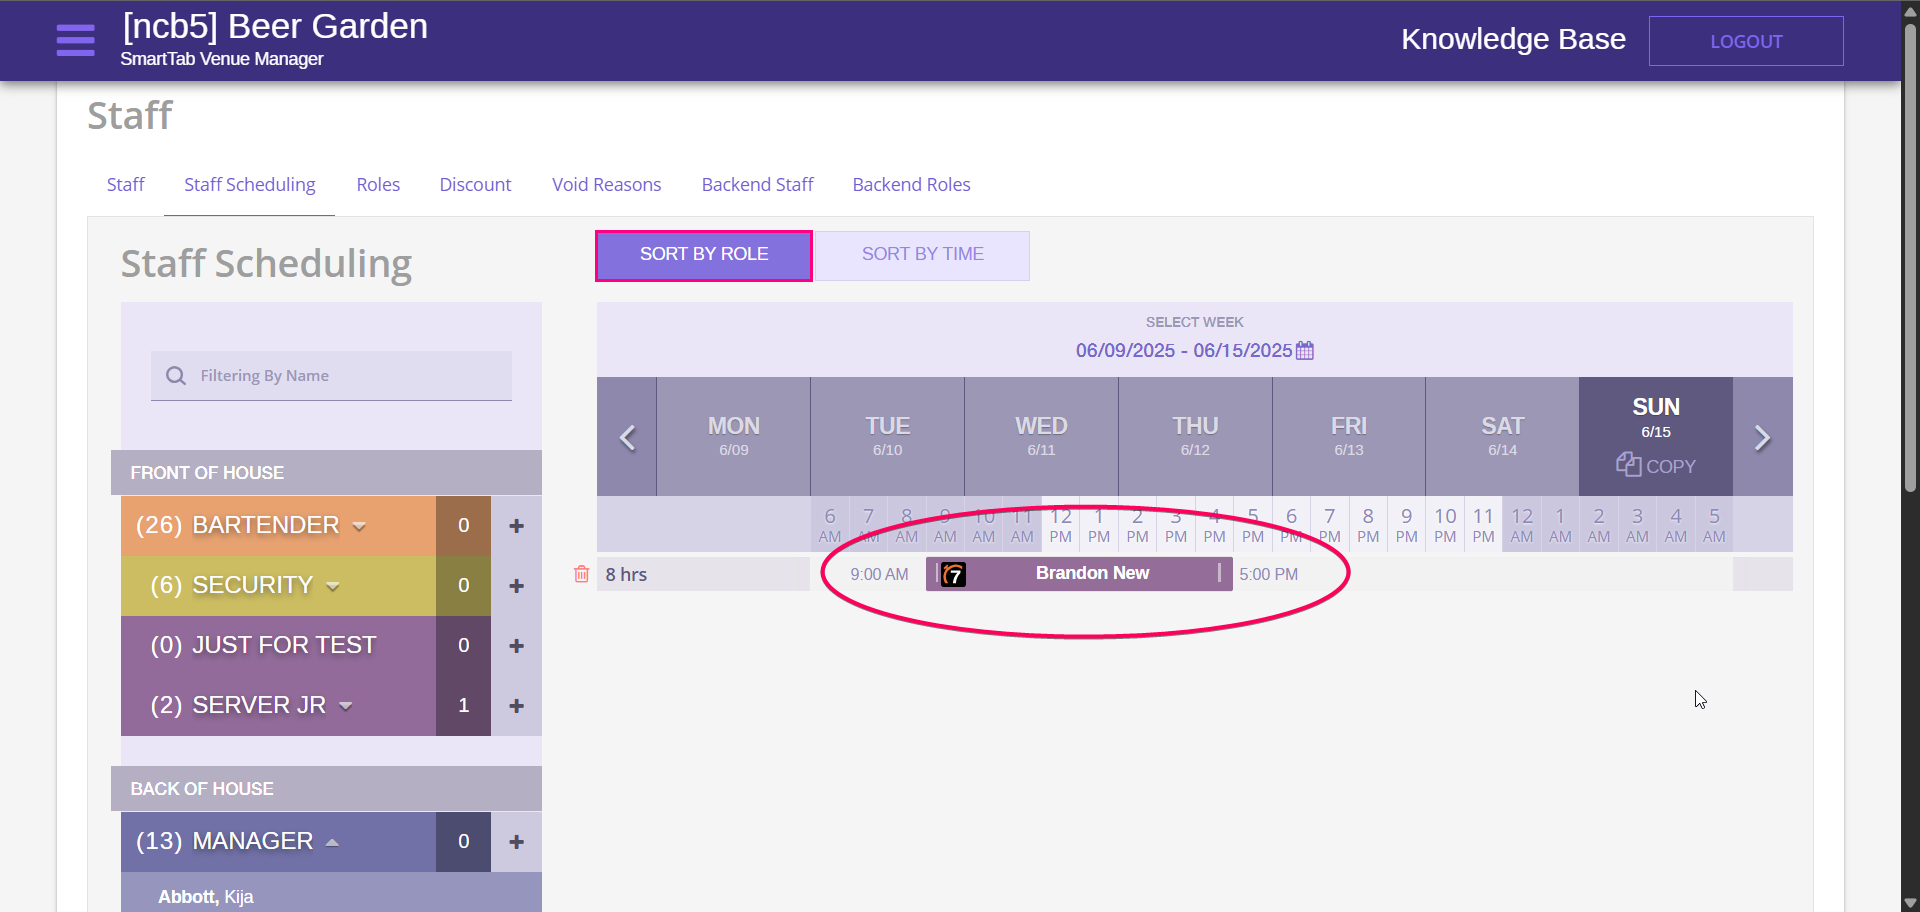
Go to SmartTab Staff Scheduling.
-
To add the shift of click the “+” button next to role whose shift we want to add. The empty line with the color of the role will be added to the schedule. The length of the shift is 8h by default.
-
To map is with 7shifts we need to assign mapped employee to this shift. Drag and drop the employee to the created shift.
-
When the scheduled shift is mapped with 7shifts, it will be reflected with the 7shifts icon.
-
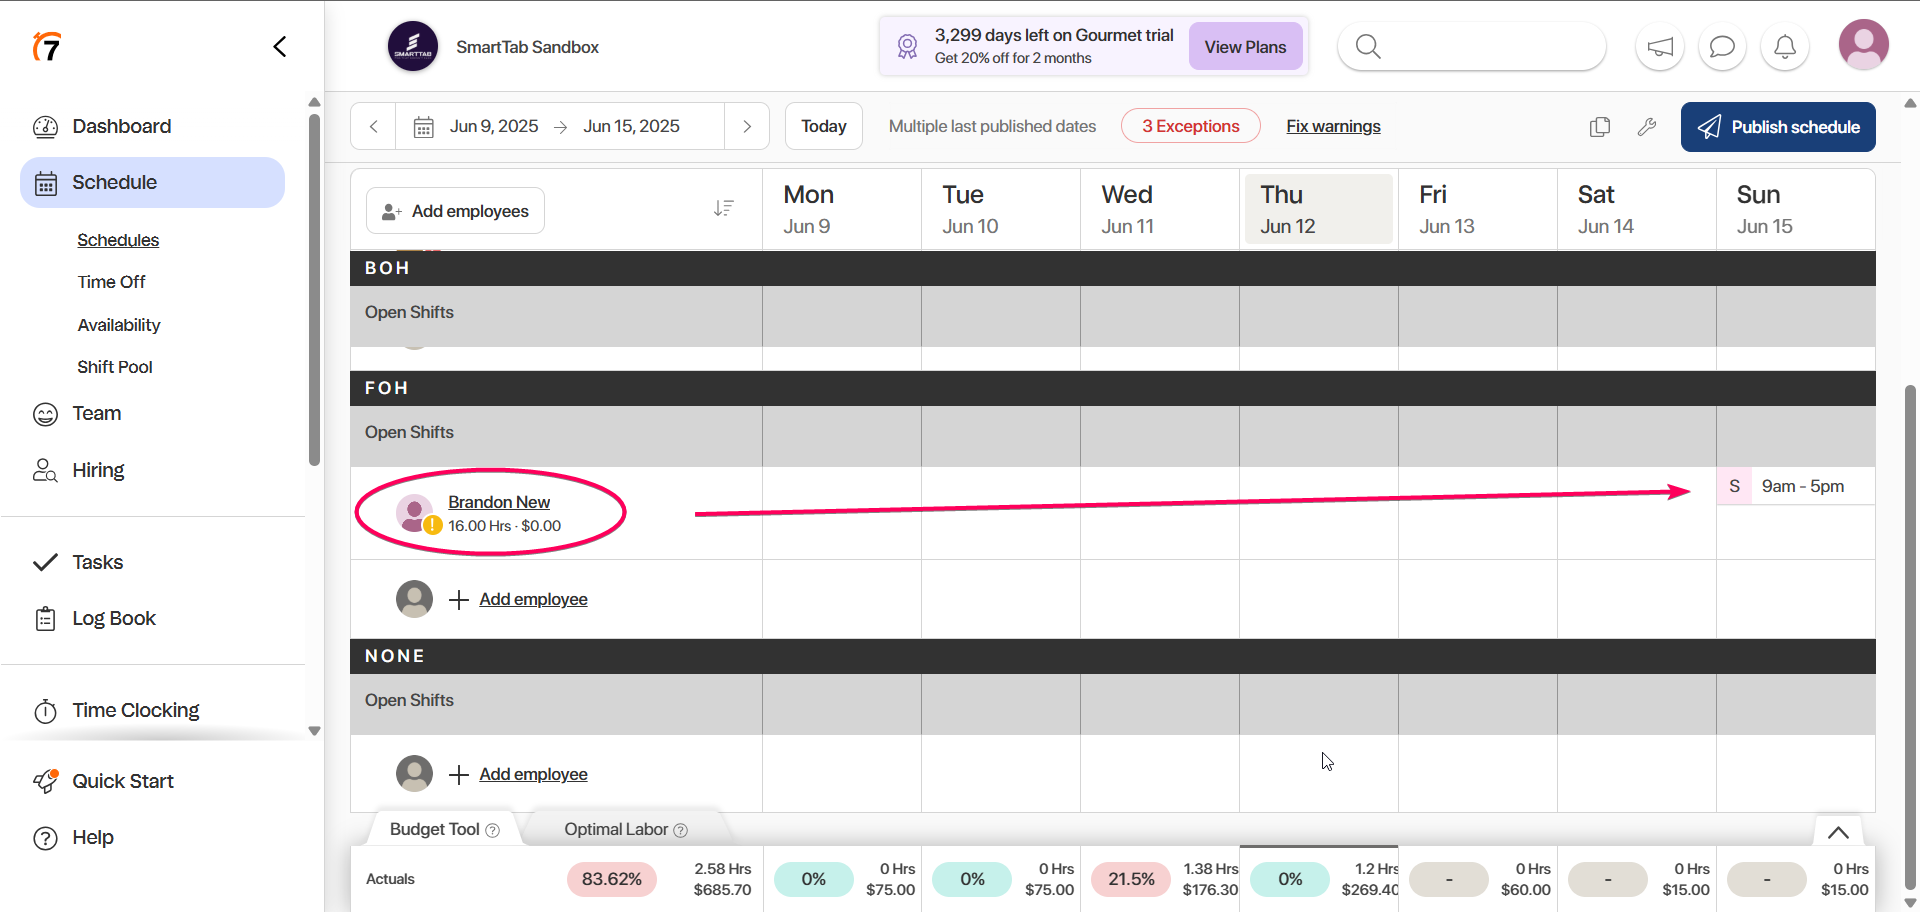
The created shifts we can find on the 7shifts Schedule page.
Create a new shift in a 7shift Scheduling
-
Go to the 7shifts Schedule page.
-
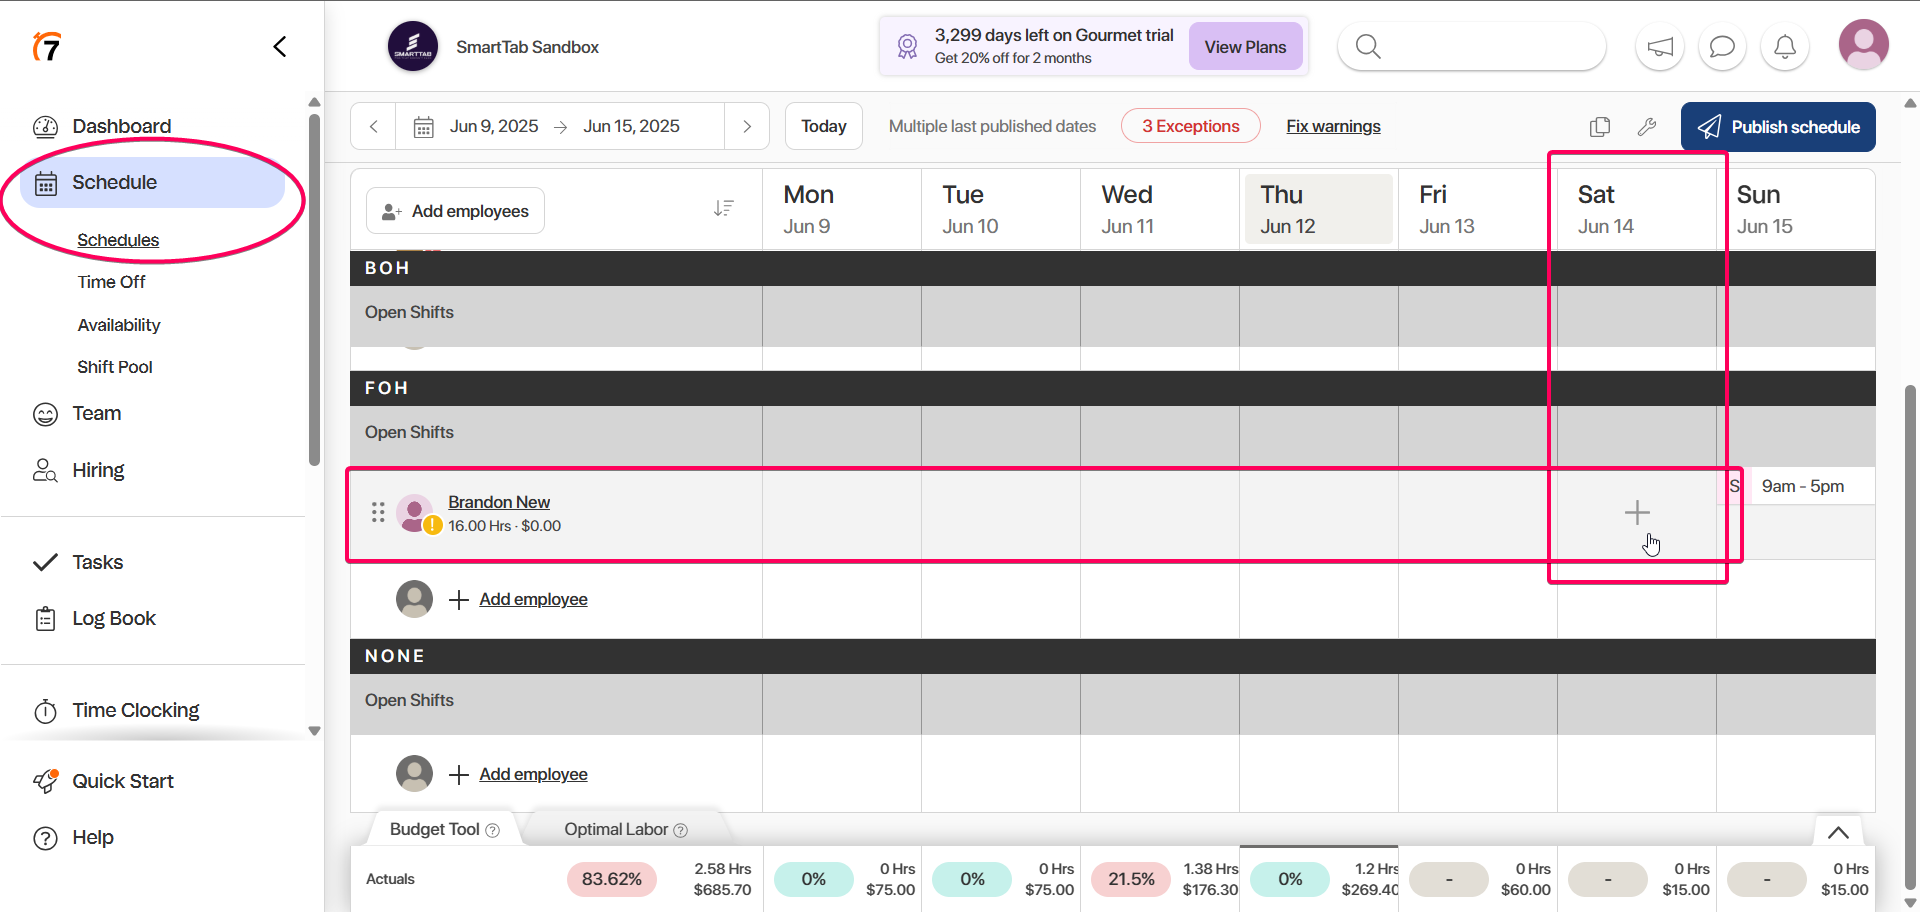
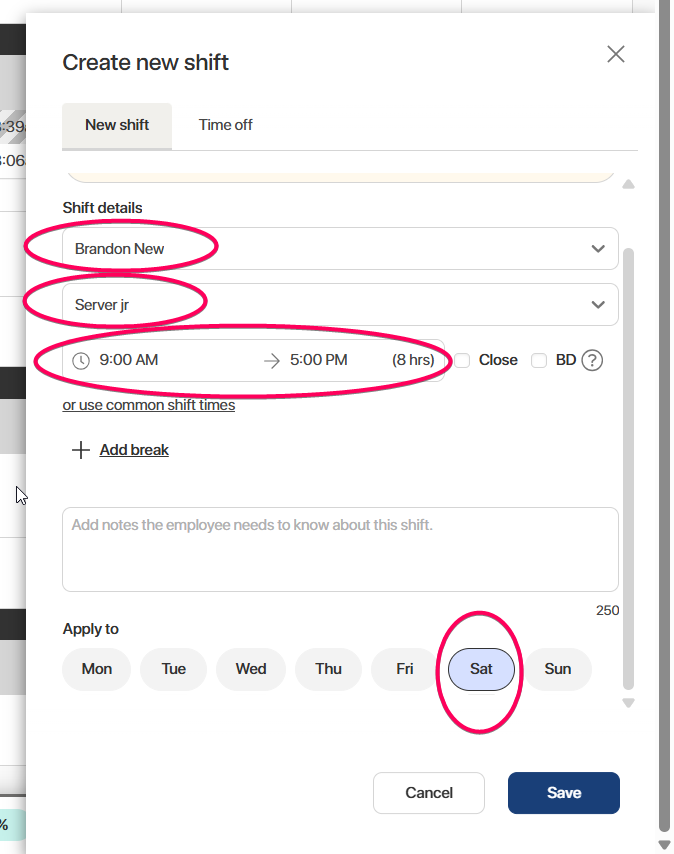
Select the Employee and the day when we want to add a shift to the schedule, and click the “+“ on that day.
-
The employee, his role, default shift hours, and day are prefilled. Click SAVE to add the shift tothe schedule.
-
The shift will be reflected in the SmartTab schedule within 2 minutes.
View worked shifts in 7Shifts Timesheet
-
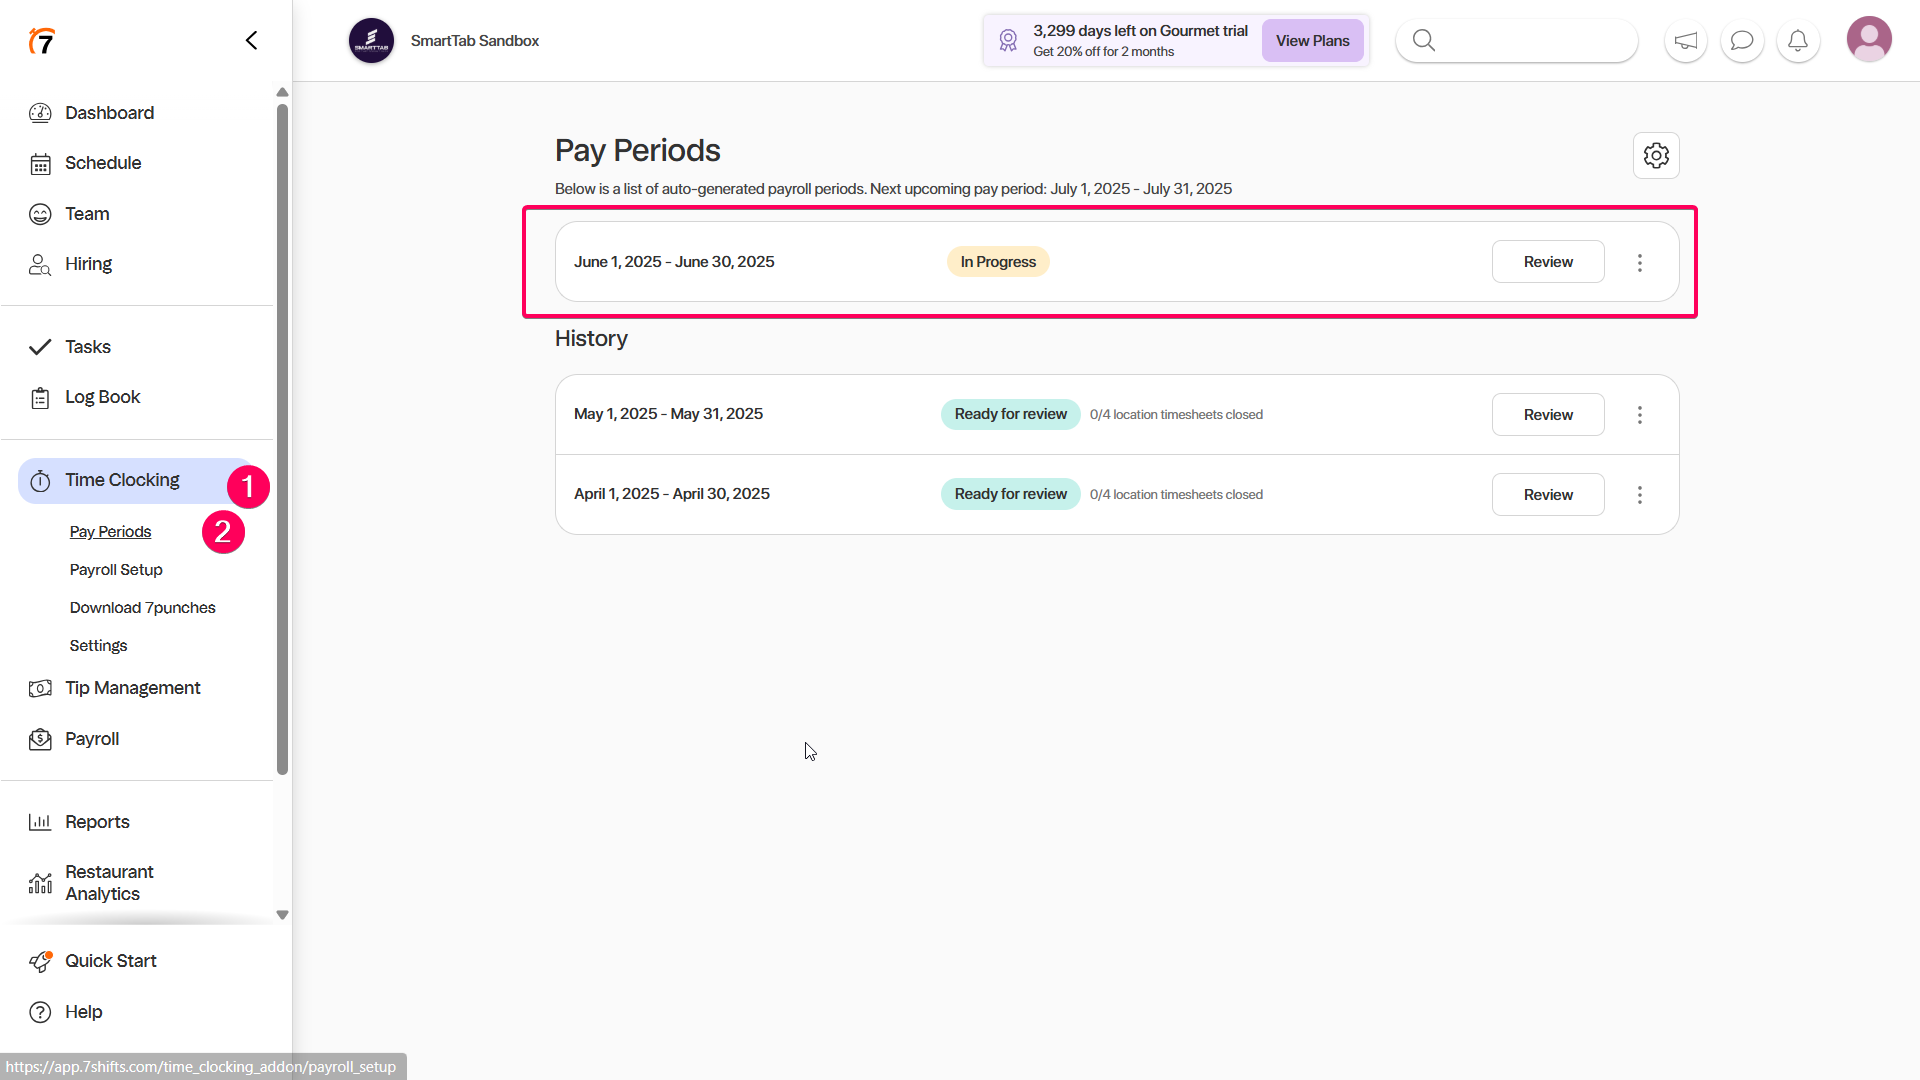
Go to Time Clocking, select the Pay period that is IN PROGRESS now.
-
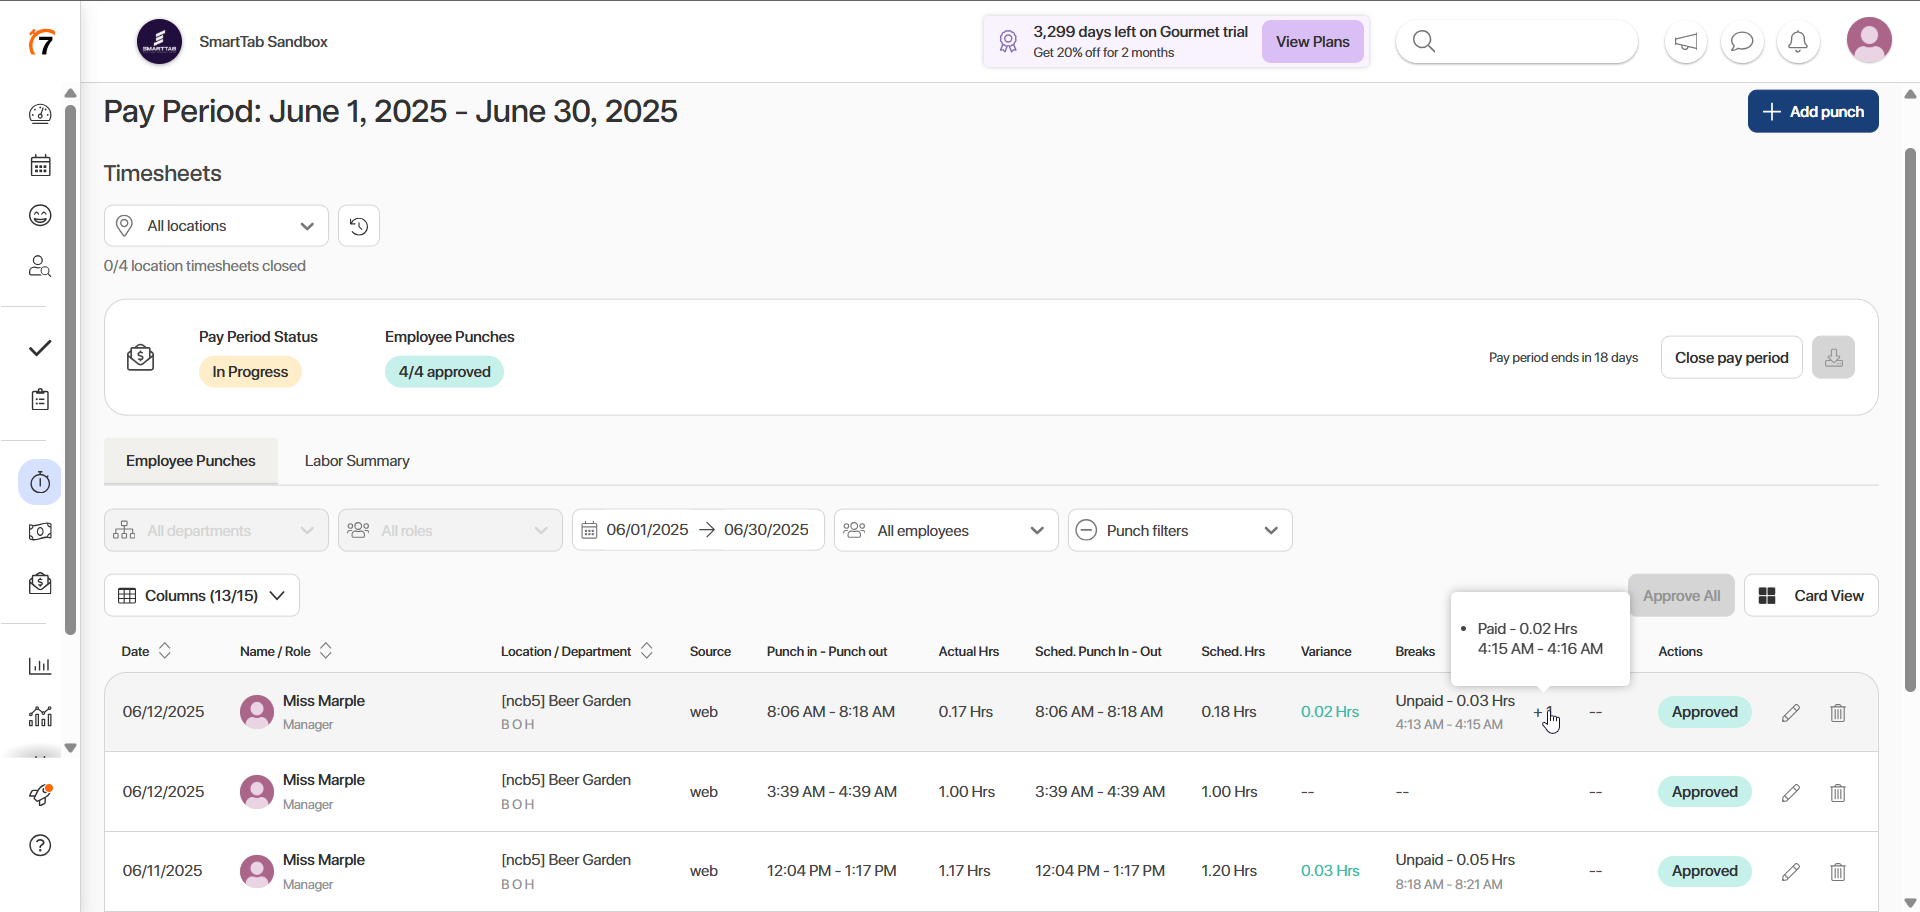
All shifts worked from the POS and created in the Timesheet report are reflected in the Employee Punches table. Breaks PAID and UNPAID are reflected in a table in the Breaks column.
View paid tabs in 7Shifts
For now, paid tabs are available via API only