Prerequisite: Be on-site in front of a terminal with Login Access.
Step 1
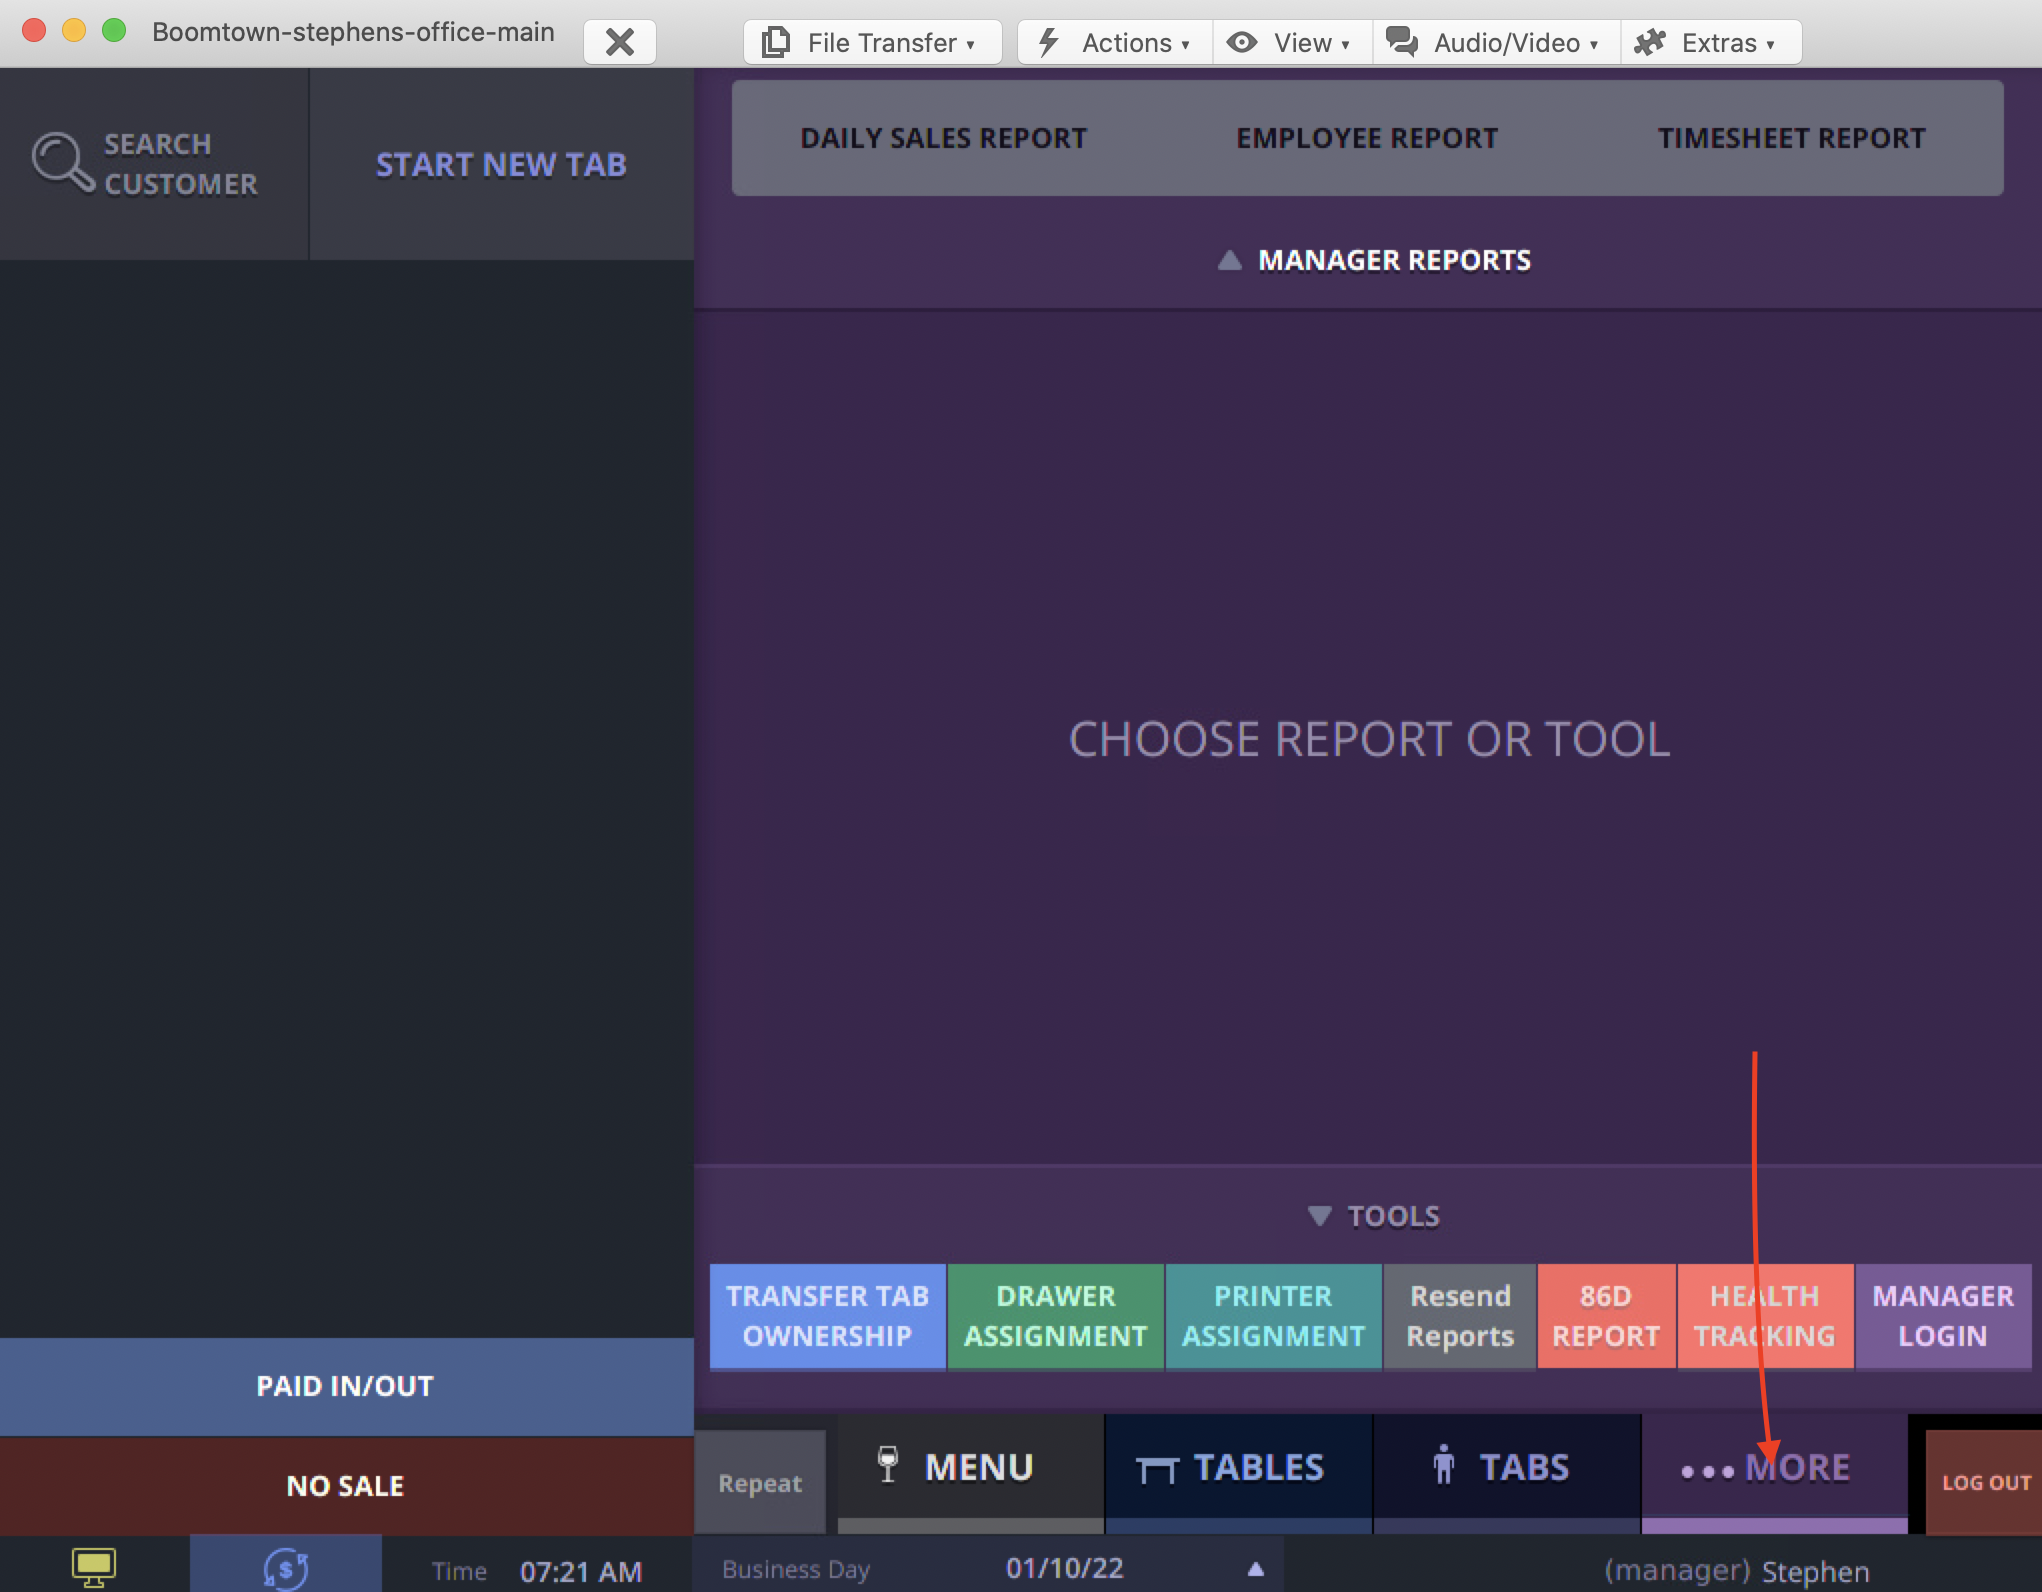
Log into the SmartTab terminal and select More
Step 2
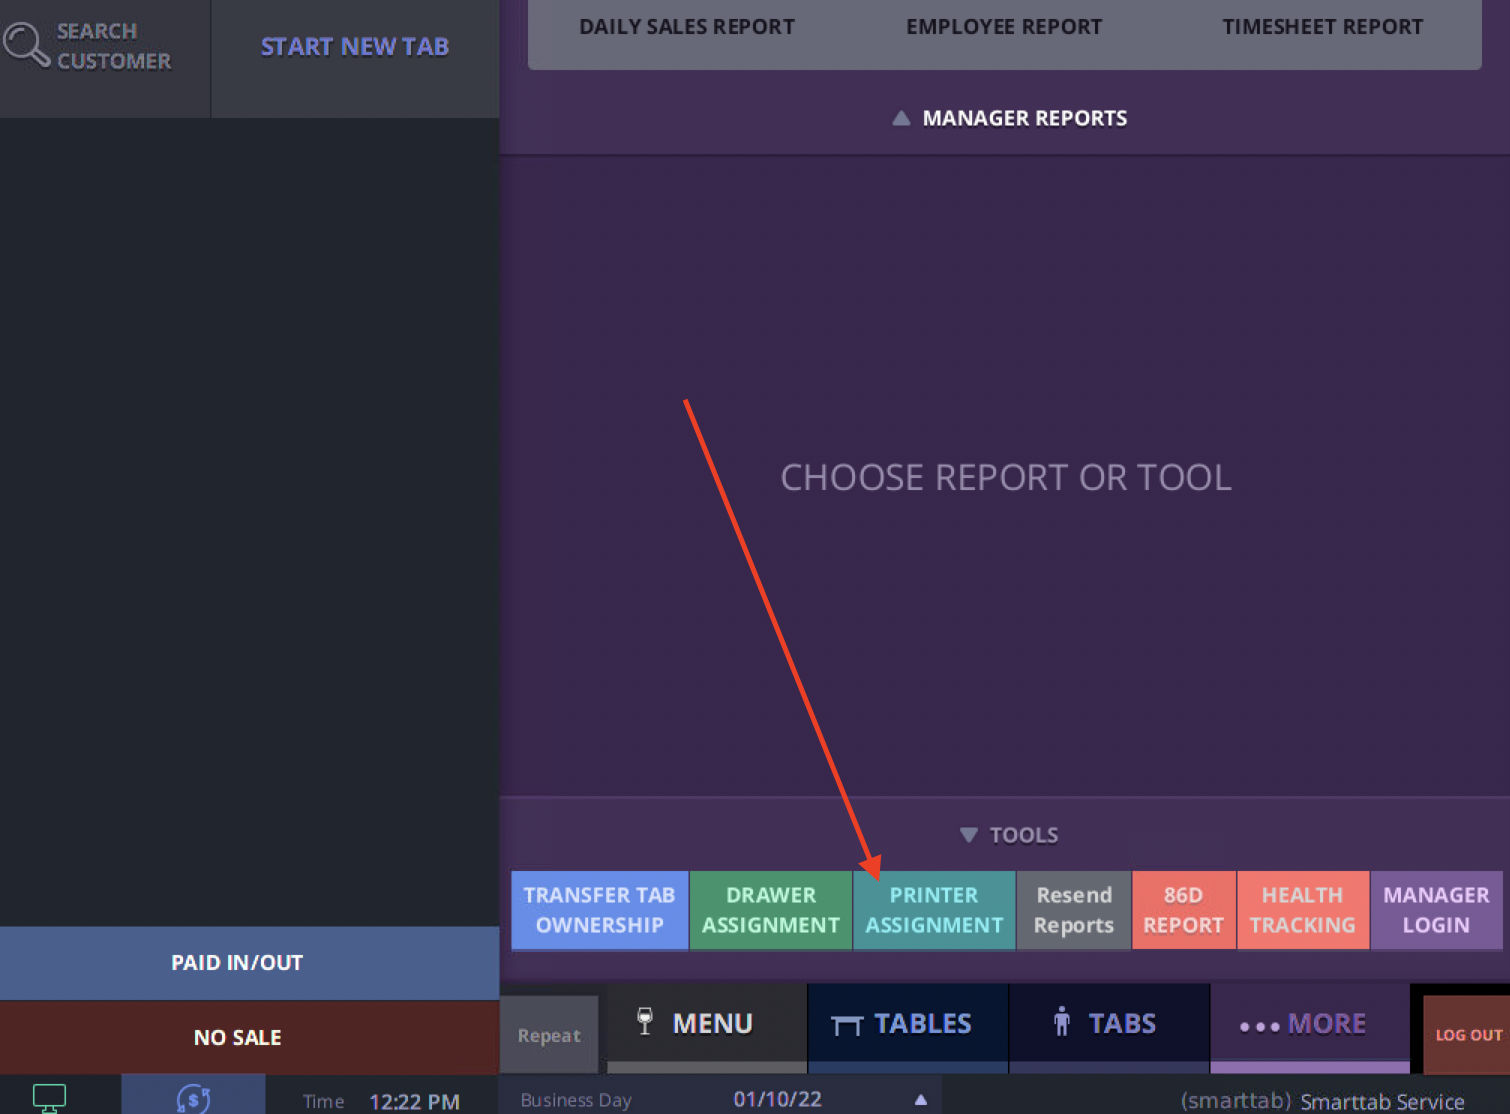
Click on the Printer Assignment button in the bottom of the screen
Step 3
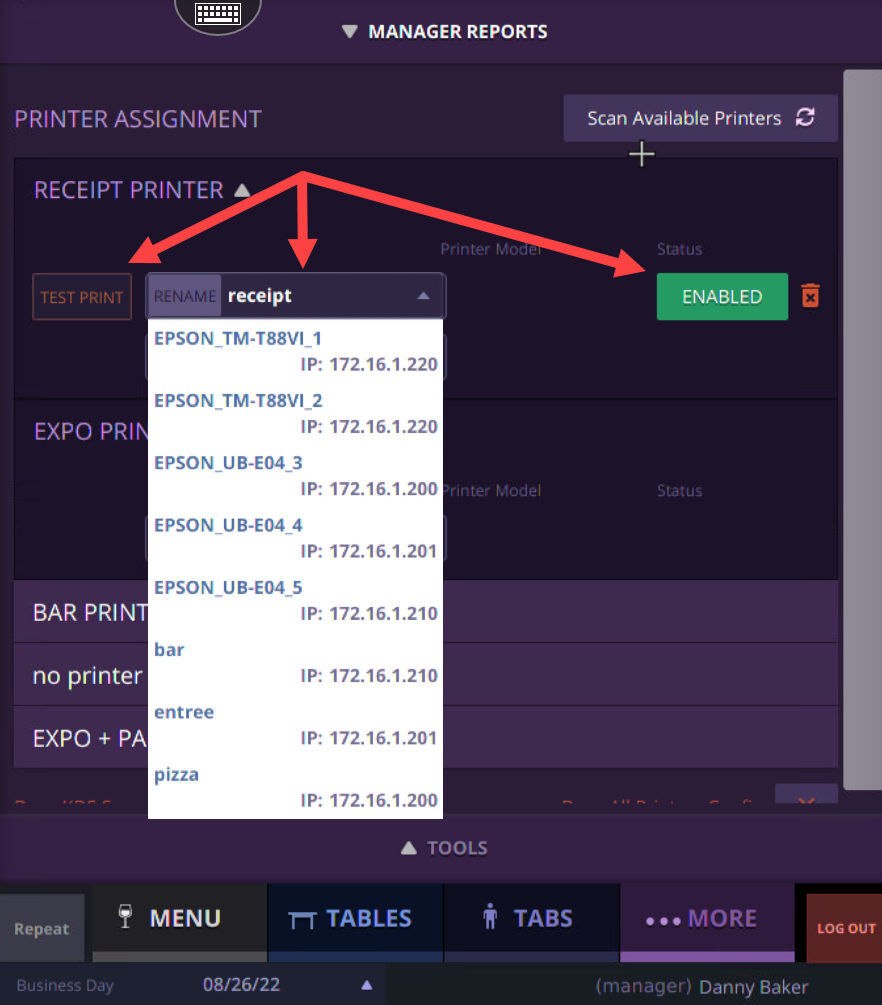
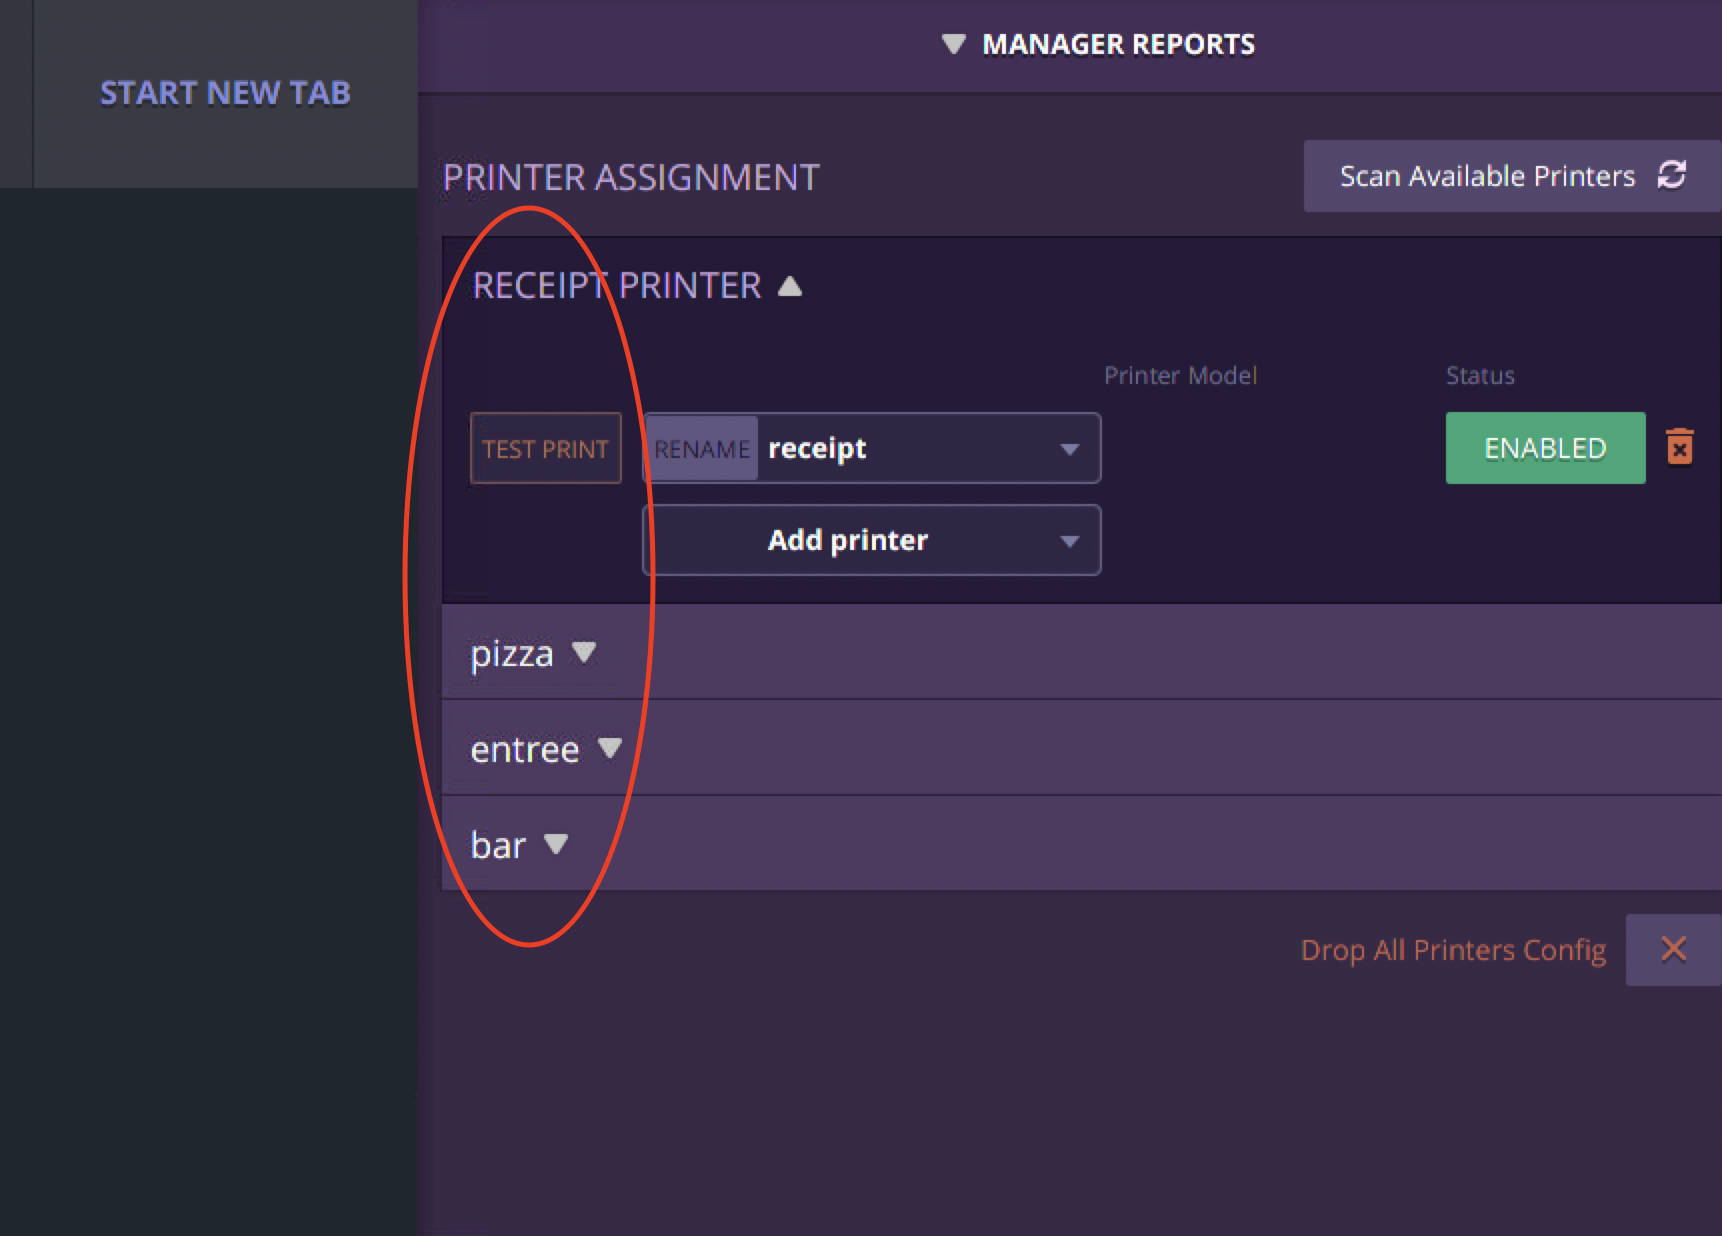
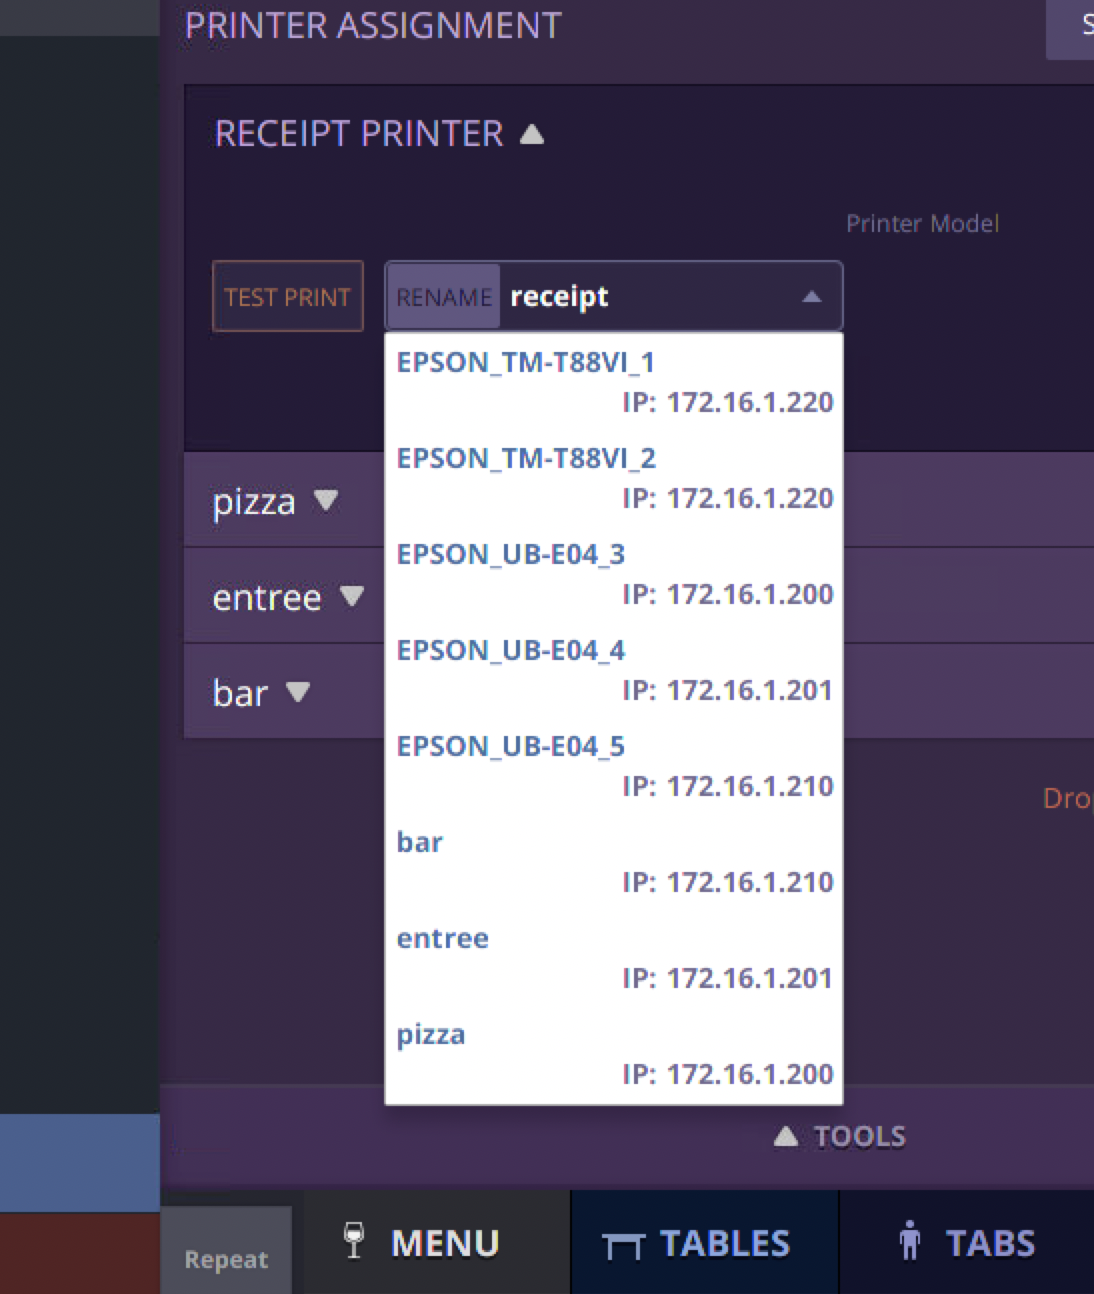
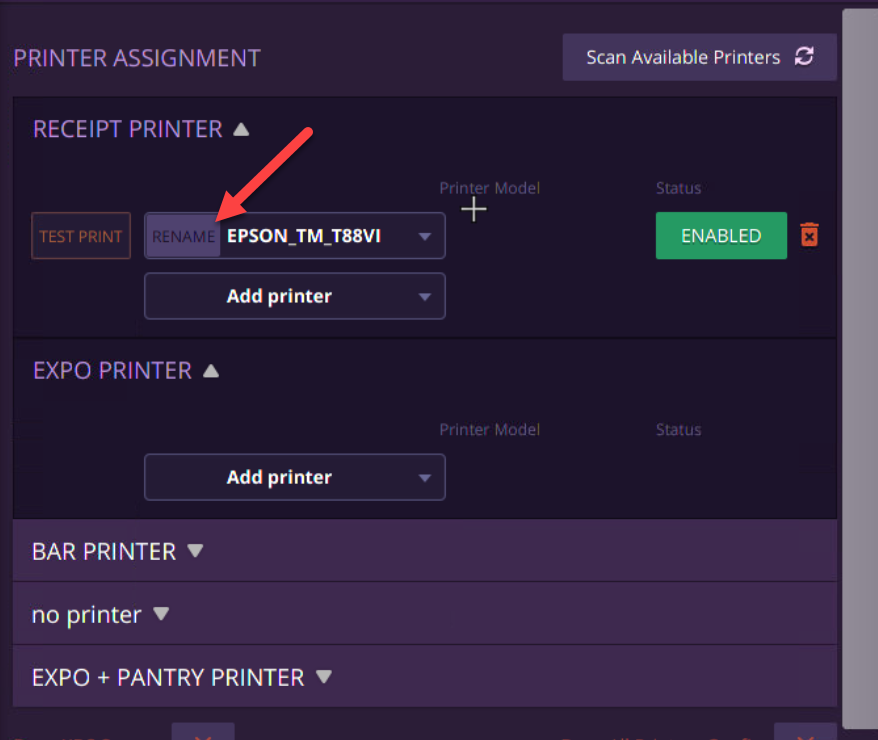
There will be several printer selections starting with Receipt (which is the first by default) followed by other selections ( i.e. BAR,KITCHEN, EXPO, SERVICE-BAR) Printers other than the Receipt printer can be added in the Printer Group area in the back of house under Menu Designer.
Step 4
Use the drop-down of each of the printer type to select the desired printer. There will be an add printer option to add additional printers if needed.

Step 5
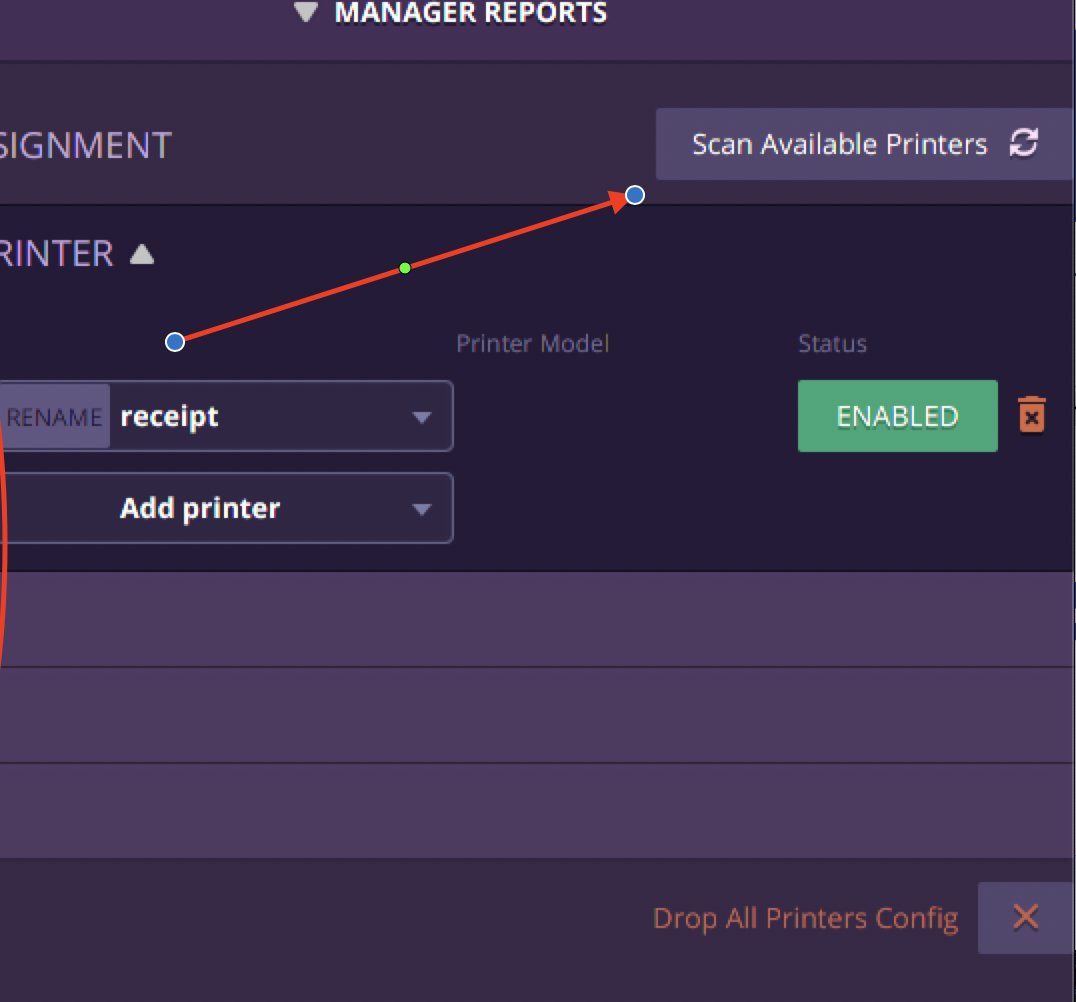
If you are unable to find the desired printer for the category you may need to use the Scan Available Printers button in the top-right corner of the screen. A spinning wheel will appear to indicate that the station is searching all available local and network printers. Once this process is complete you may again use the drop down menu in each category to search for the desired printer.
Step 6
Once you have selected the desire printer from the list of available printers, click Rename to the left of the drop down and rename the printer to its correct value. Click the Green checkmark when done. i.e. Receipt
Step 7
If you are troubleshooting and the printer in question is not working, you must determine is the best printer assigned to it? Is the printer you are trying to use enabled? Press the test print to see if a receipt is sent to the printer in question