Prerequisite: This function is completed from your POS.
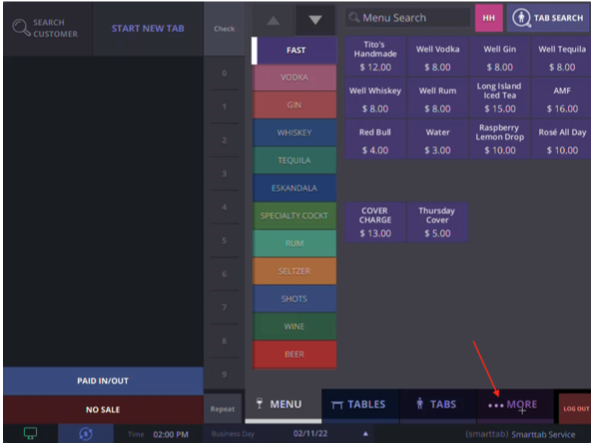
Step 1
Log into your POS and navigate to the bottom right corner and hit “More”
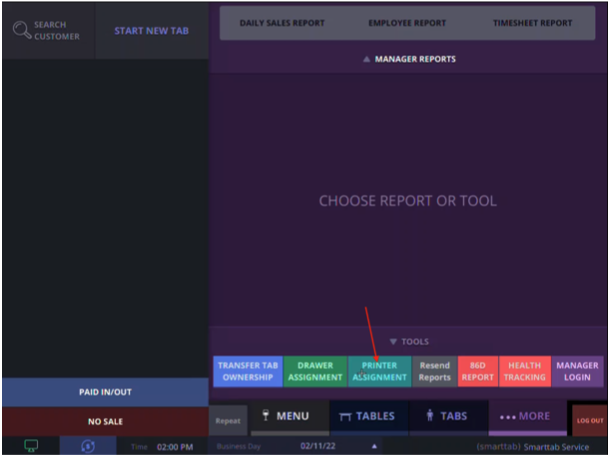
Step 2
Select “Printer Assignment”
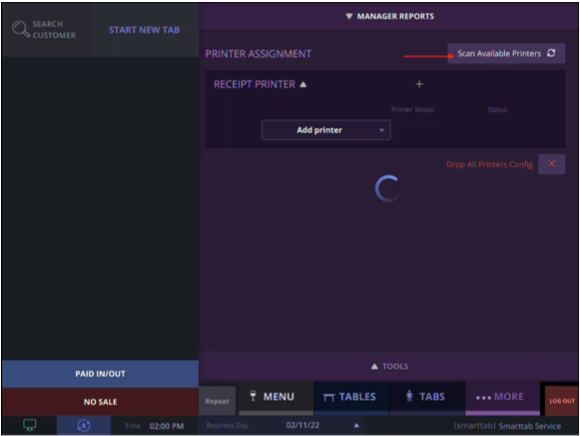
Step 3
Scan for available printer. If none appear, then log out of your POS app
Step 4
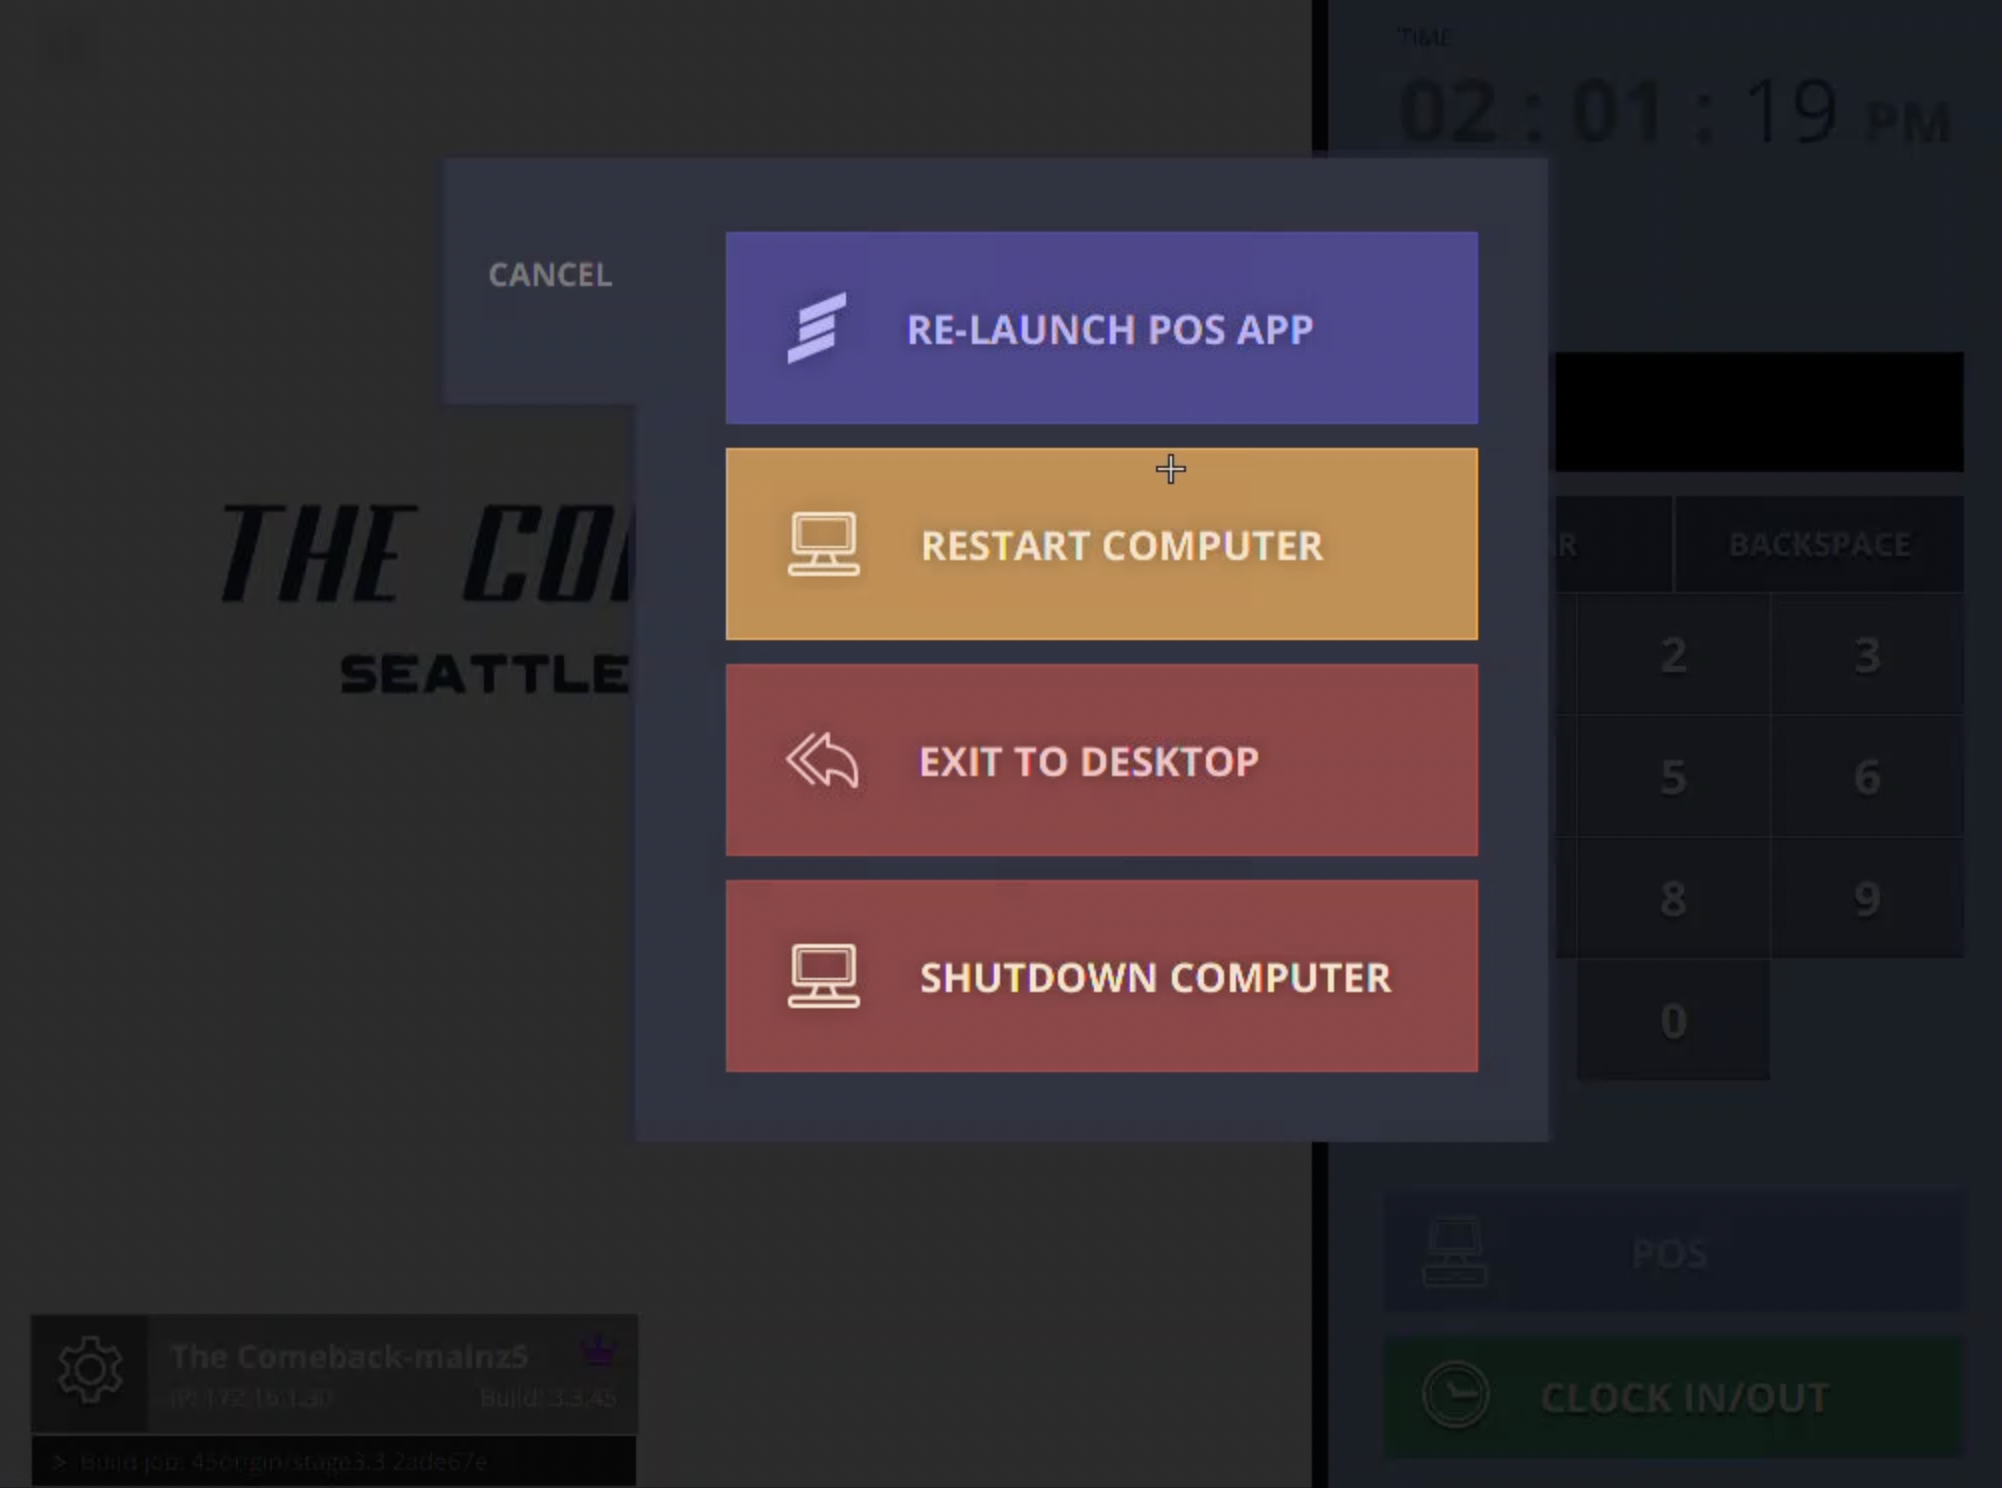
Once you log out, hit the button on the top left corner of your POS screen to exit to the desktop. Note: A pop-up window will appear prompting you to “exit to desktop” and then to select “yes” or “no”
Step 5
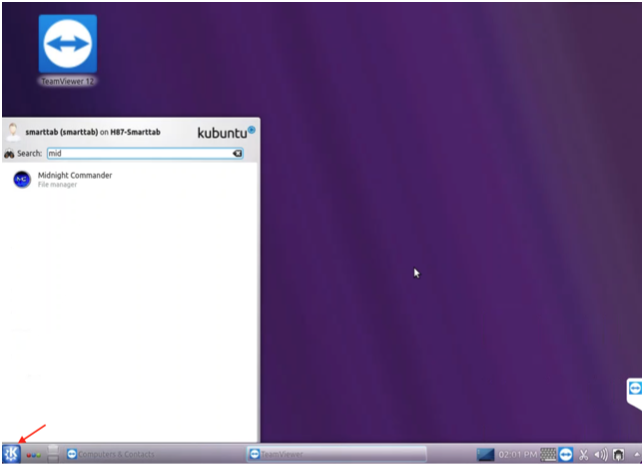
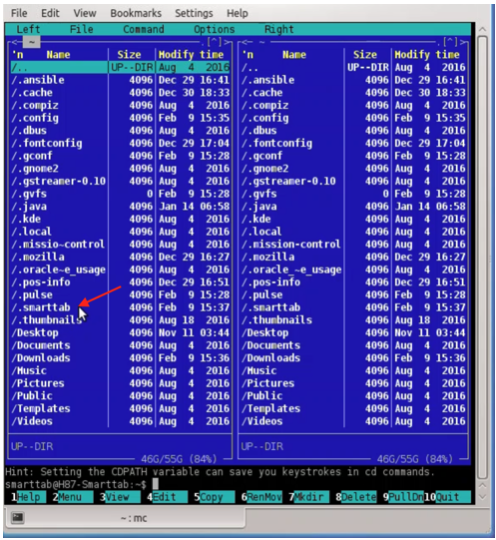
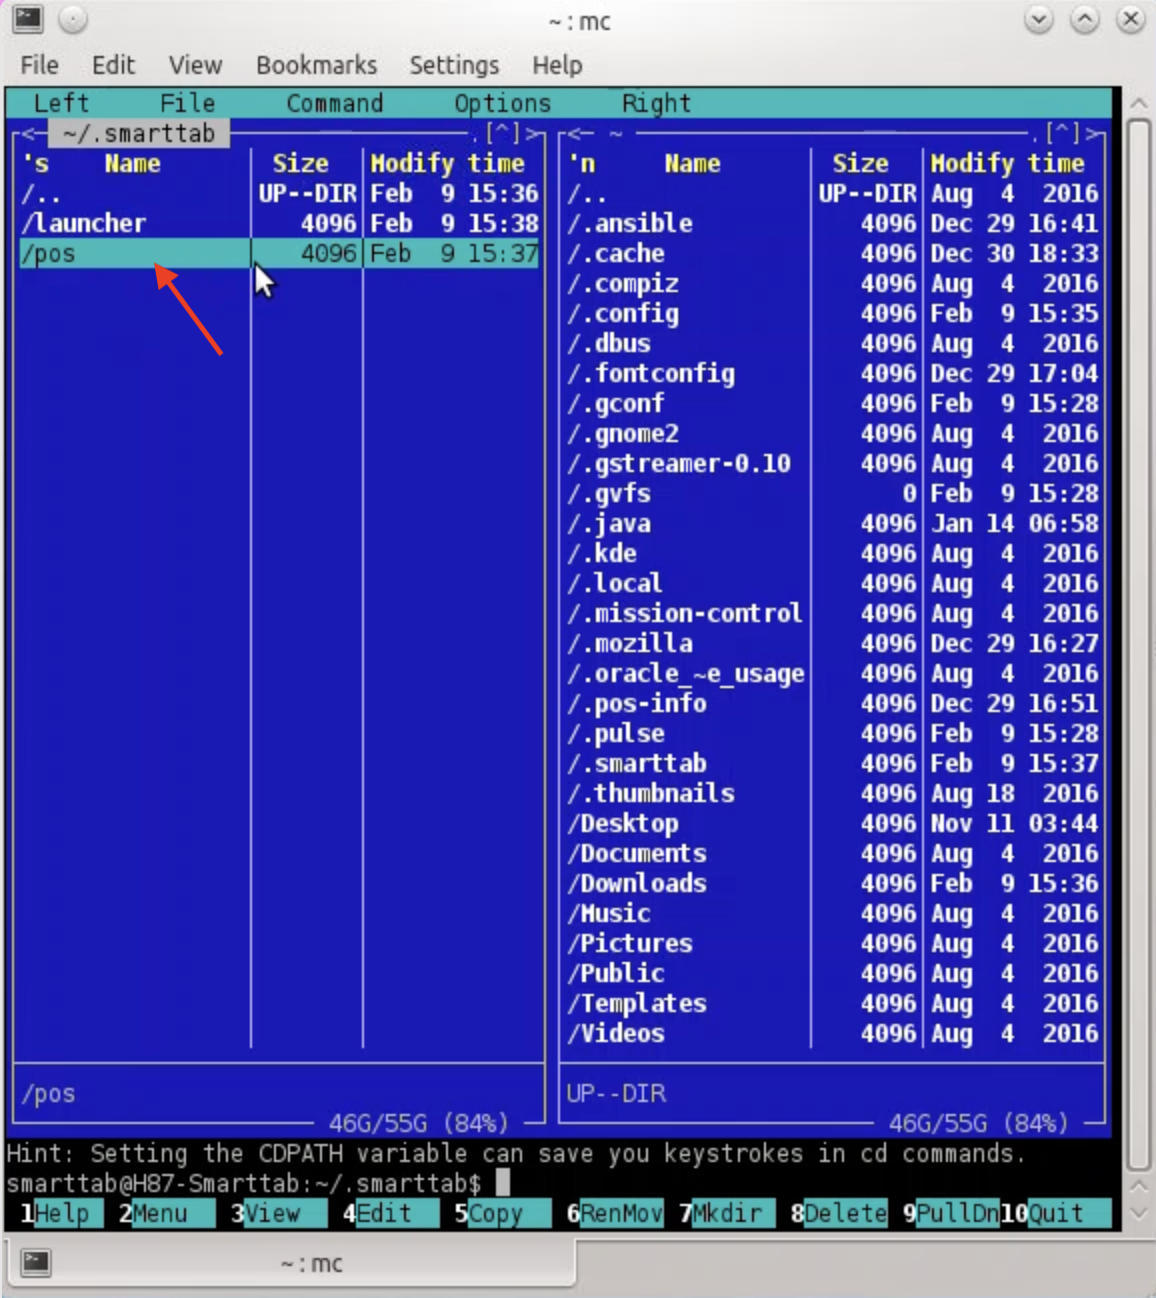
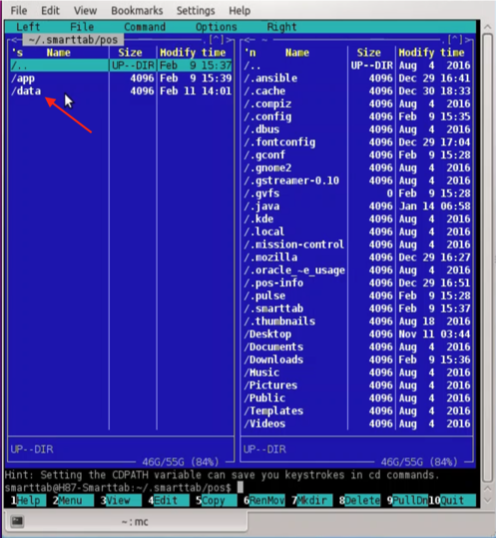
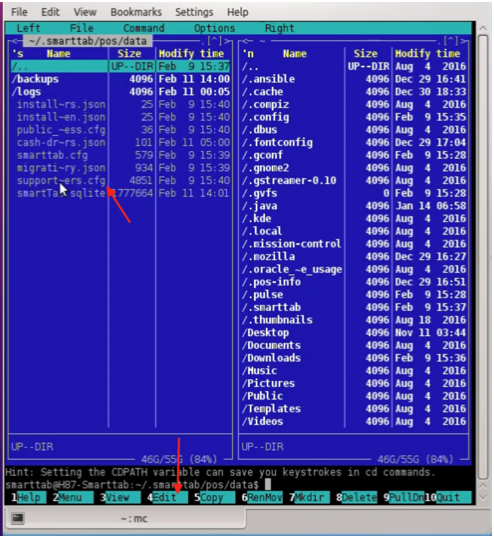
To access your printer configuration file select the “K” button at the bottom left of your screen and search for “Midnight Commander” open that application and look for the file called “/.smarttab”. Double click on that and then select “/pos” > “/data” once there you will see “support~ers.cfg” select it and then hit the “Edit” button at the bottom of your screen. This will show you a list of all the printer that are usable.
Step 6
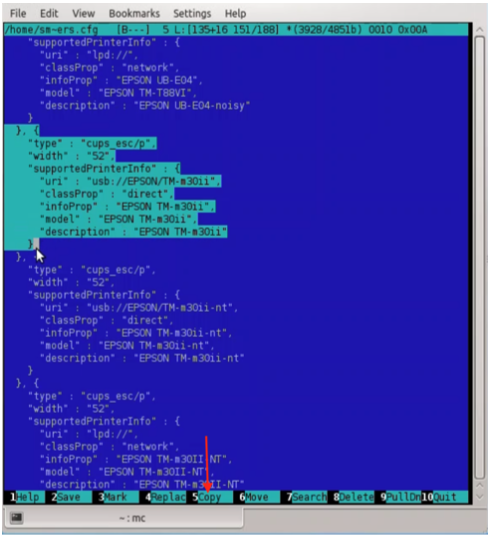
For this we will be adding a direct printer. Copy the entire section as shown by selecting the section and hitting the “Copy” button, it will automatically copy and paste the selected text, once copied, hit the enter key once. Click in the blank space to the right to deselect text. Note: This part is a little unclear. You may need to try this step on both the “Network” and “Direct” printer configurations.
Step 7
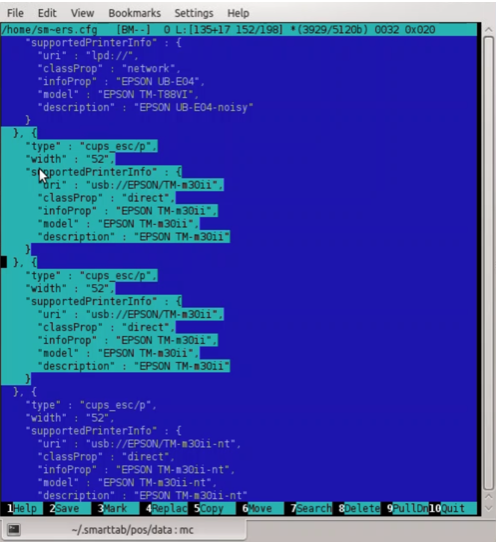
You will need to change the printer name and keep in mind that capitalization matter. For this printer you will need to change all the lowercase “i” to capital letters.
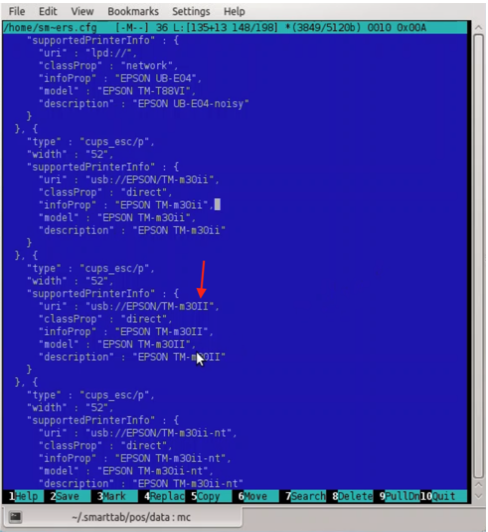
Step 8
Once you finish changing the letters, hit save at the bottom. Note: if the printer doesn’t show when you log back into the POS app you will need to redo this step for the “Network” printer configuration.
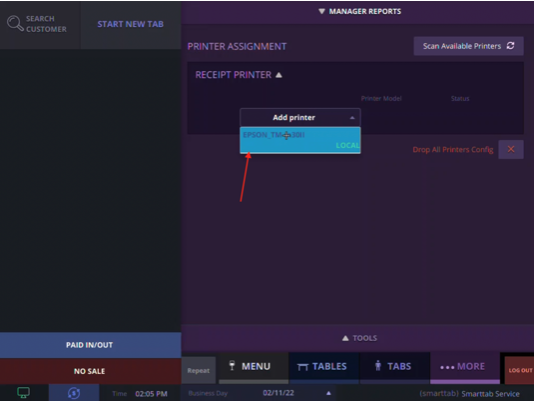
Step 9
Once you are back in the POS app, go to “MORE“, select “printer assignment“, select “add printer” and then it should show up and you will have successfully added a printer to the printer configuration file.