Here are 3 methods to start a bar tab.
1) Add items > Chip Credit Card
2) Start New Tab > Manually Enter Tab Name
3) Chip Credit Card > Add Items > Send To Tab
Note: Although the language the POS uses is “bar”, restaurants often utilize bar tabs to ring in to-go orders.
Add items > Chip Credit Card Method
Note: This method stores the credit card info to the tab for later use.
Step 1
Log into the POS with either fingerprint biometrics or by your POS code. This is the main menu screen you’ll see when you log in.
Step 2
From here, select the items you want to add to the tab. The items will begin to populate as line items on the left hand side of the screen. This area is called the “tab view”.
Step 3
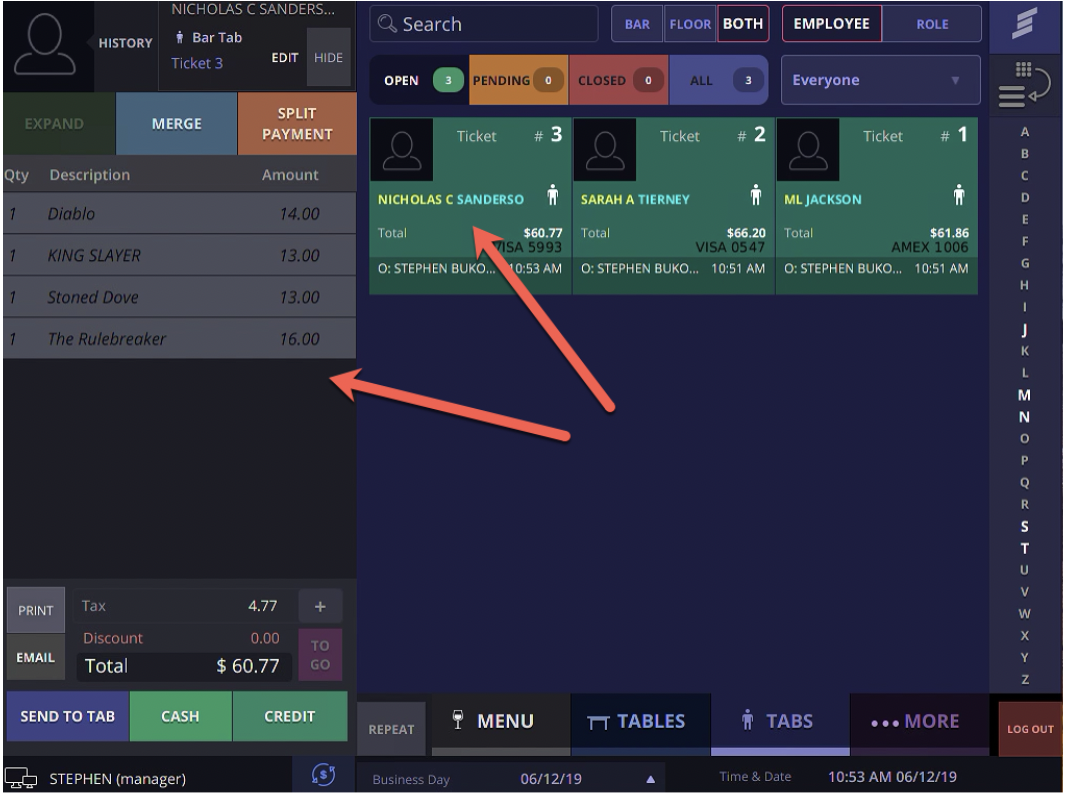
Chip the customer’s credit card*. A green boarder will appear around the screen to indicate a successful chip card entry. Once you chip the card, in the top left corner of the screen , their name (populated from the credit card information), and assigned ticket number will show a quick, 3-second visual display confirming the tab has been created. After the 3 seconds the tab is no longer displayed in the tab view, the assumption is that you have completed the first round of orders and would like to store the tab for later.
*DO NOT CLICK THE GREEN CREDIT BUTTON. THIS INDICATES AN ATTEMPT TO MAKE PAYMENT.
Step 4
Once a bar tab is created, the POS will return you to the main menu screen. To view tabs click “Tab Search” in the top right corner of the screen or “Tabs” near the bottom right section.

Step 5
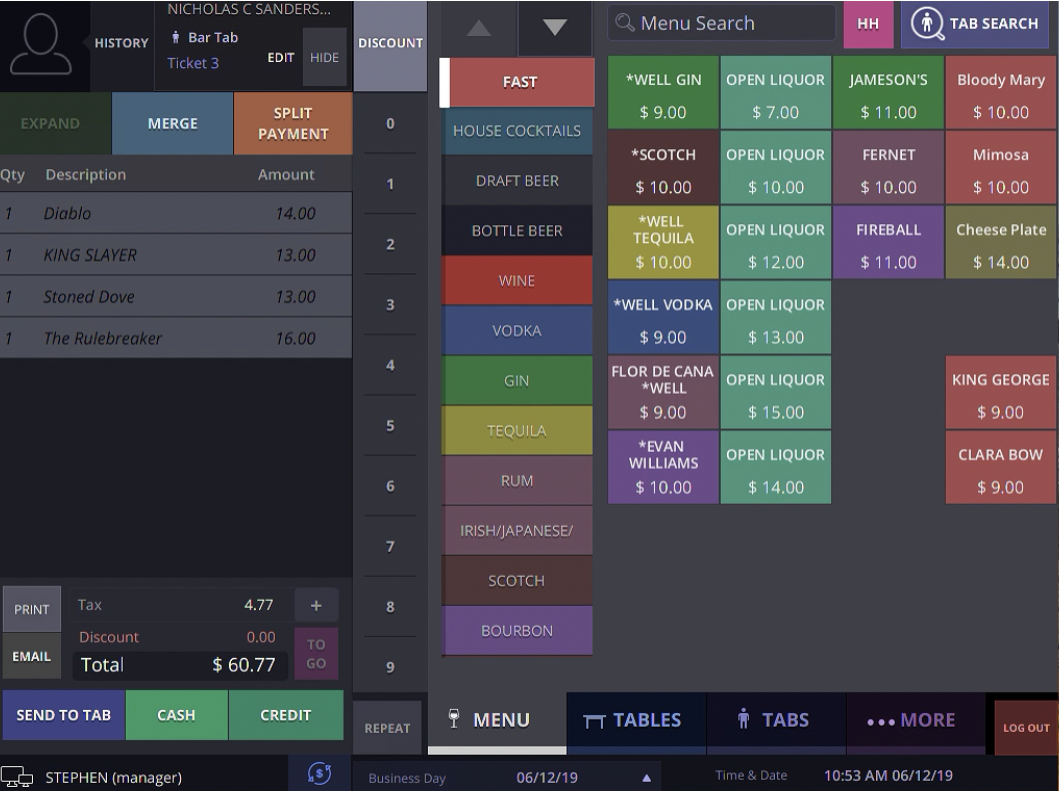
Click the tab you want to view once, to bring it up in the tab view.
Step 6
With the tab already open in the tab view from the previous step, click the Tab a second time or Select “Menu” to bring up the main menu and add new items.
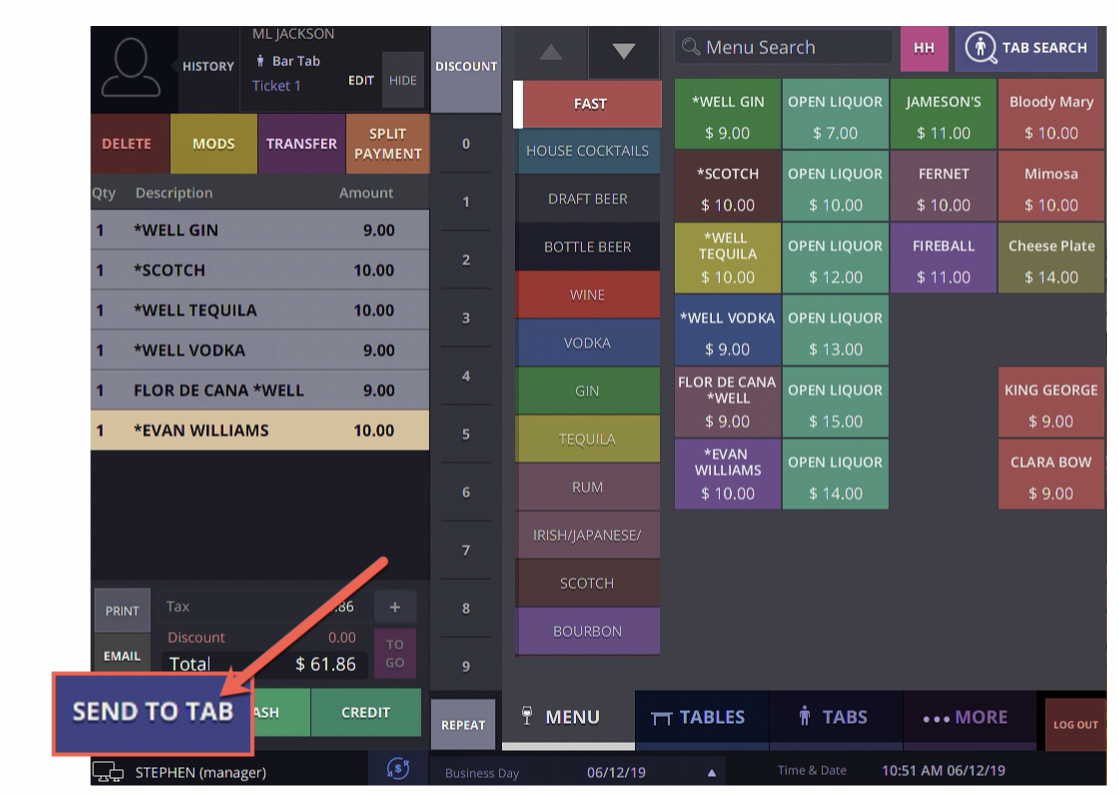
Step 7
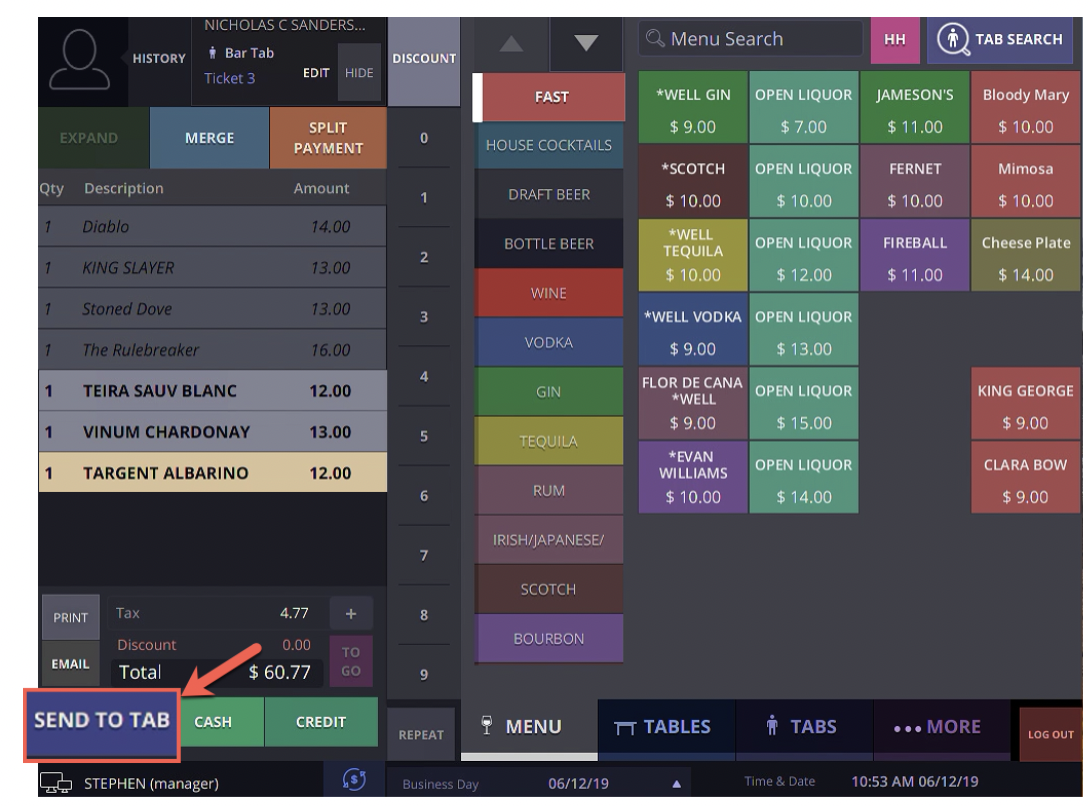
Once you’ve added new items click the blue “Send To Tab” button on the bottom left corner of the screen to finalize the order. This will also clear your tab view and hide the tab within the Tabs page once again.
Start New Tab > Enter Tab Name Method
Note: This method is one of two ways to start a bar tab without a customer credit card.
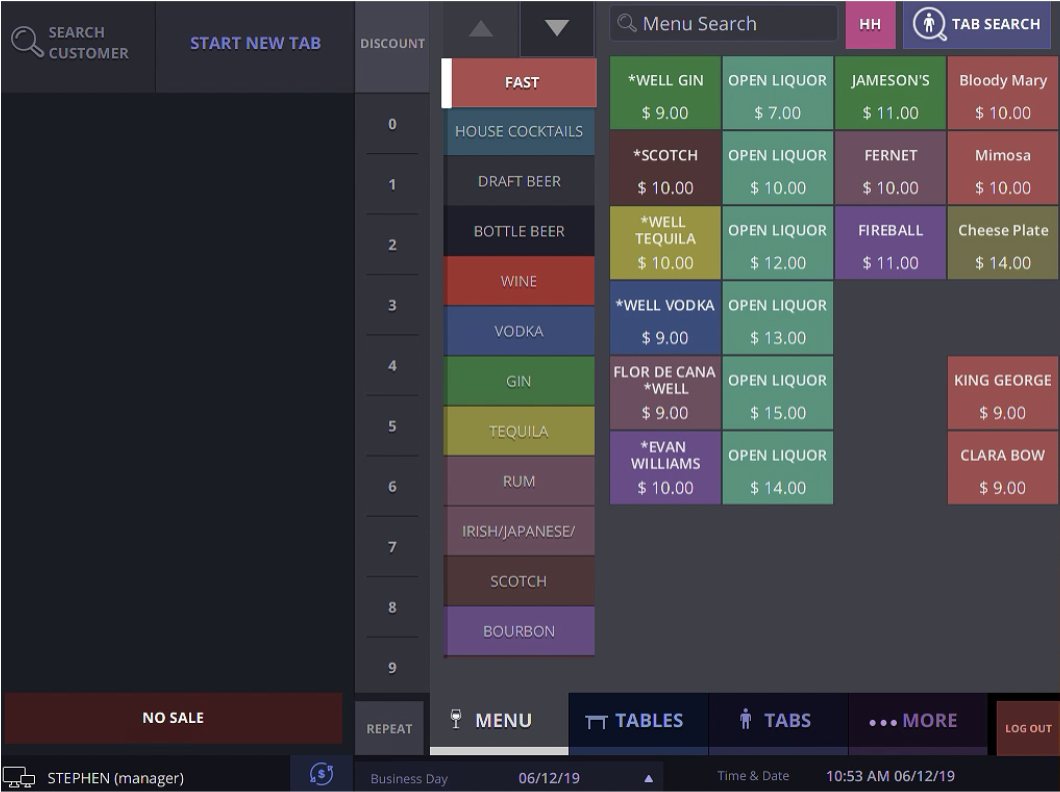
Step 1
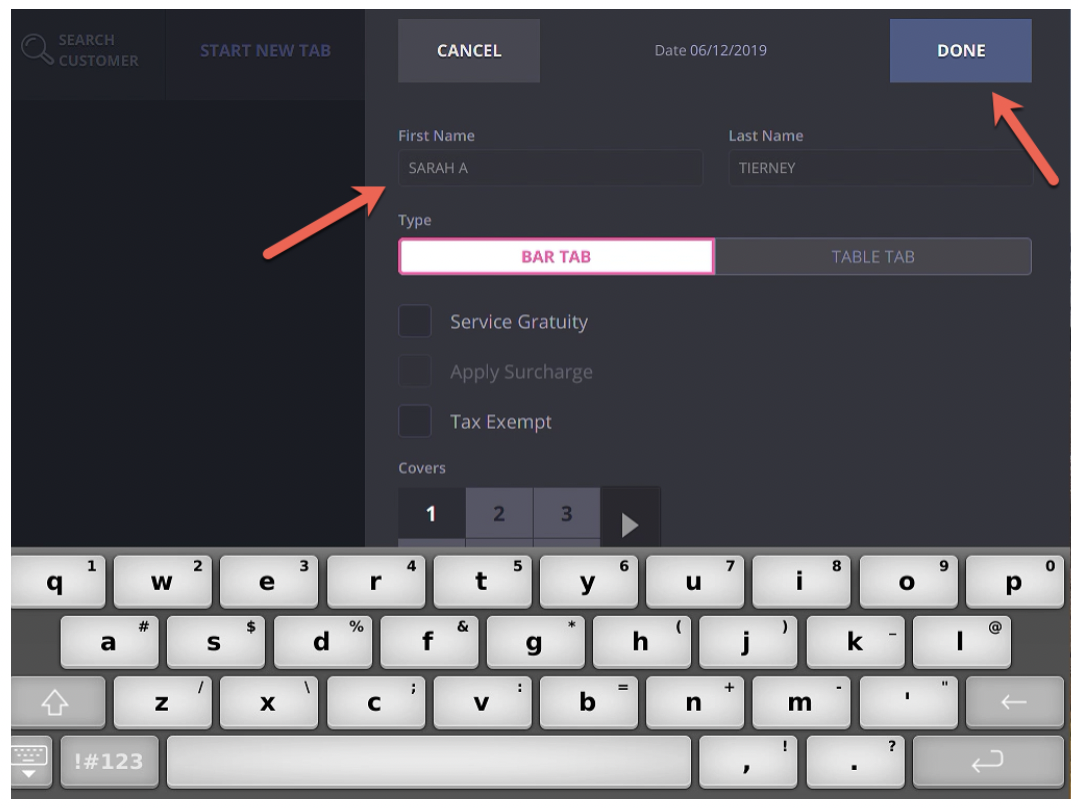
Click the “Start New Tab” Button in the top left corner of the screen.
Note: The “Start New Tab” Button is not available when looking at a tab in the tab view. To make it available, hide the tab you are looking at with the “Hide” button.

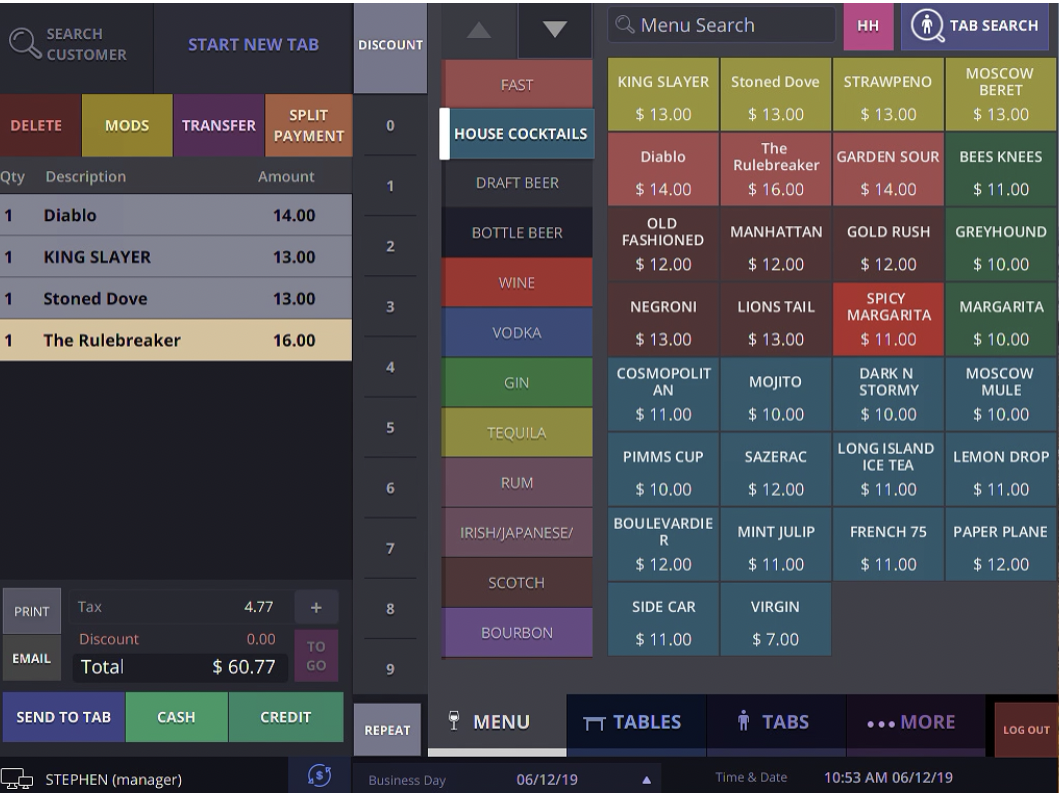
Step 2
From here, you’ll be prompted with a keyboard and info page to enter in the Customer Name. Type in a name or label into the First or Last Name section. Finally, click done to return to the main menu where you can add items to the bar tab that was just created.
Step 3
Once you’ve added menu items click the blue “Send To Tab” button on the bottom left corner of the screen to finalize the order. This will also clear your tab view and hide the tab within the Tabs page.
Chip Credit Card > Add items > Send To Tab Method
Note: This method stores the credit card info to the tab for later use.
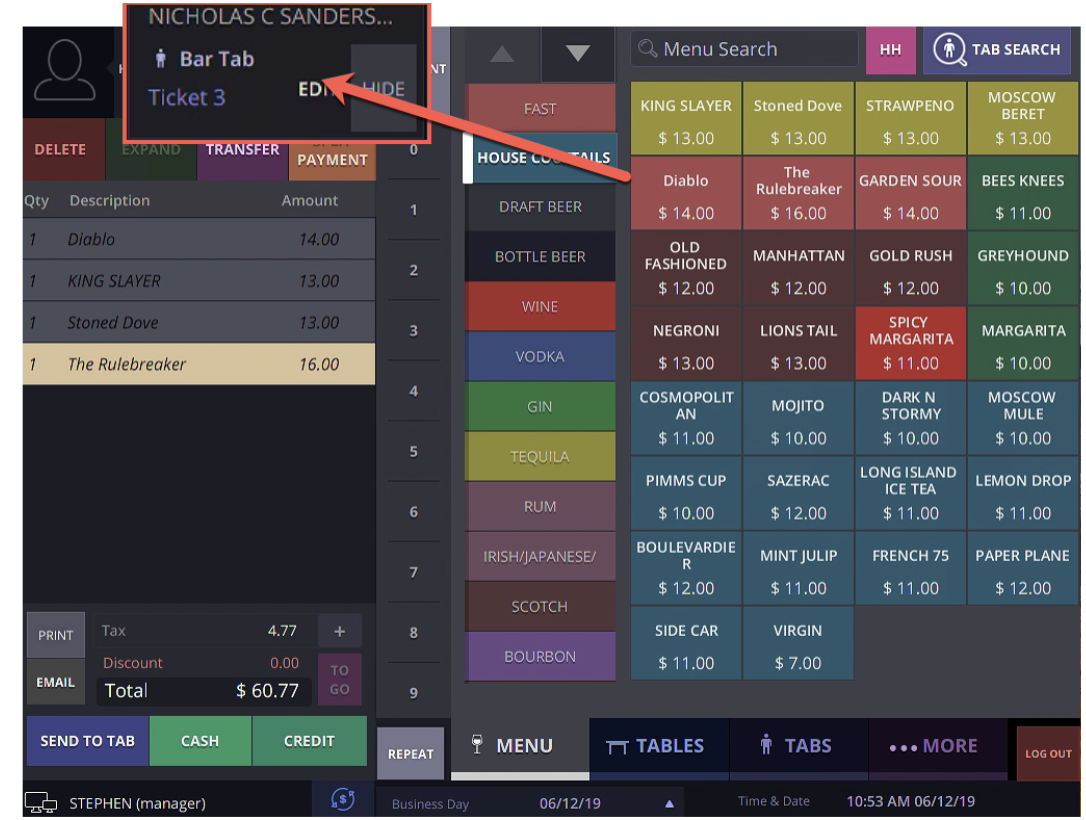
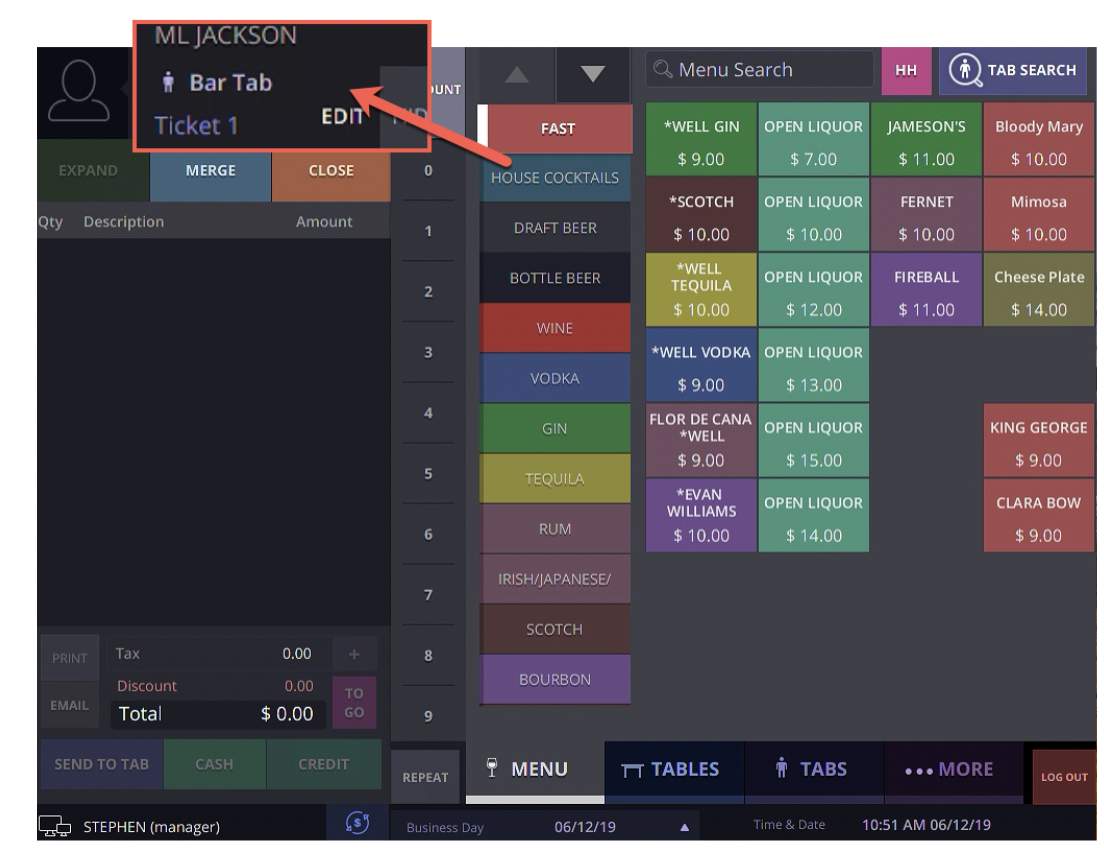
Step 1
Once you chip the customer’s credit card* the “Start New Tab” button hides away and is replaced with the customer information, pulled from the credit card, as well as it’s ticket number and the “EDIT” and “HIDE” button. The tab stays in the tab view so that you can now add menu items.
*DO NOT CLICK THE GREEN CREDIT BUTTON. THIS INDICATES AN ATTEMPT TO MAKE PAYMENT.
Step 2
Once you’ve added menu items click the blue “Send To Tab” button on the bottom left corner of the screen to finalize the order. This will also clear your tab view and hide the tab within the Tabs page.