Prerequisite: This function is completed from the back-end web URL
A user looking to change this setting will need the username and password to login into the back-end URL of their venue.
Note: you will need to set up Mods prior to completing this action.
Step 1
Click on the Hamburger menu in the top left of your web browser
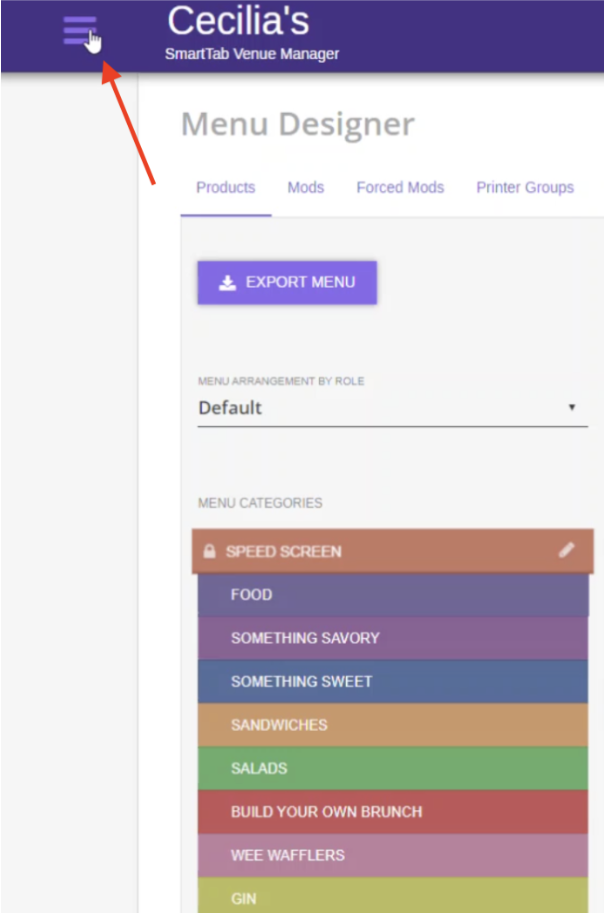
Step 2
Navigate to the “Menu Designer” link and select “Forced Mods”
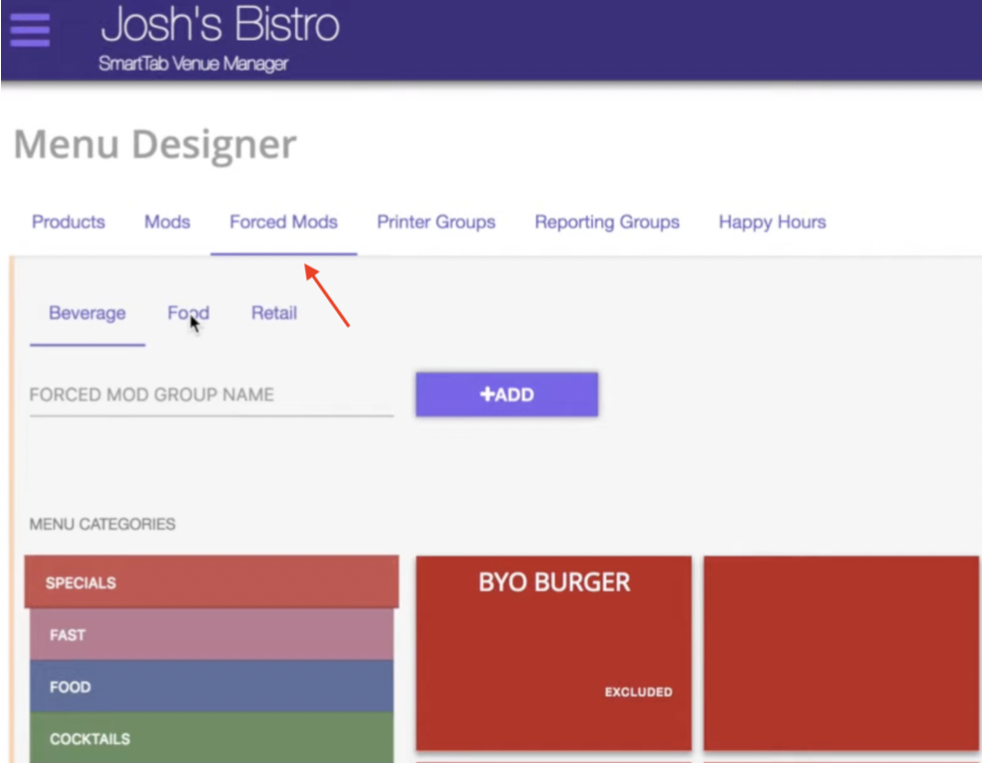
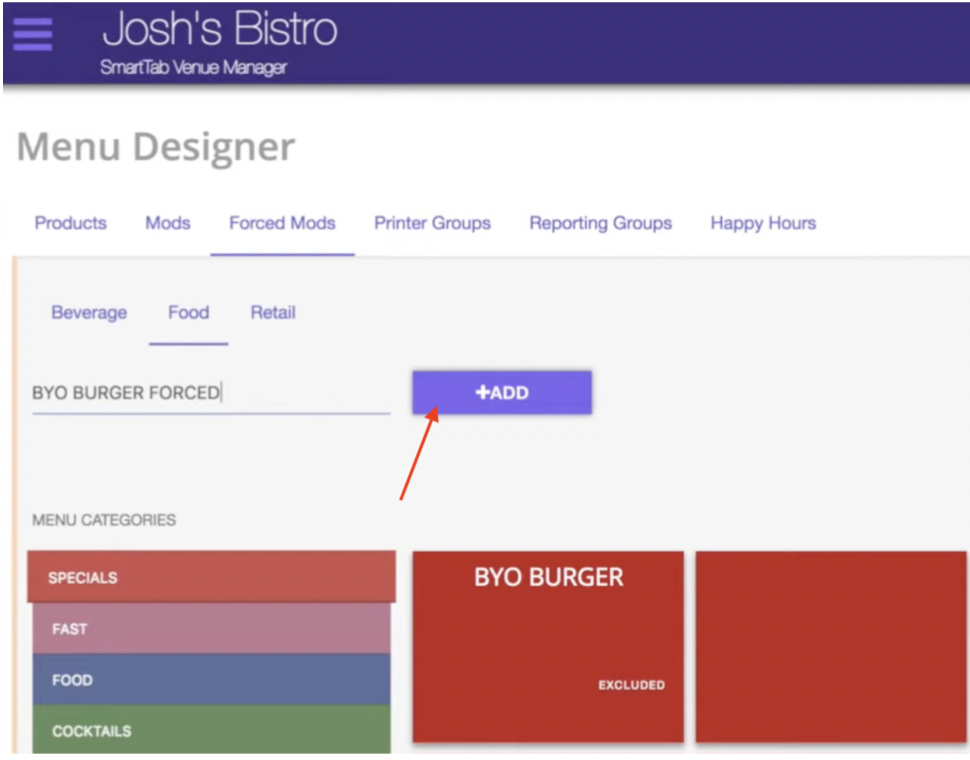
Step 3
To create a forced mod you will need to first create a category. Enter the name of the category in the space provided and click “+Add”.
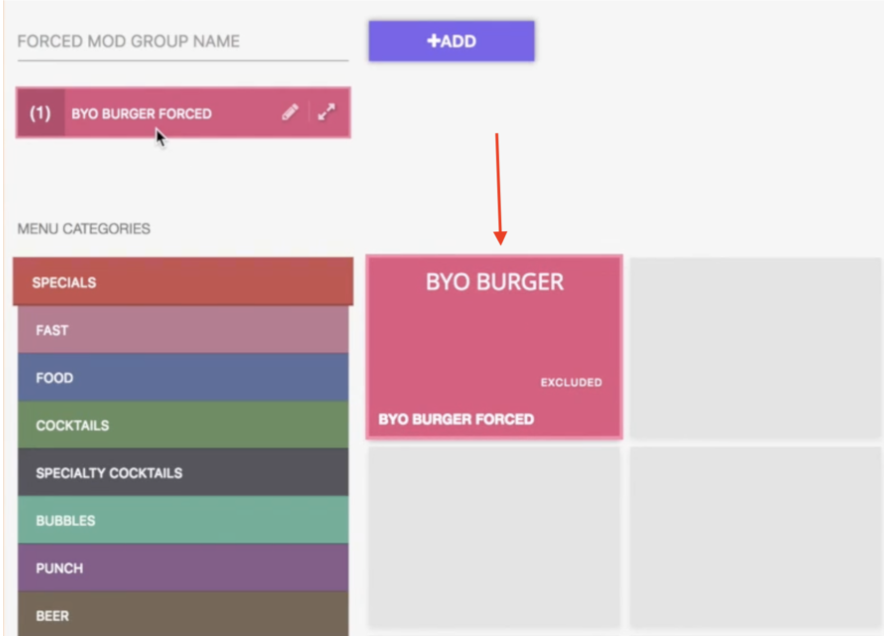
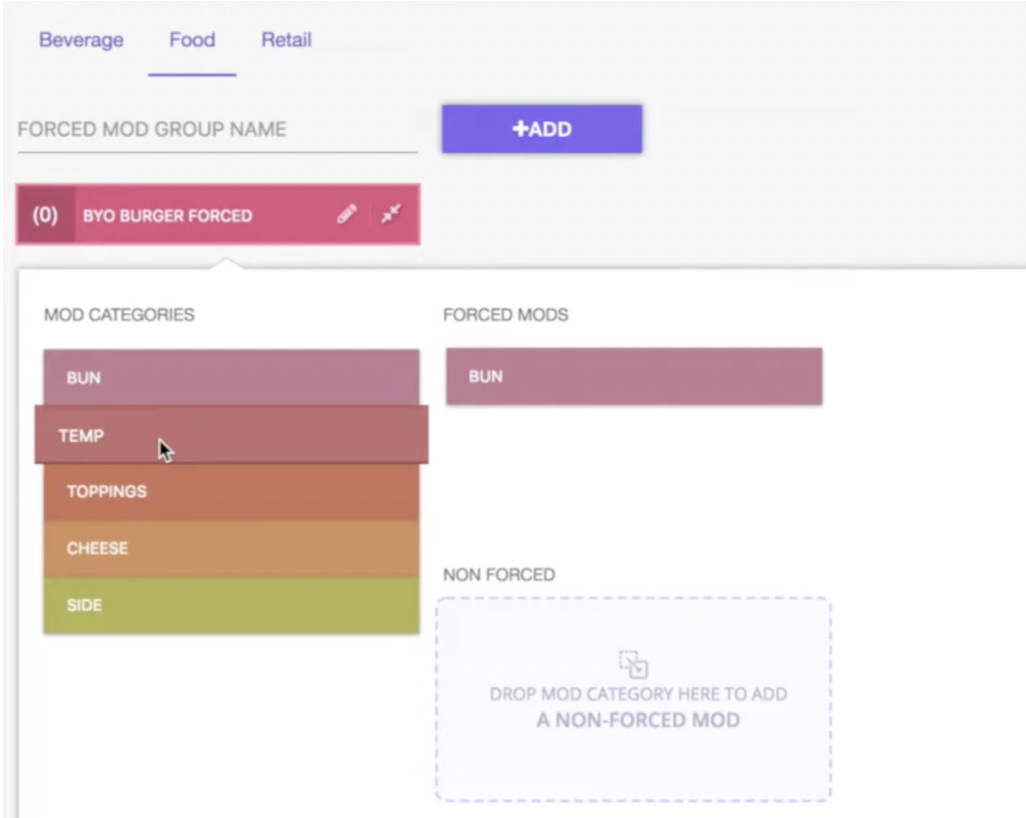
Step 4
Hit the expand key to bring up the forced mod rule pop-up window. From there you can drag and drop from the previously entered categories.Note: Go in order of the questions your server will likely use when taking the order from the customer.
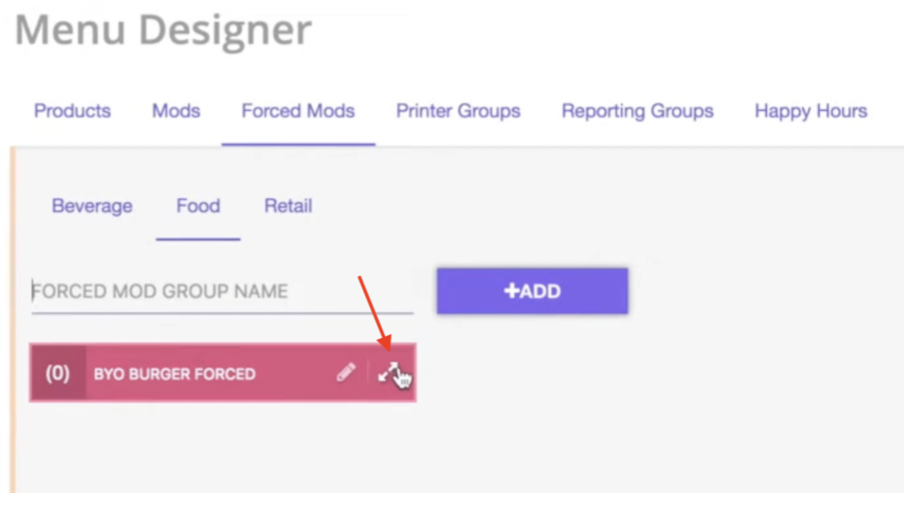
Step 5
Now you can click on each forced mod to see/edit specific rules. You can edit if a selection must be made in order for the item to be processed, the displayed order of forced mods, and the price.
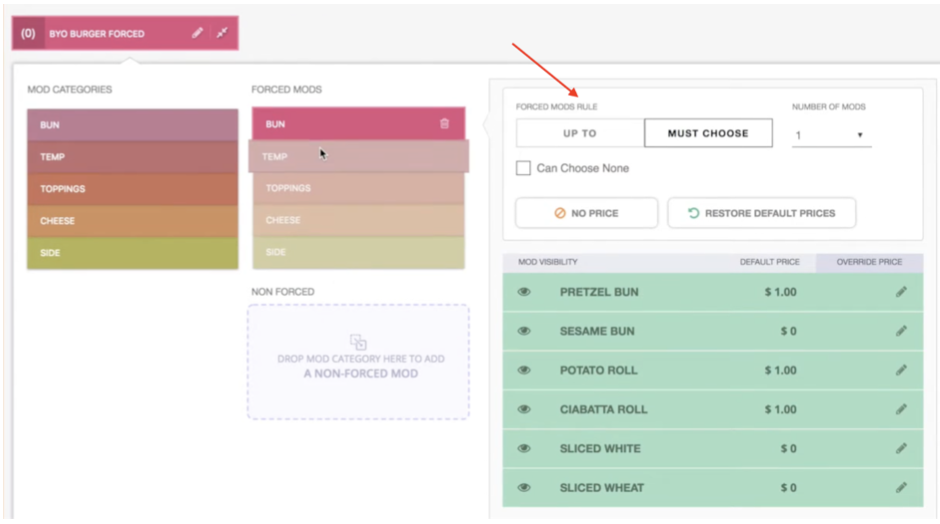
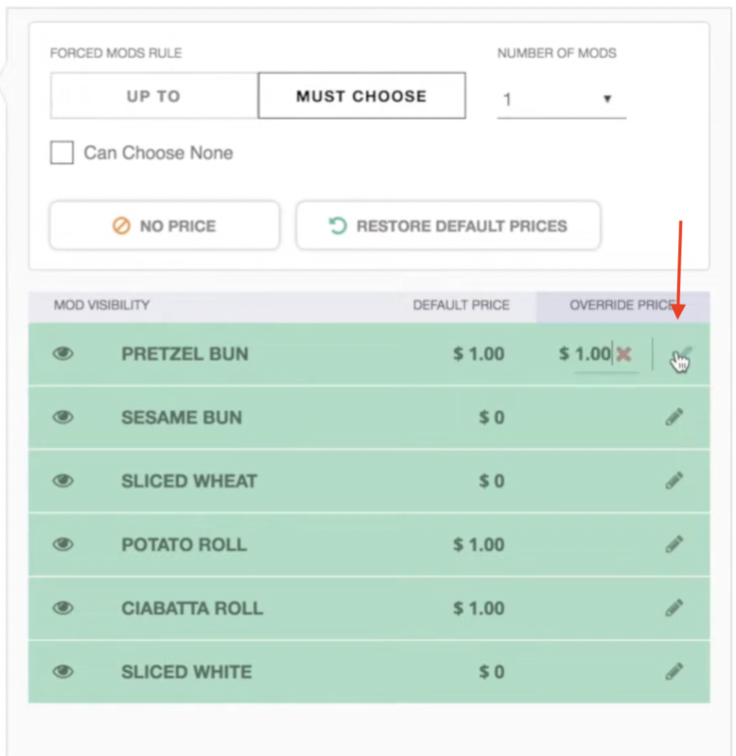
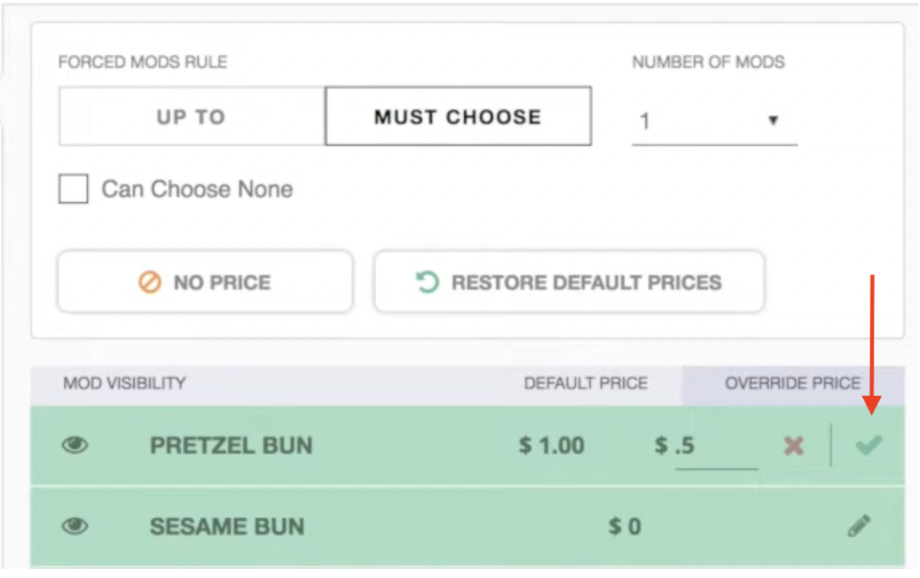
Step 6
To edit or override the price of a forced mod click on the pencil tool, set the new price and hit the check mark tool to save.
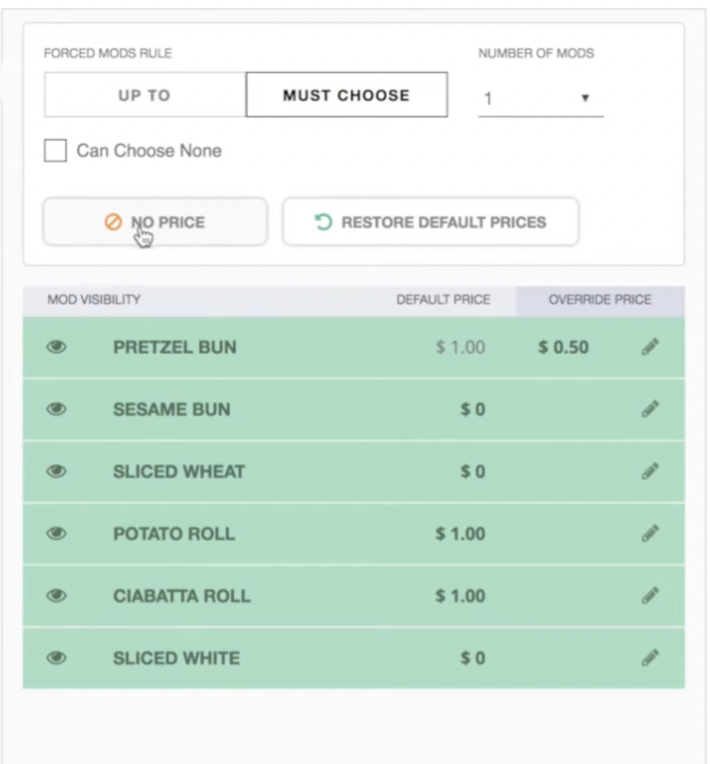
Step 7
Other options you have with this window is to restore the default price, give the command for no price and/or remove visibility. Once completed you can collapse the rule window by hitting the arrow key next to your forced mod.
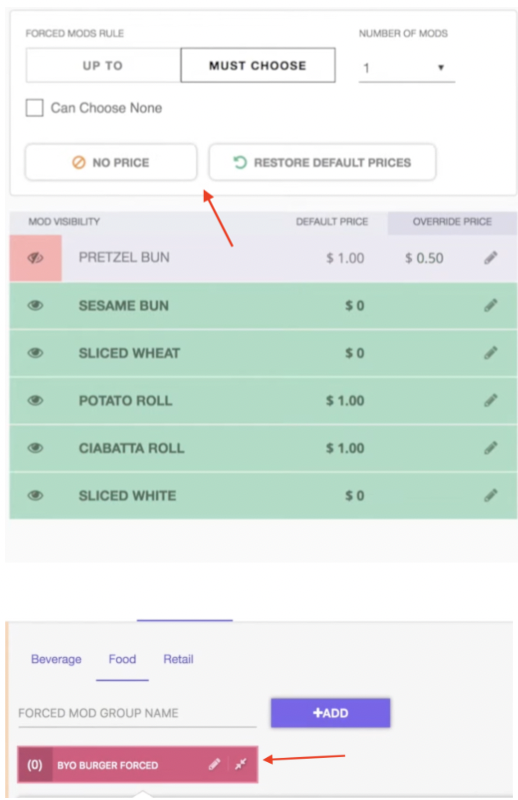
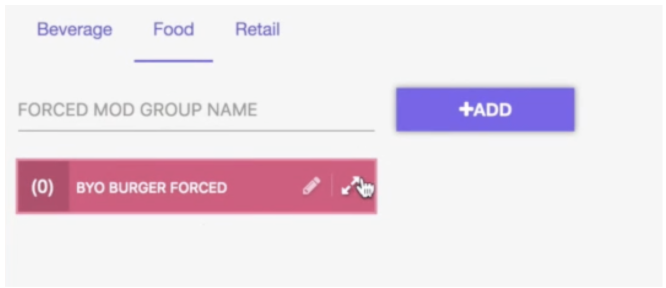
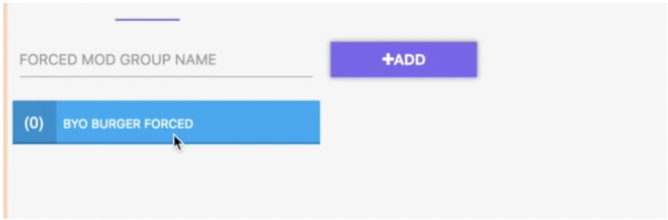
Step 8
Check the color of the forced mod at the top of your screen, if it is pink then the forced mod is active, if it is blue then it is inactive. Note: Click on tile to activate forced modification.