Prerequisite: This function is completed from the back-end web URL. A user looking to change this setting will need the username and password to login into the back-end URL of their venue.
Step 1
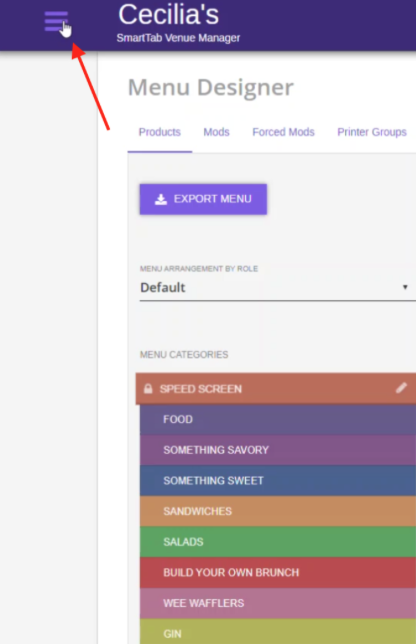
Click on the hamburger menu in the top left of your web browser and select menu
Step 2
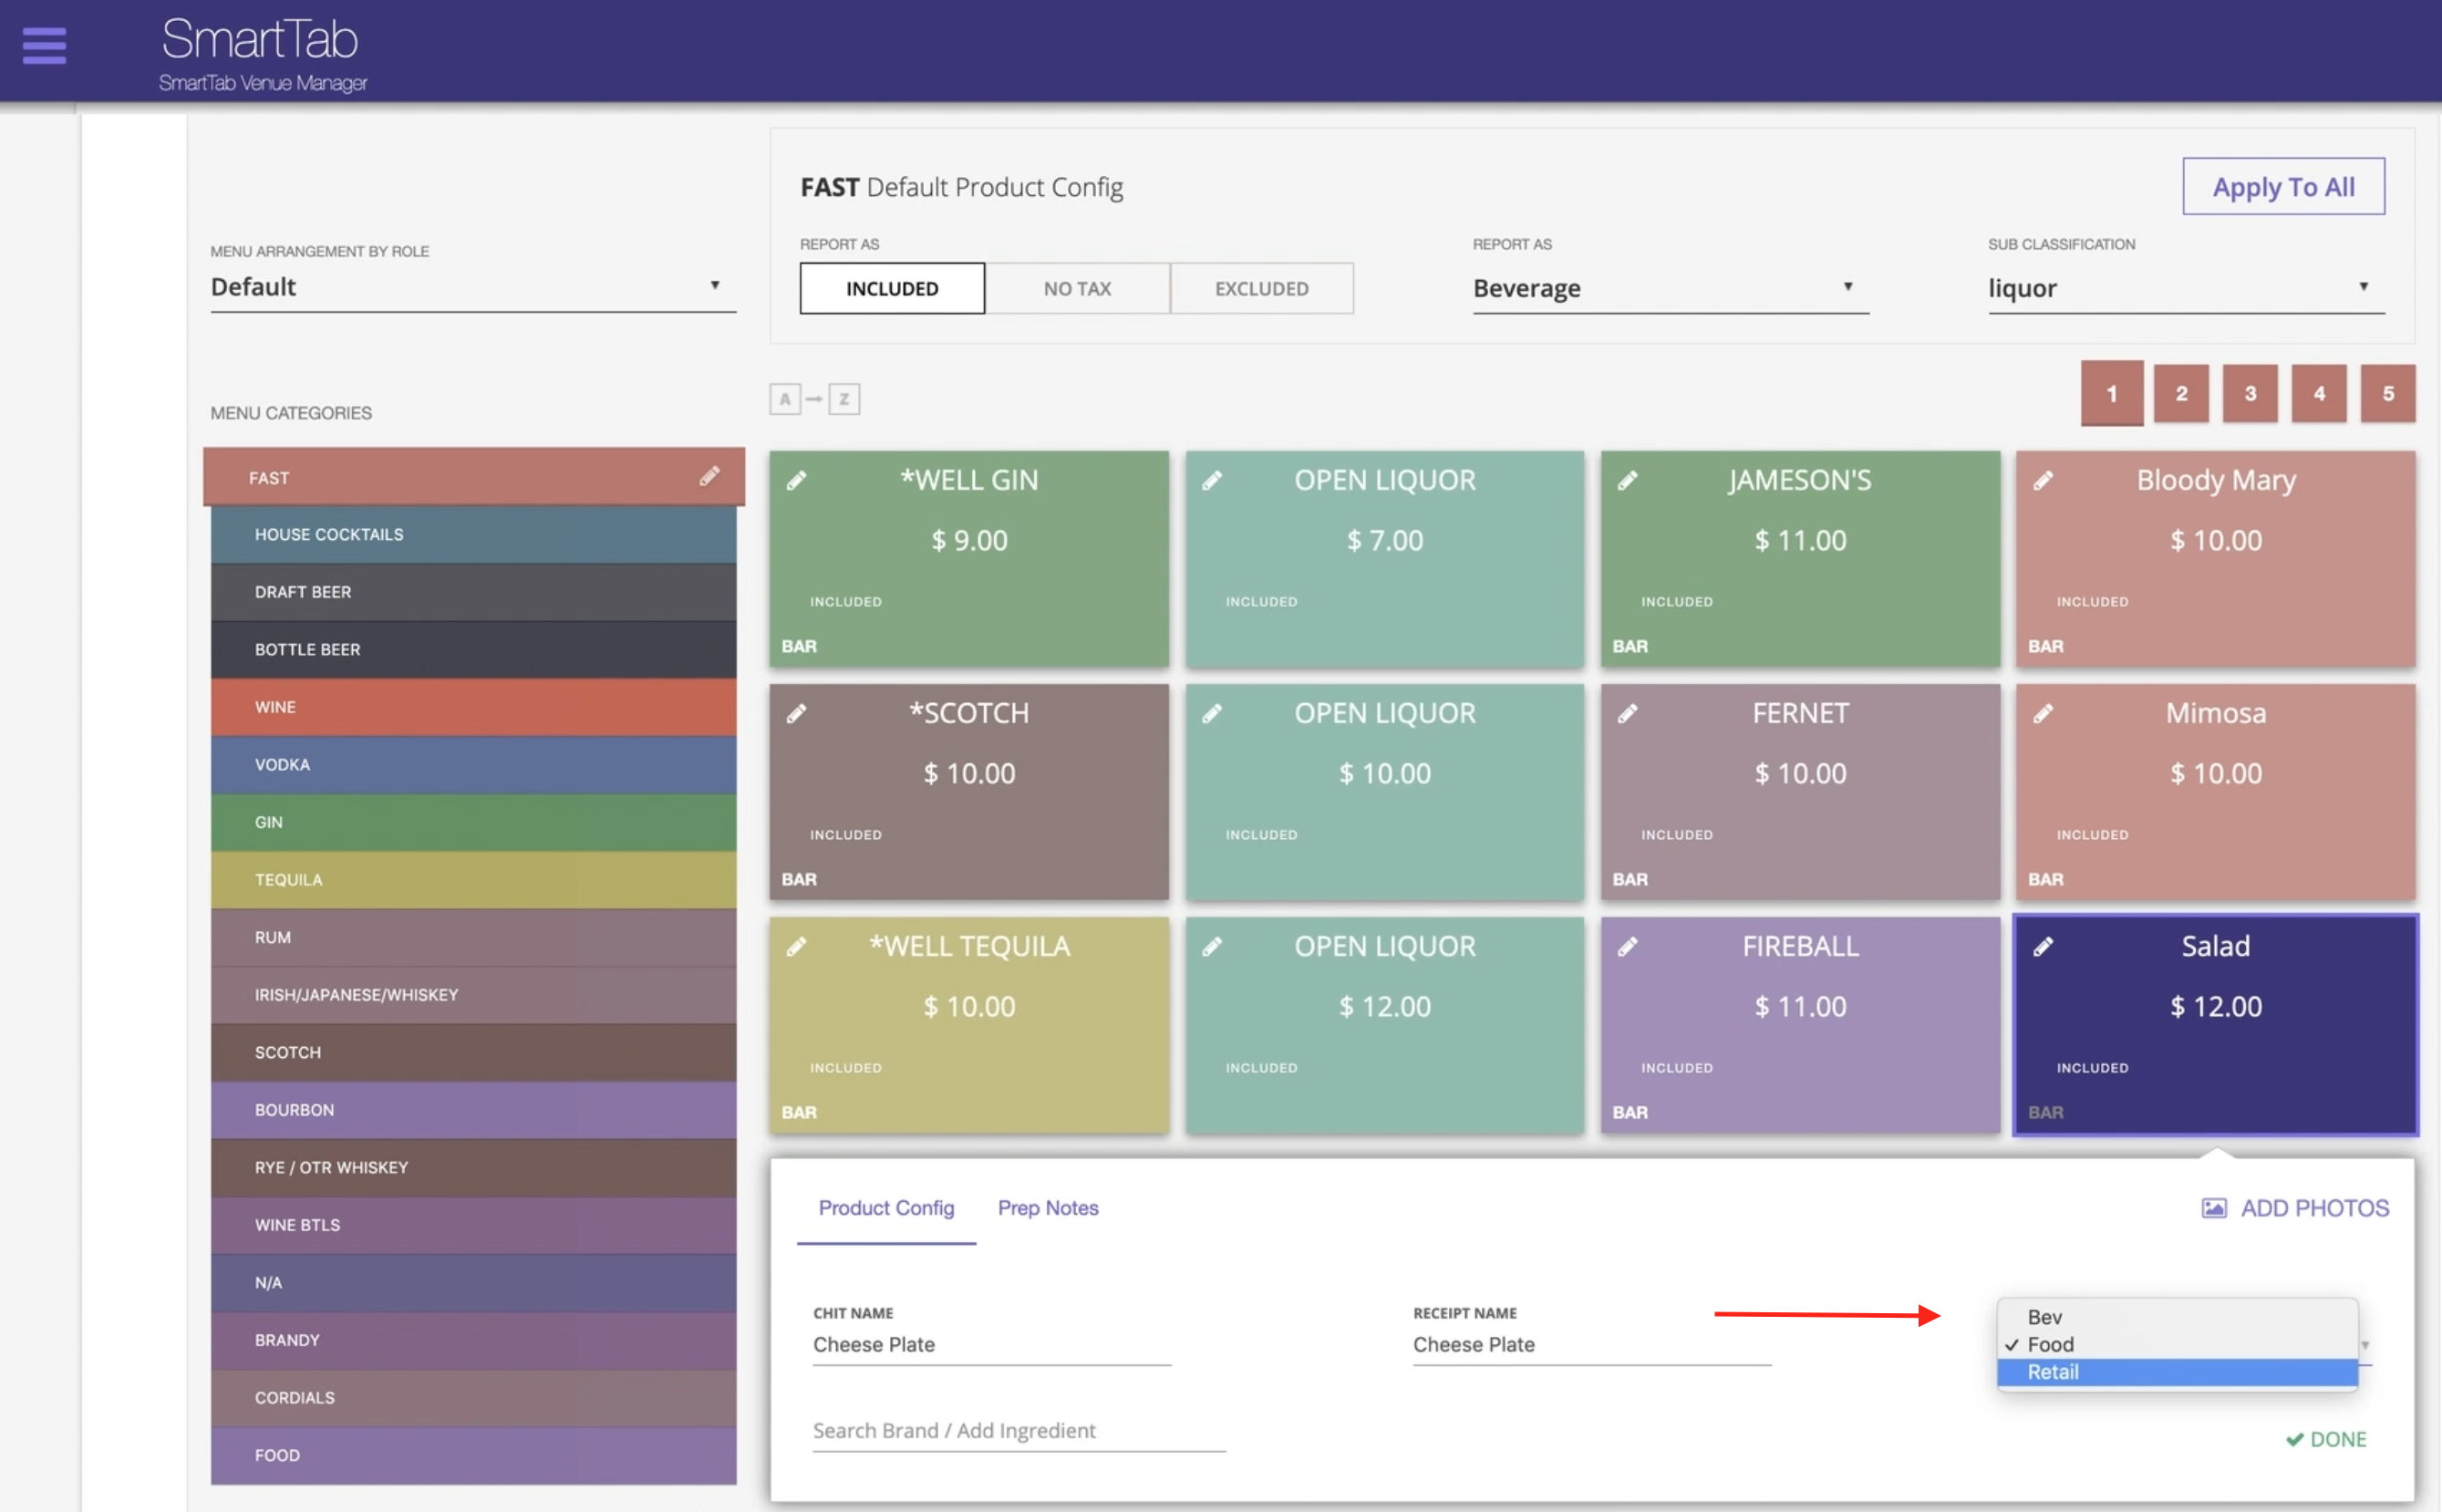
Select the MODs tab. There you will see three categories for you to choose from. Select one.
- Beverage Mods
- Food Mods
- Retail Mods

Note: Same function exists in all three Mods. Consider how you have your products reported in your menu so when you select the item on the tab it will show you the correctly associated modifiers. You can verify by selecting the tile on the back-end menu and checking the “Report as” drop down.
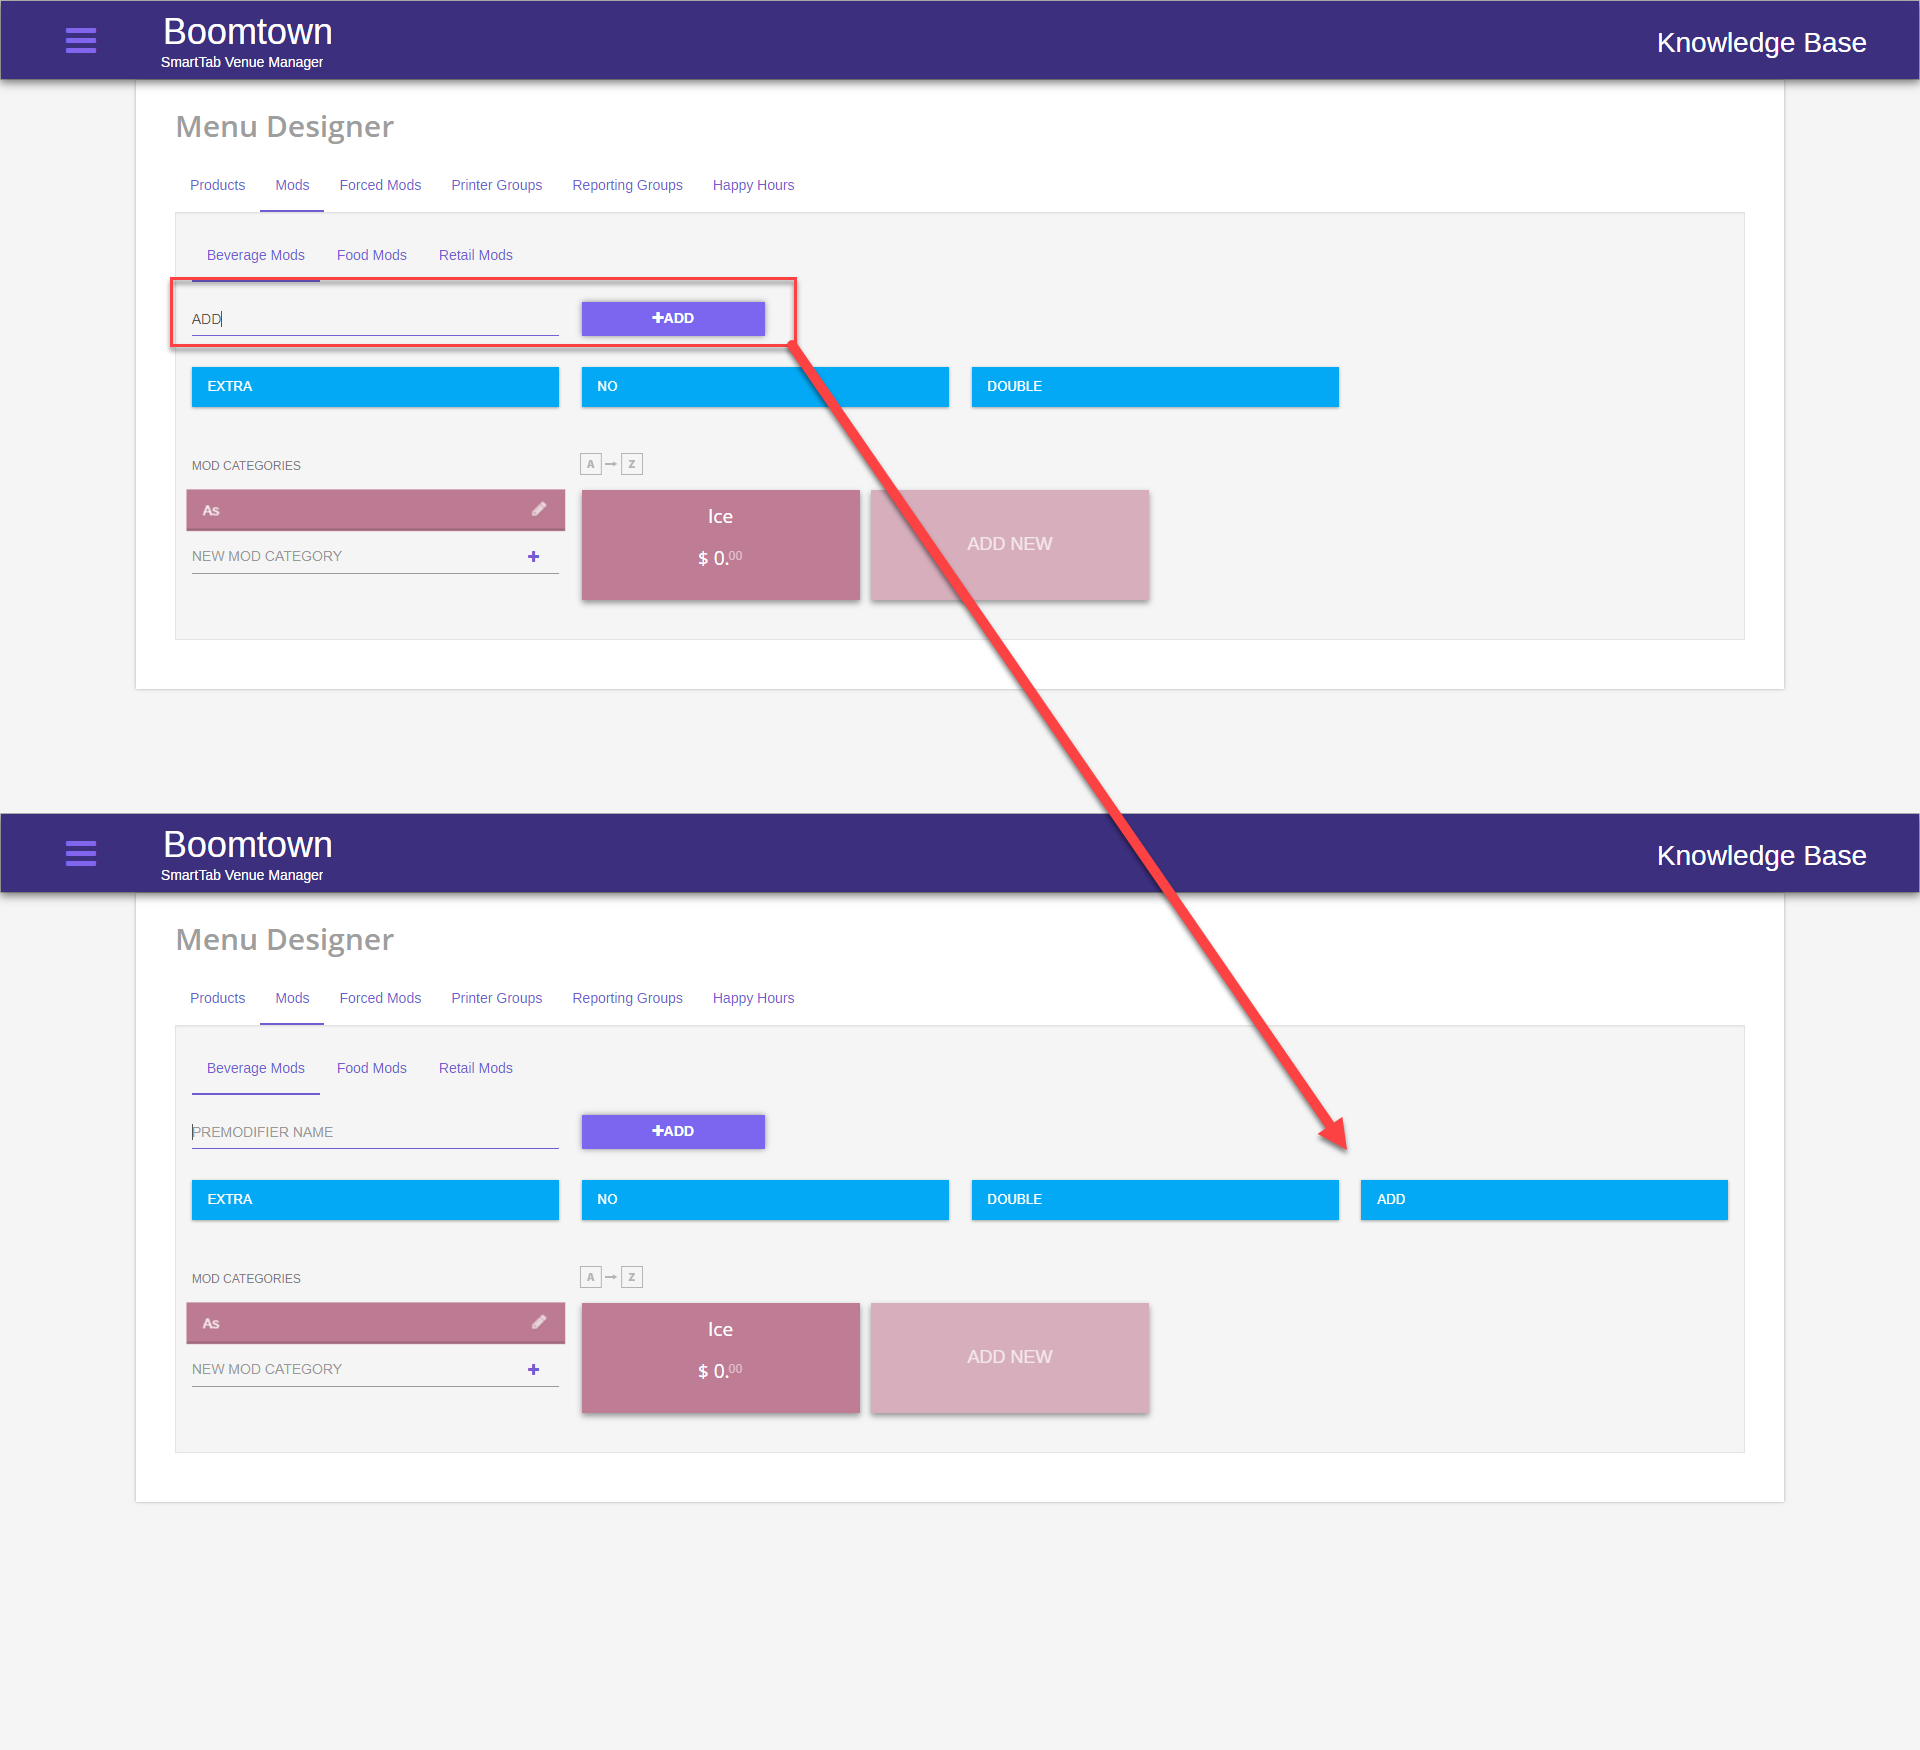
Step 3
Add Premodifiers and modifiers as needed for each category. Enter a premodifier name and press the ADD button.
- These pre modifiers will apply to any modifier added
- Examples include: Add, Sub, Extra, On Side, No, etc…
Step 4
Add a Modifier
- Double click ADD NEW
- Add a Modifier Name
- Add a Modifier Price
- Click the Checkmark to save
Step 5
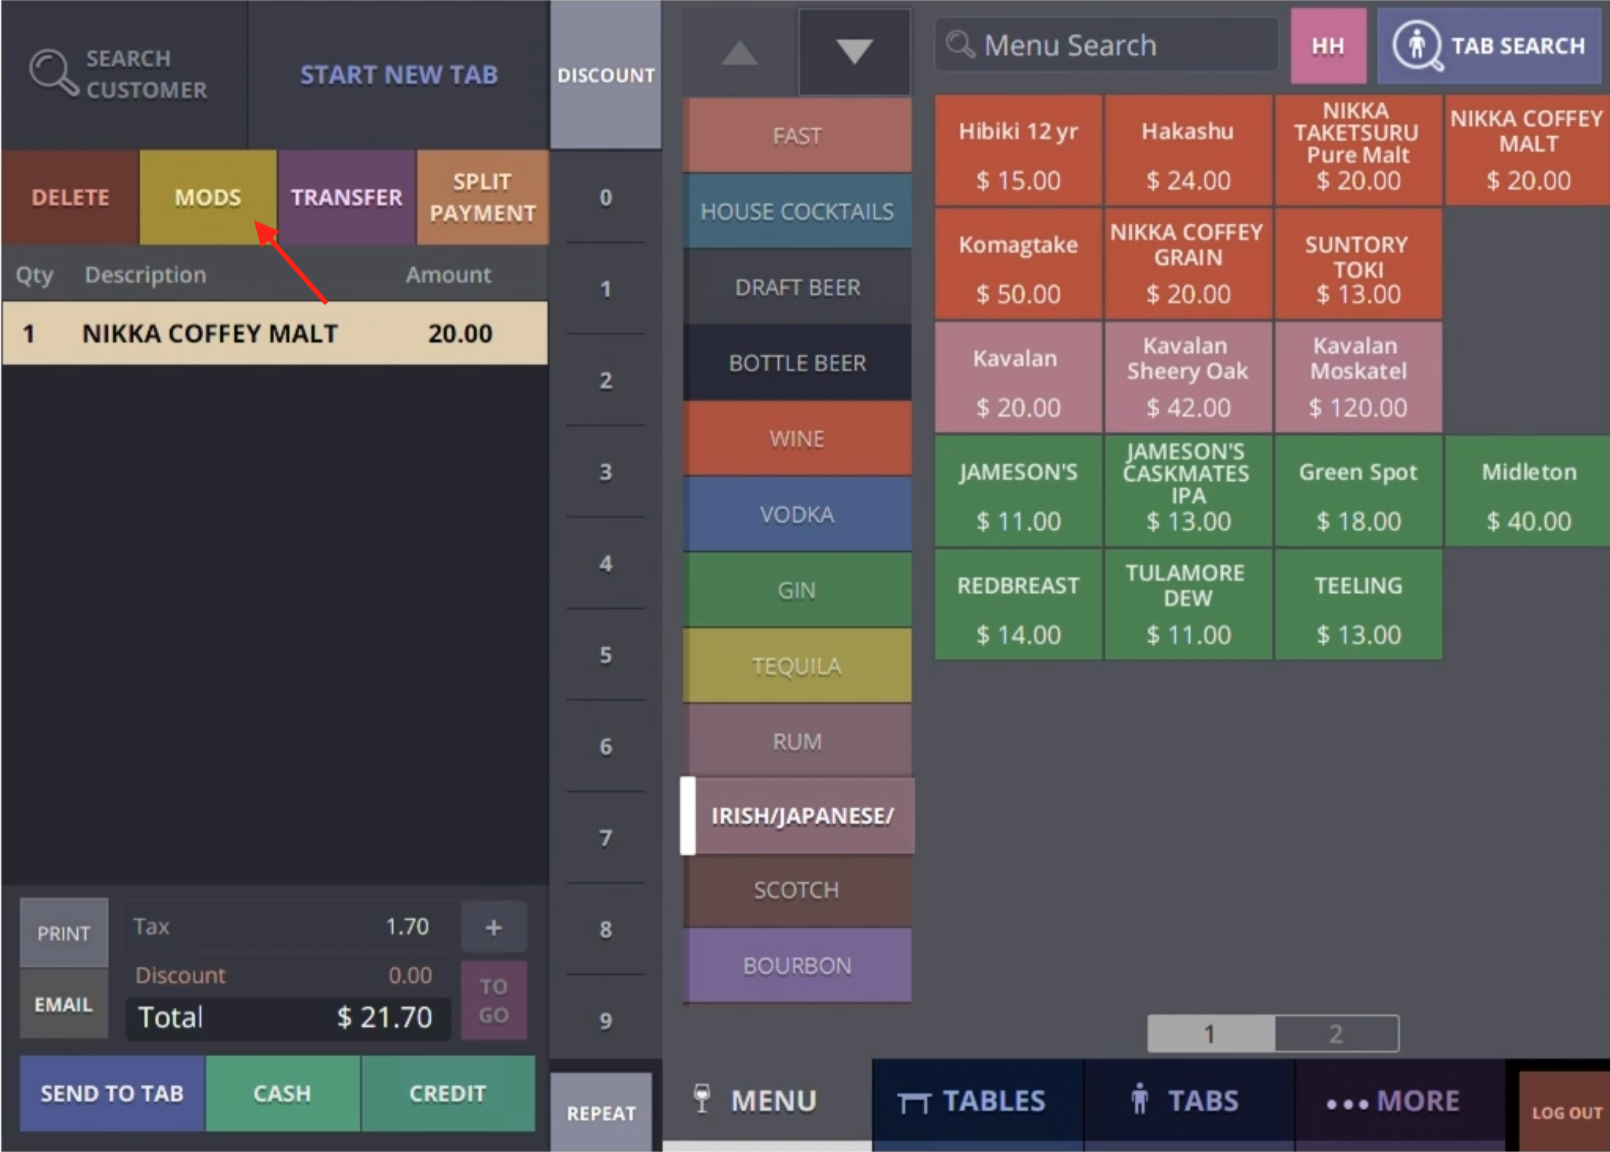
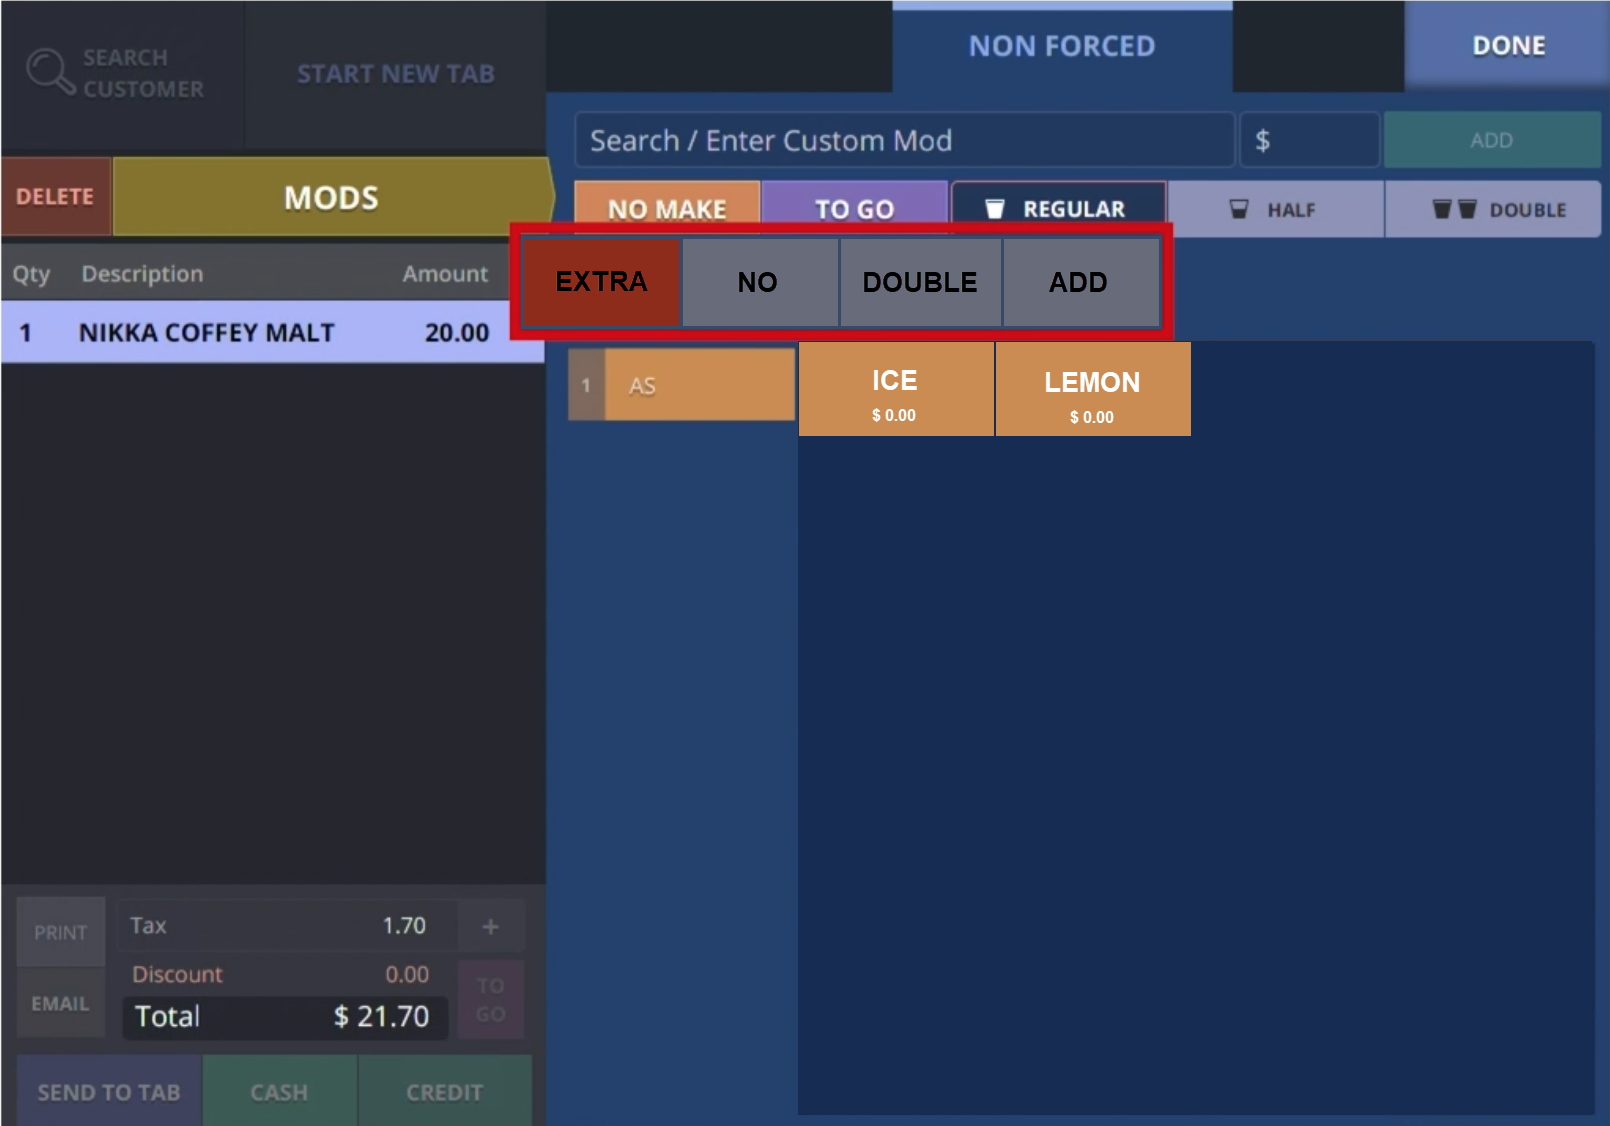
To use your modifier on your POS terminal add an item to the order and select the MODS button at the top of your screen. Premodifiers will show at the top of the MODS screen and modifiers will show underneath.