Prerequisite:This function is completed from the back-end web URL. A user looking to change this setting will need the username and password to login into the back-end URL of their venue.
Step 1
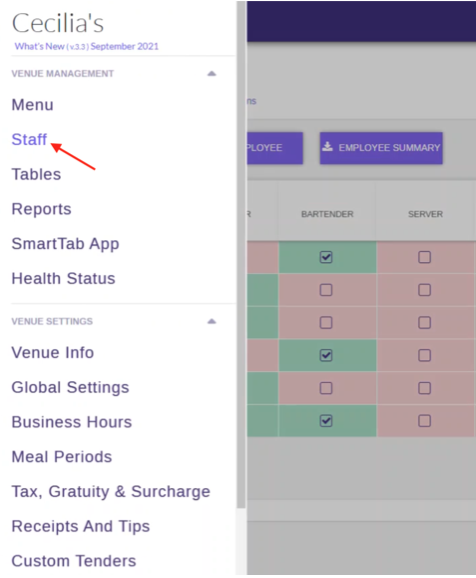
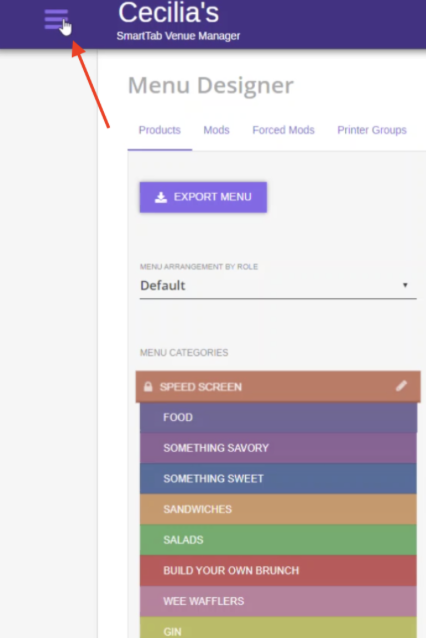
Click on the hamburger menu in the top left of your web browser

Step 2
Navigate to the STAFF link
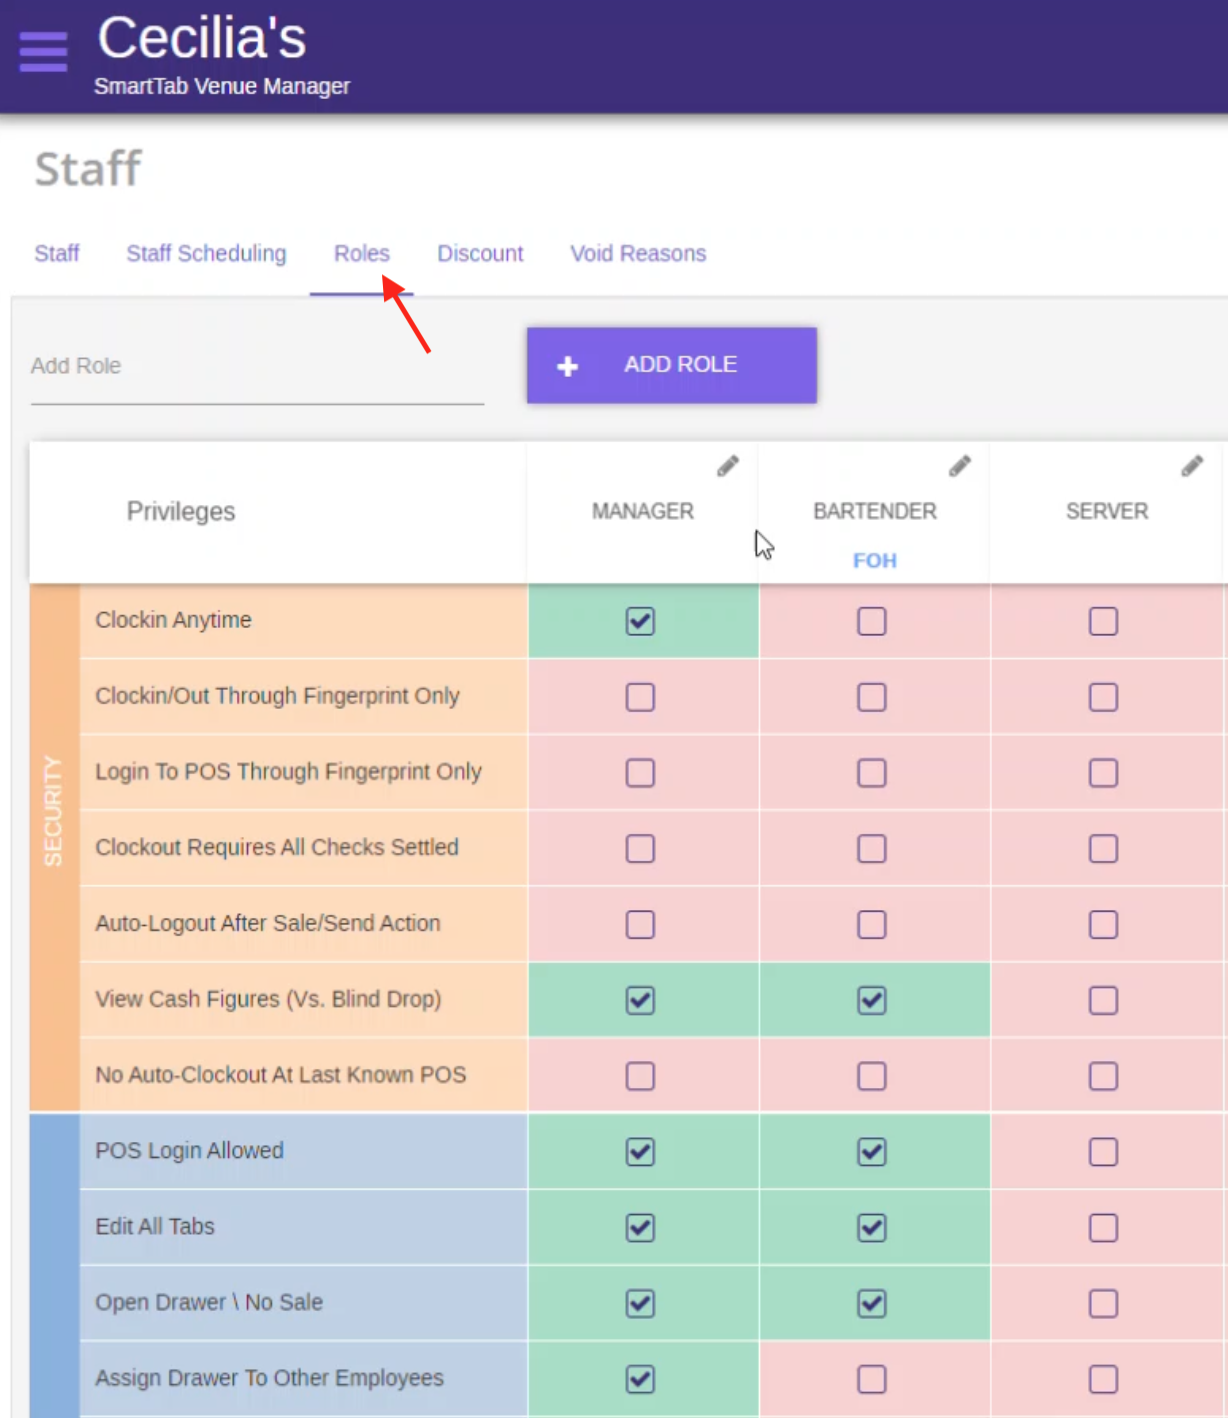
Step 3
Select ROLES and navigate to the position name that matches the privilege permission that needs to be changed
Step 4
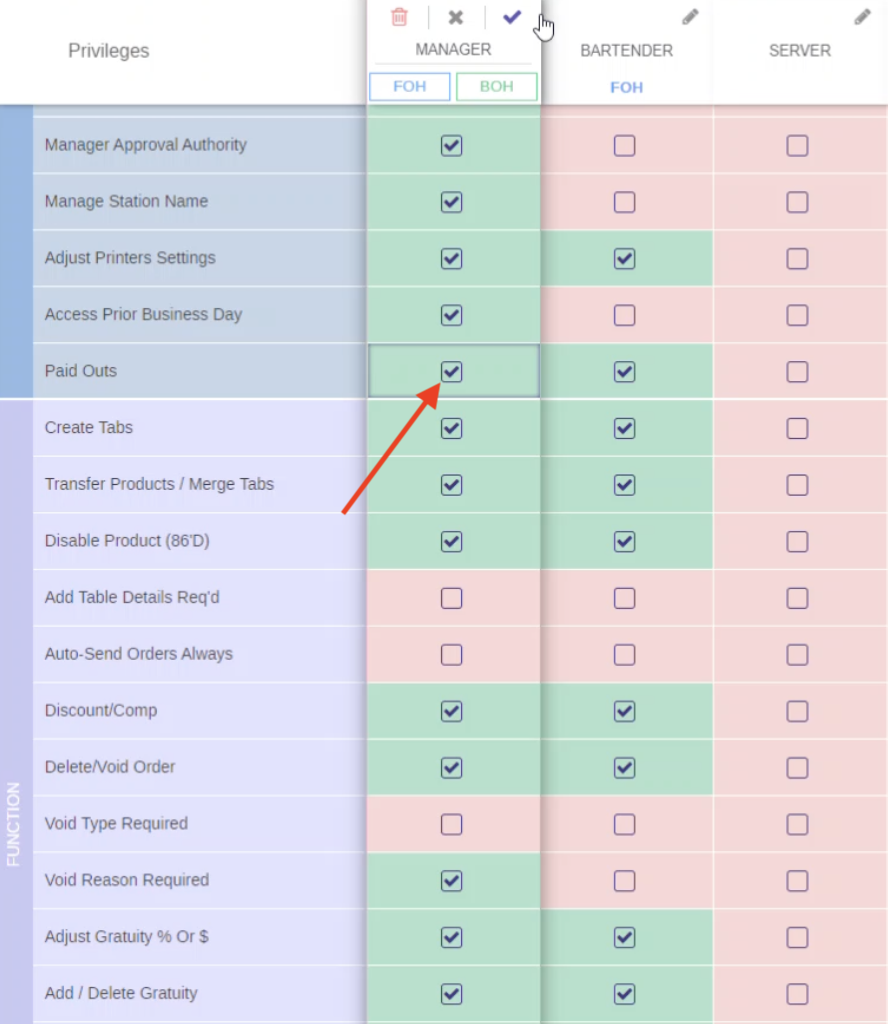
Once determined, scroll down to ACCESS and look for the row labeled PAID OUTS
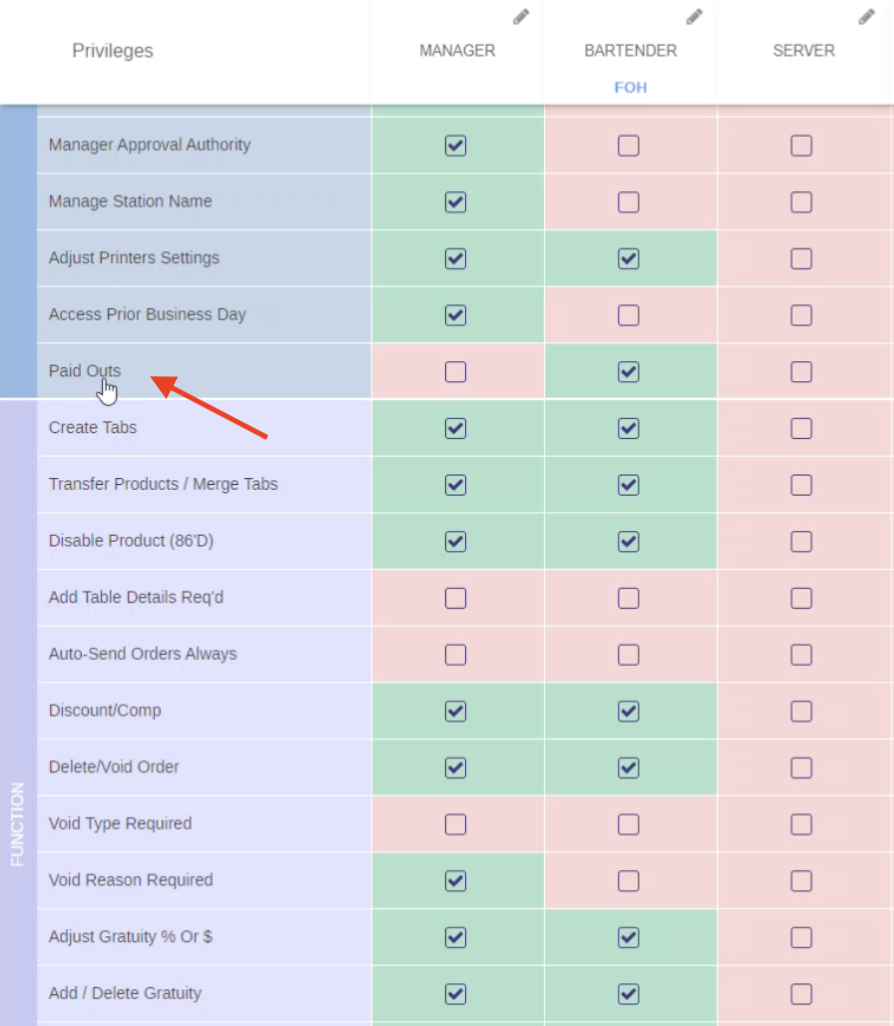
Step 5
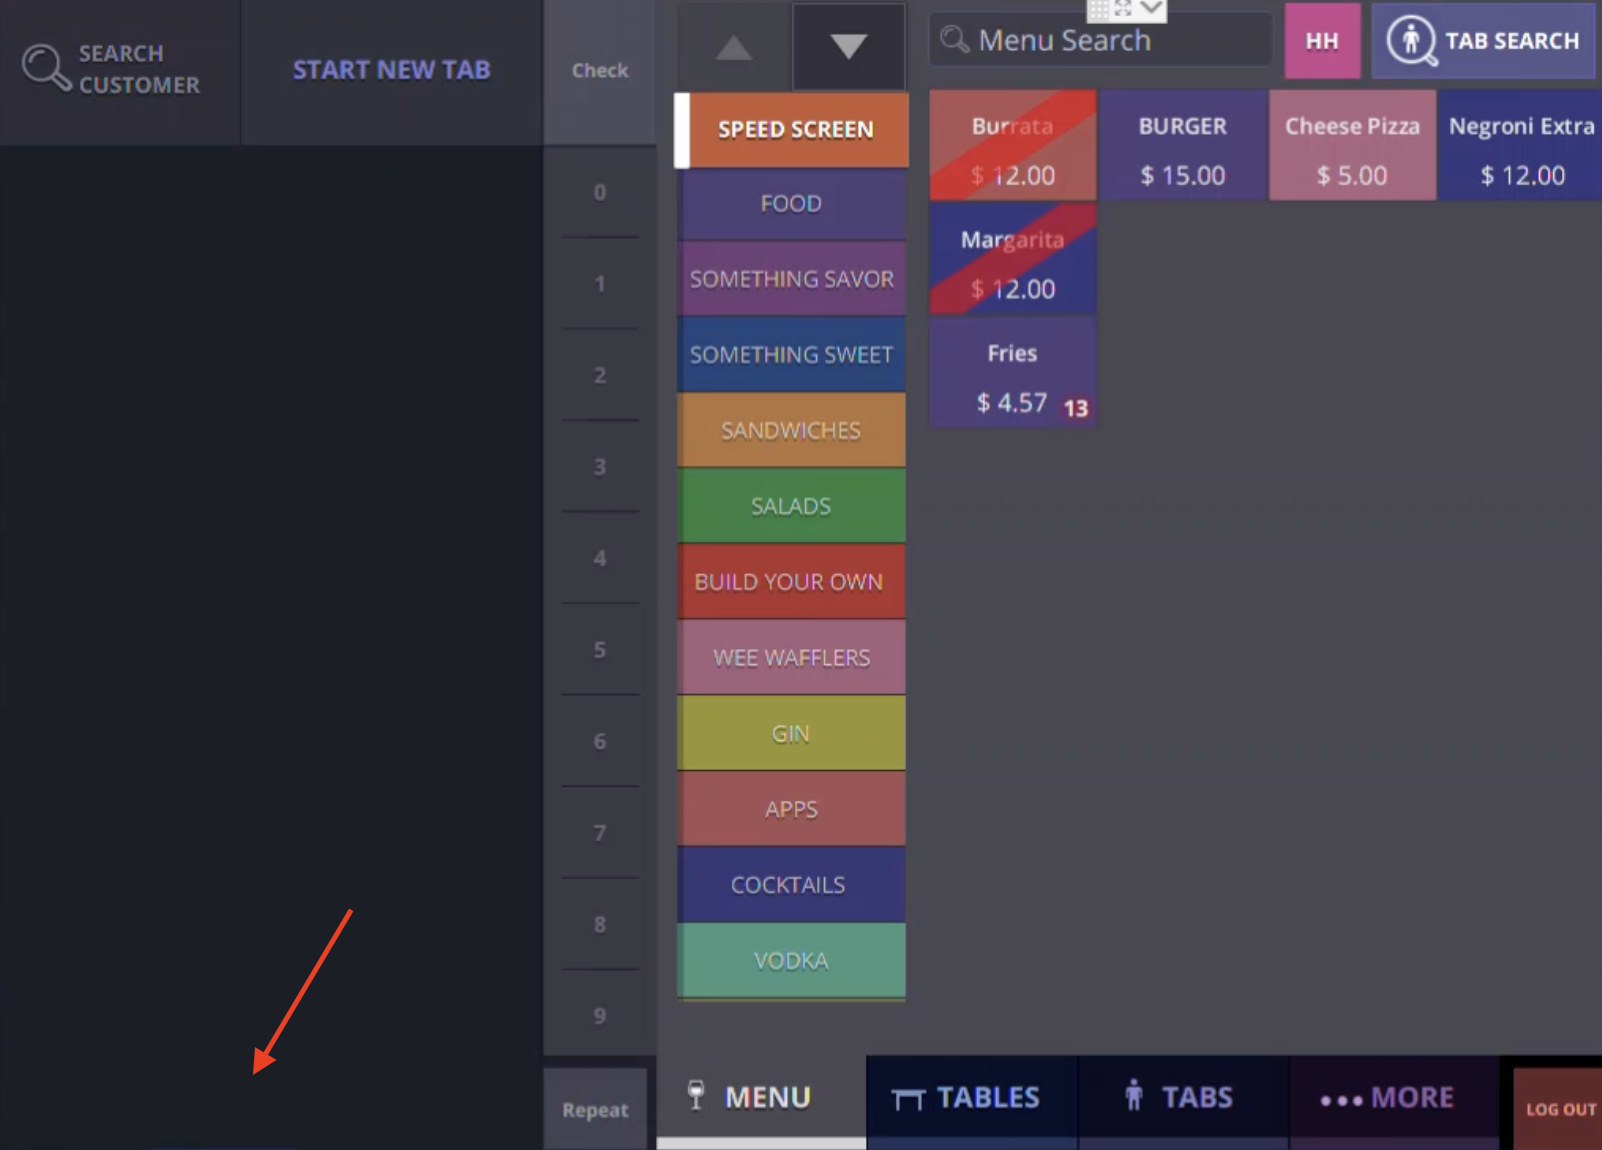
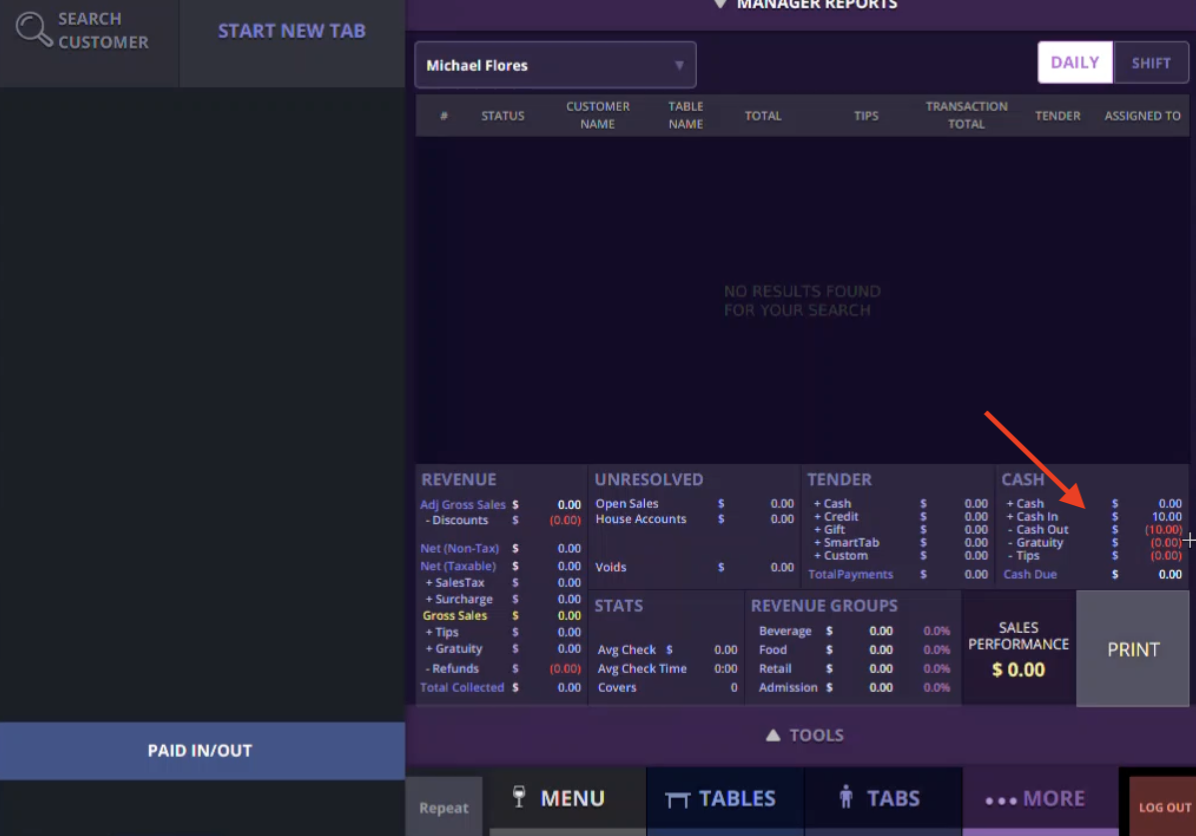
If the box is unchecked then the PAID IN/OUT button will not appear on the POS terminal
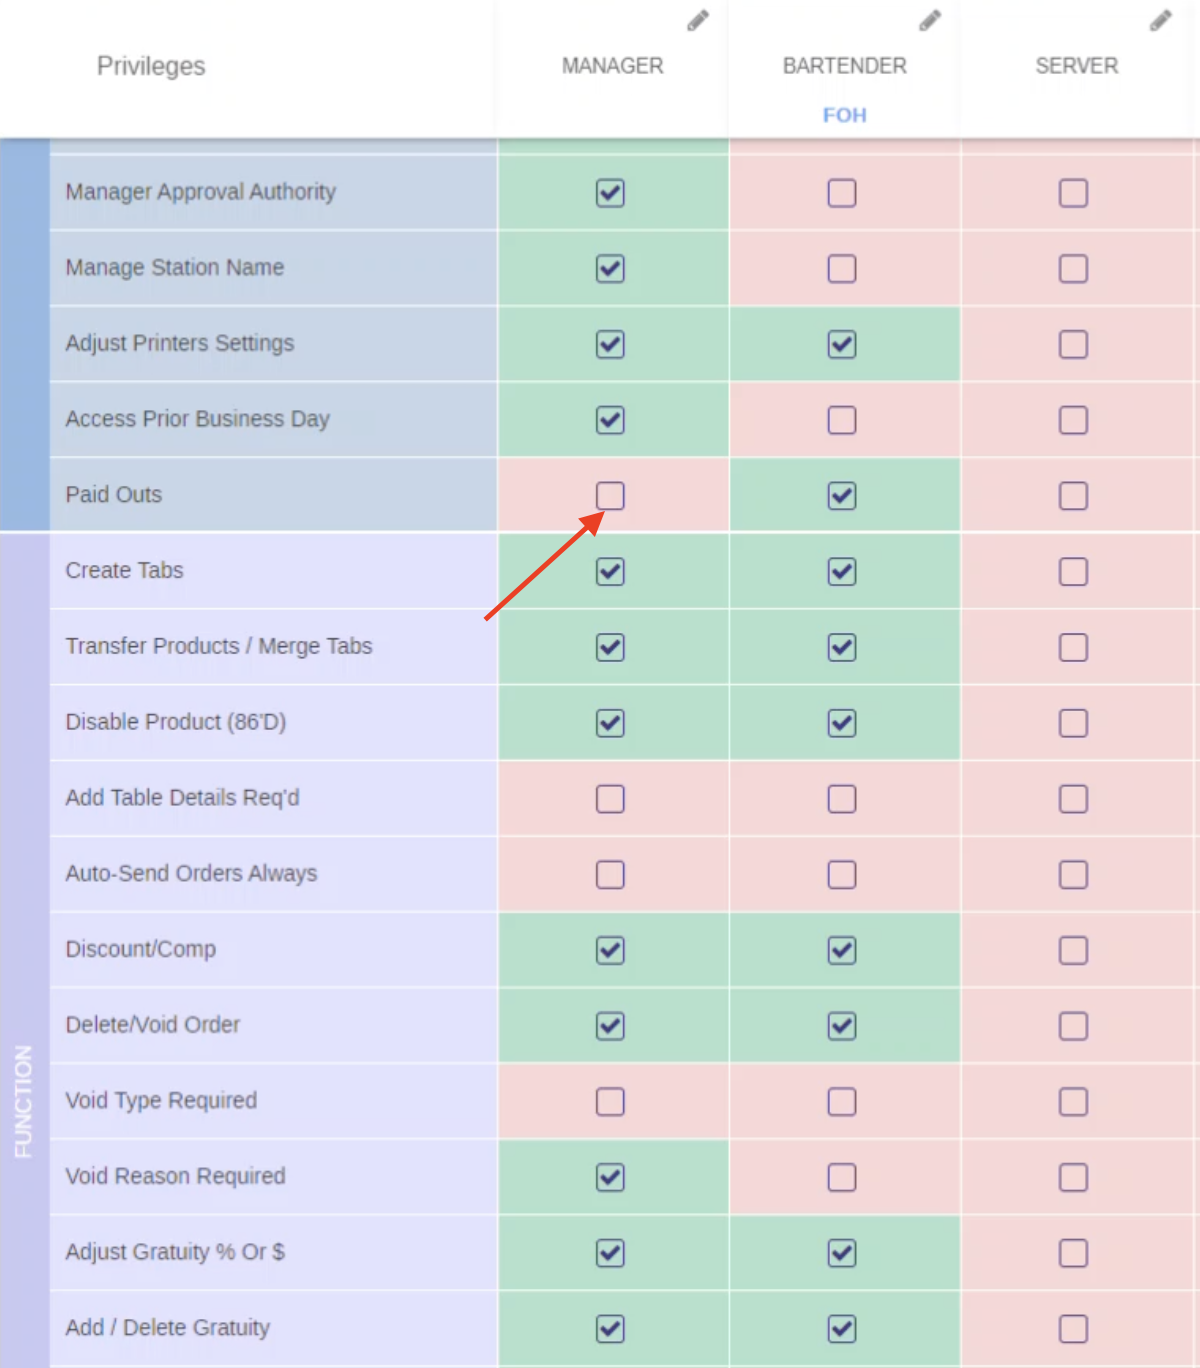
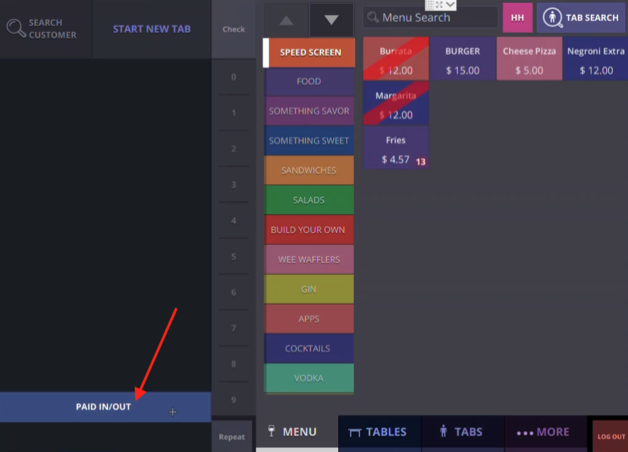
If checked then the PAID IN/OUT button will appear
How to Use Paid In/Out From POS Terminal
Pre-requisite: This function is completed from the POS terminal
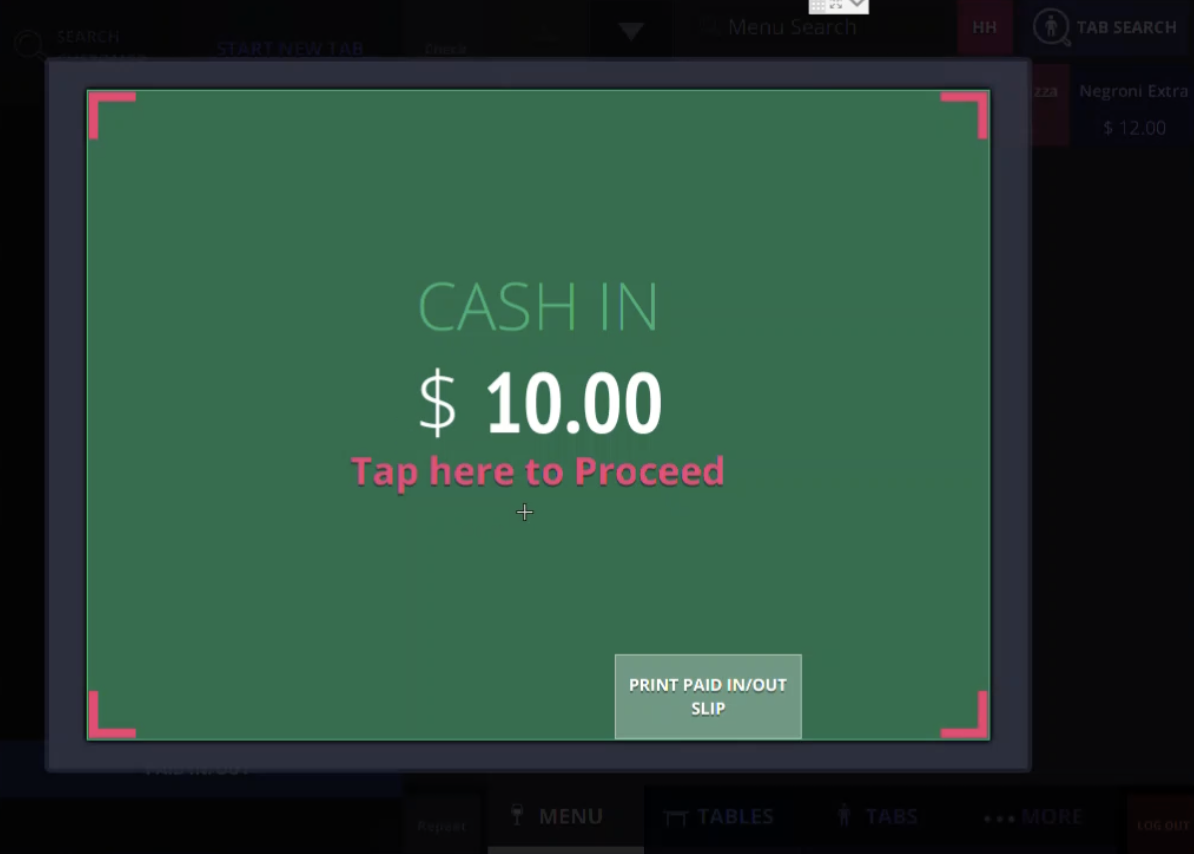
Step 1
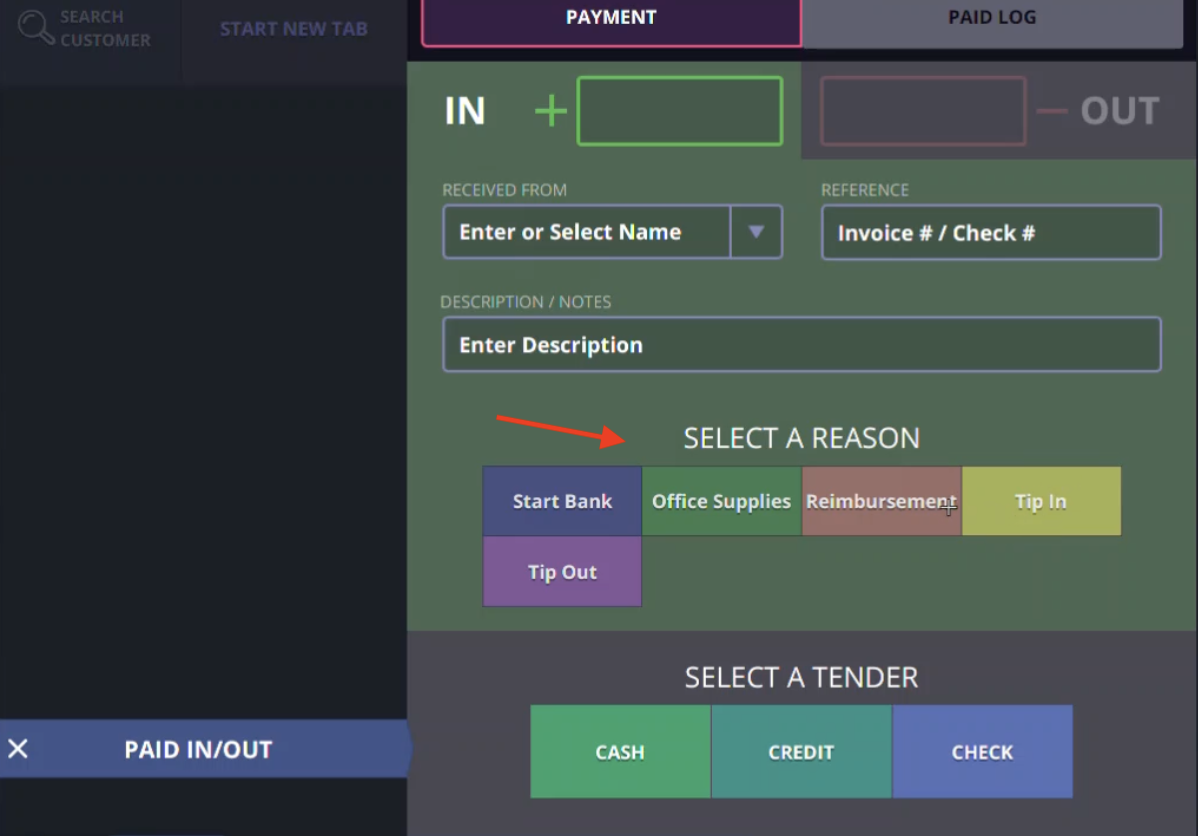
Click on PAID IN/OUT button. A new window will pop-up with IN and OUT tabs at the top. Note: Feature is attached to the logged in user.
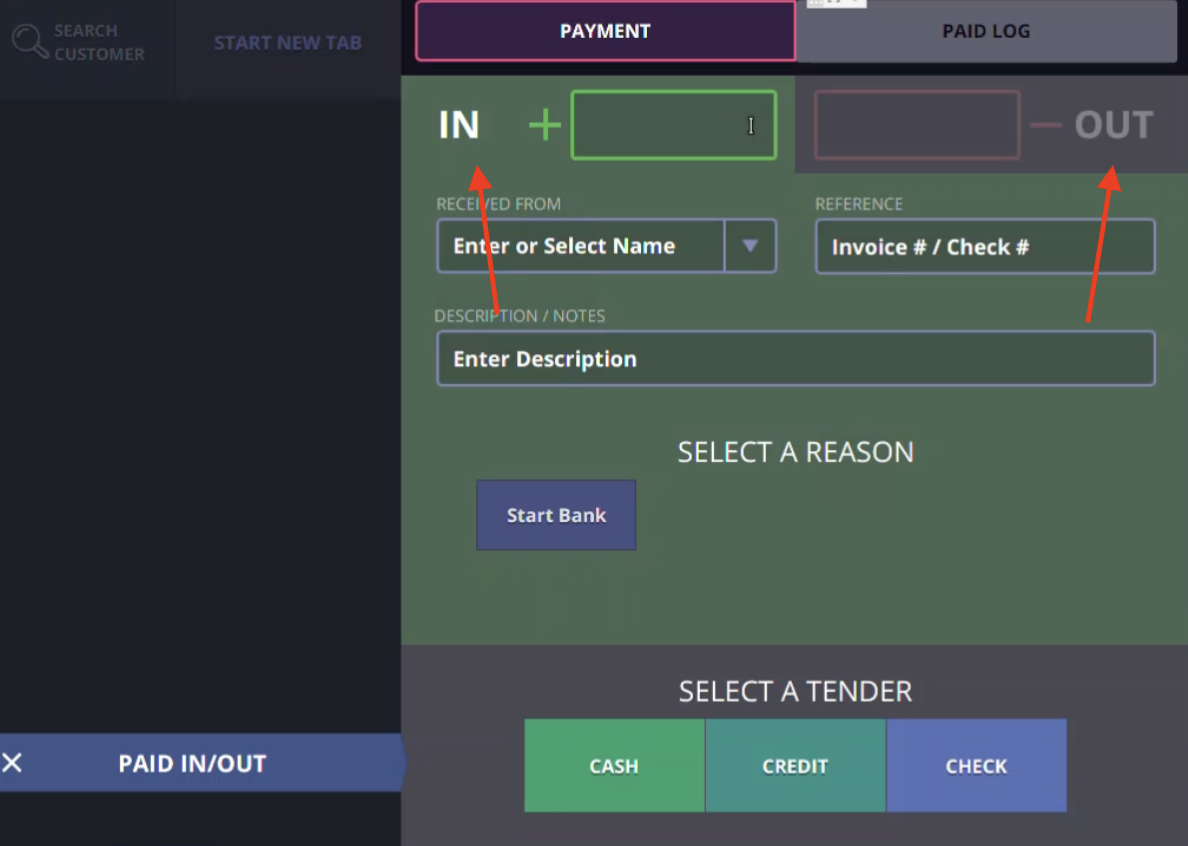
Step 2
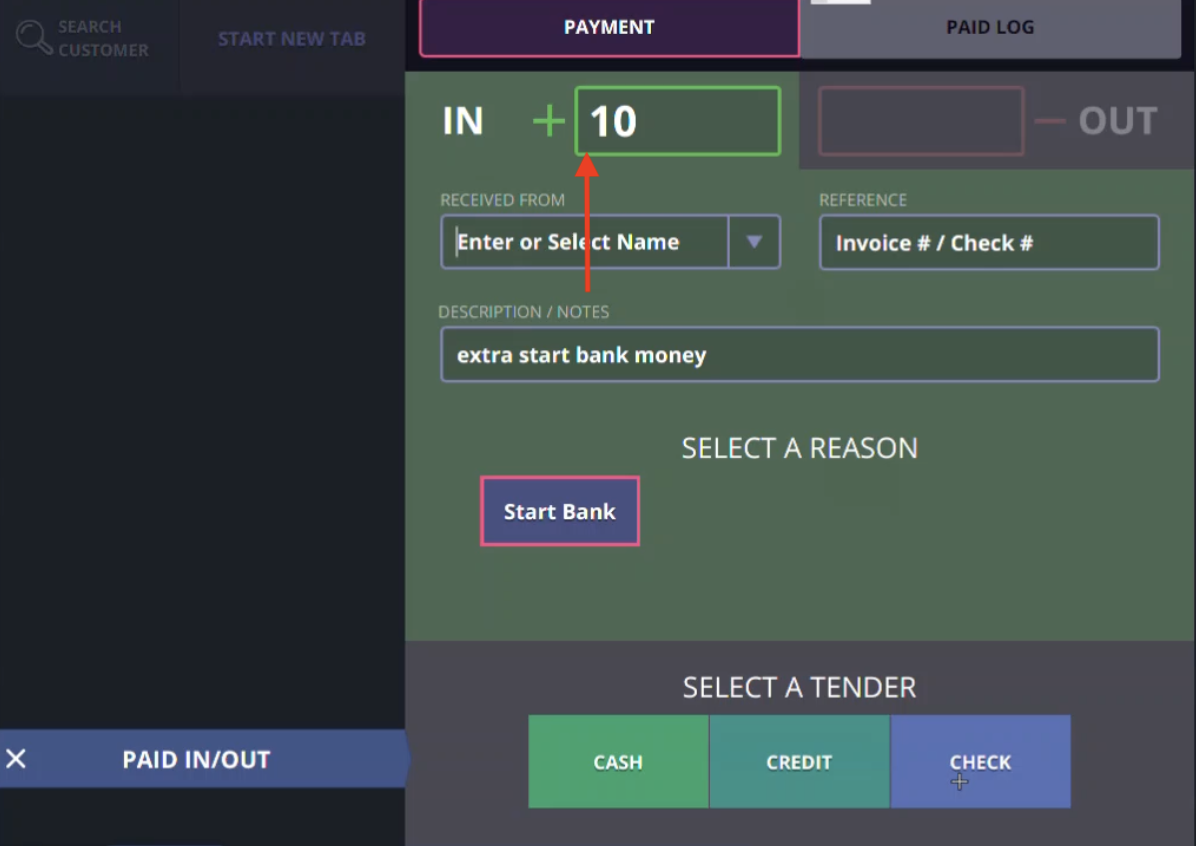
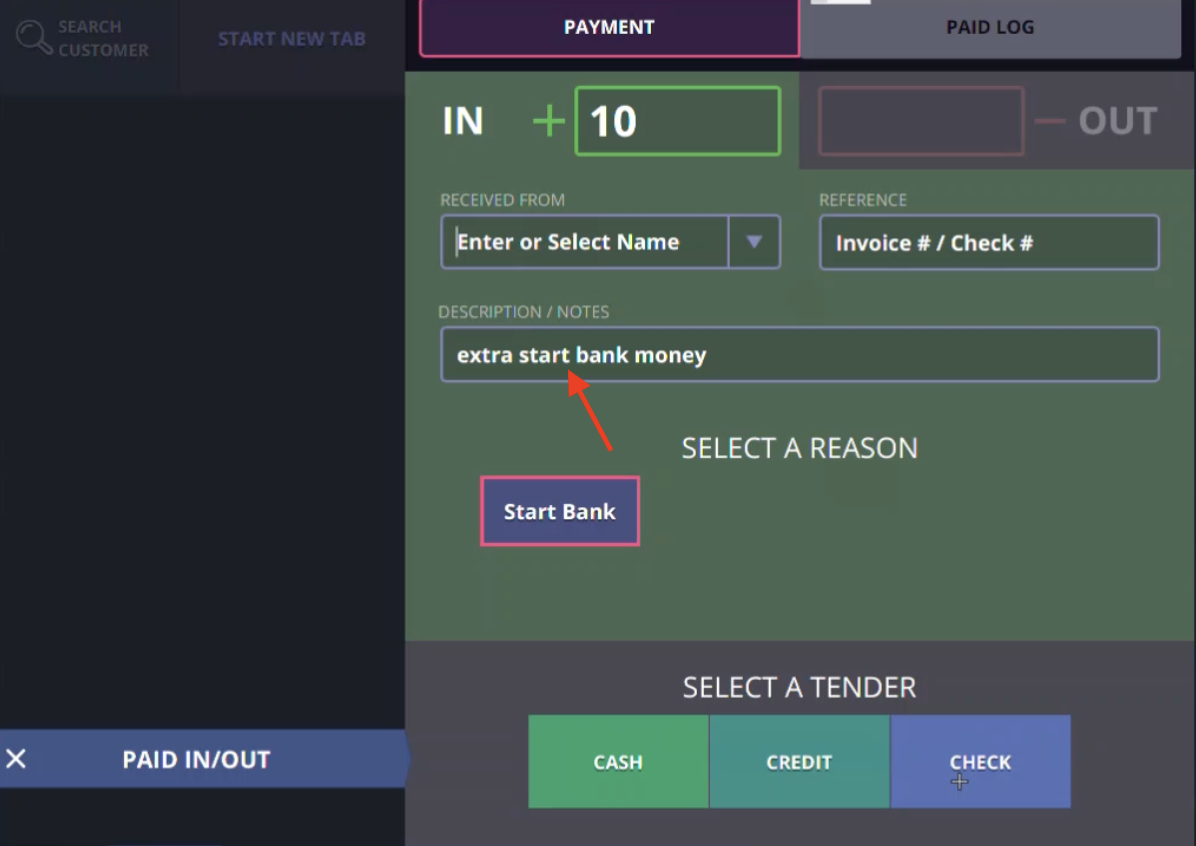
For PAID IN select IN tab at the top and type in dollar amount. Once a dollar amount is added at the top of the window you can select a reason for the pay IN, more on how to add reasons to follow. You can then add a note/description if needed. Note: Do not use RECEIVED from drop down as it will calculate the cash

Step 3
Navigate to TENDER at the bottom of the window. Once a TENDER is selected a successful PAID IN pop-up will appear. A receipt will automatically print
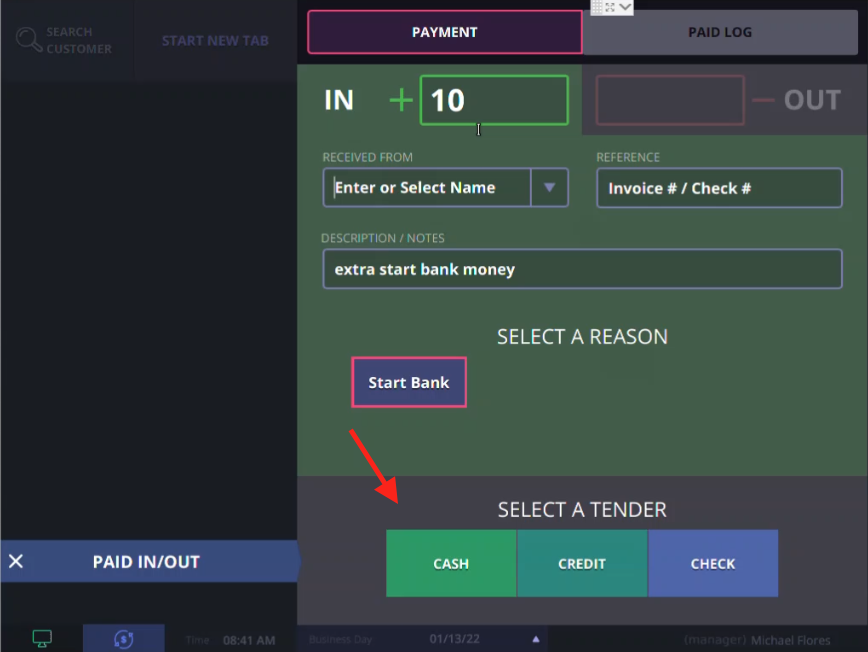
Note: Process can be completed for “Paid out” under “OUT” tab using the same steps
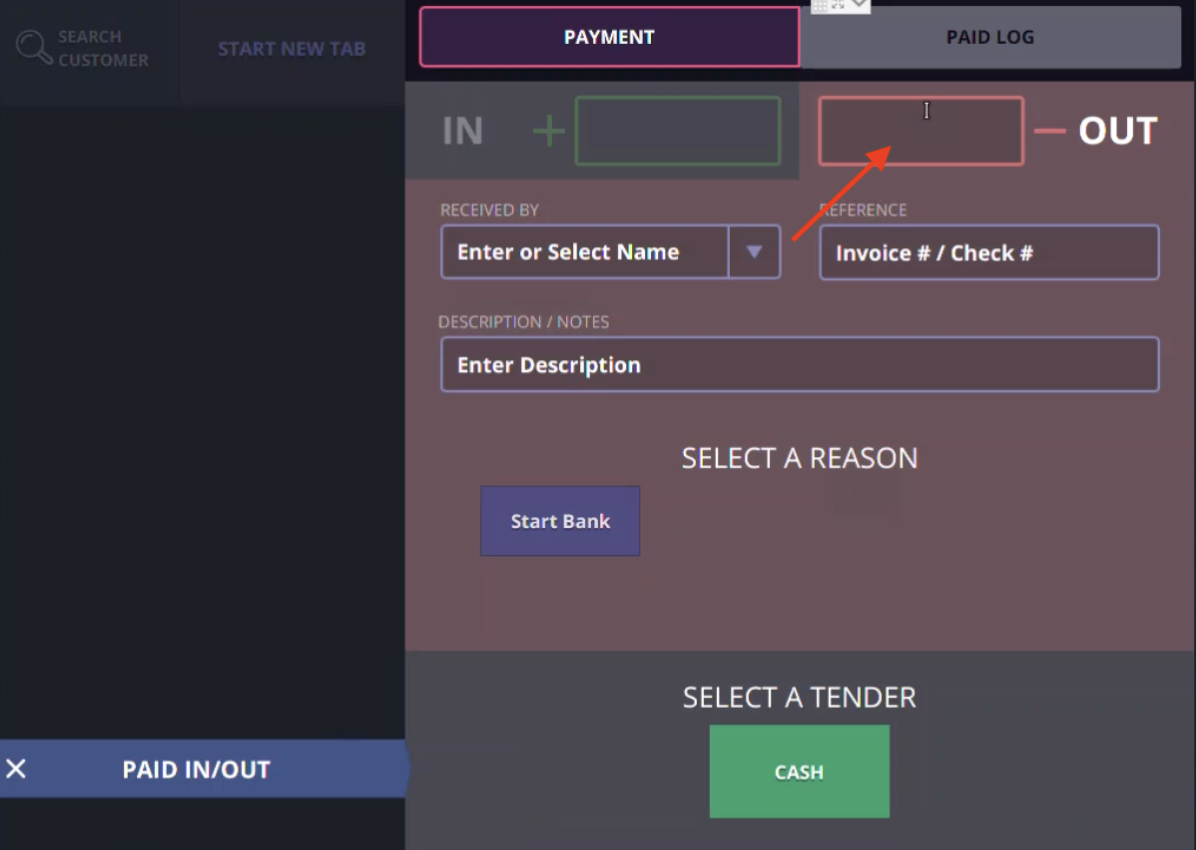
Step 4
You can verify the PAID LOG by selecting the tab at the top right corner of the screen

How to Check The Report
Prerequisite: This function is completed from the POS terminal
Step 1
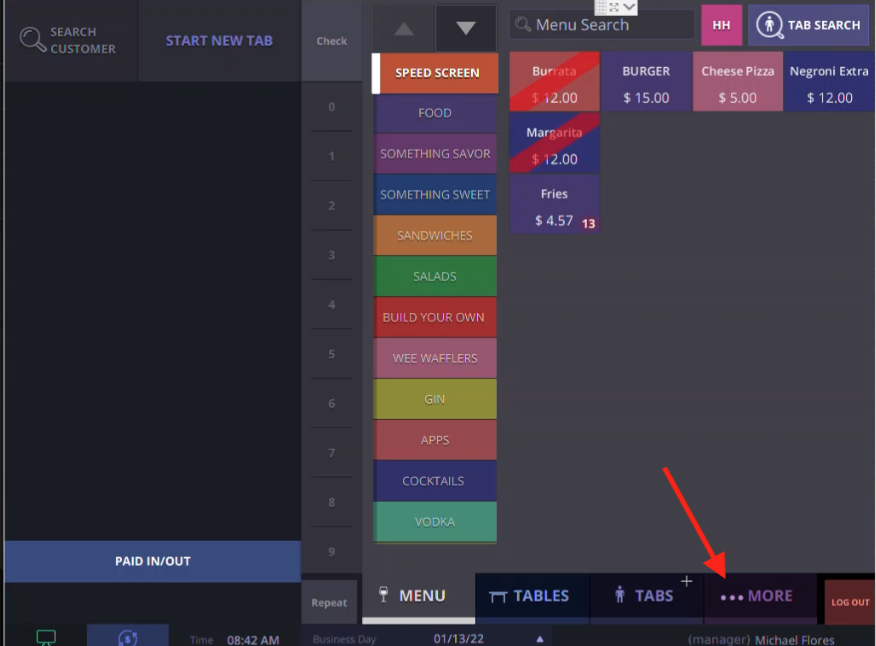
Navigate to MORE at the bottom right corner of the window
Step 2
Select the EMPLOYEE REPORT tab
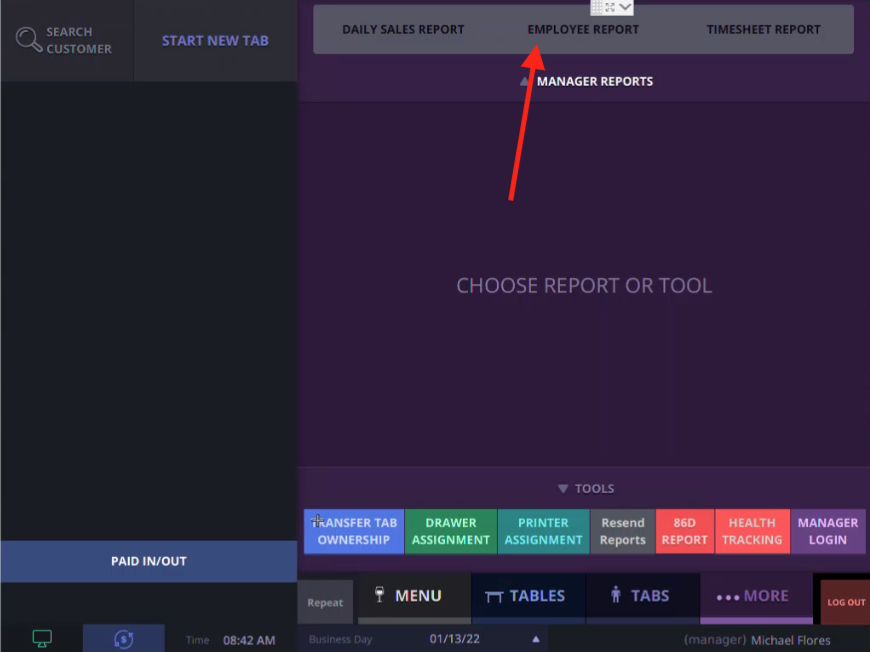
There you can see the cash in /out report
How to Add Reasons to PAID IN/OUT
Prerequisite: This function is completed from the back-end web URL. A user looking to change this setting will need the username and password to login into the back-end URL of their venue.
Step 1
Click on the Hamburger menu in the top left of your web browser
Step 2
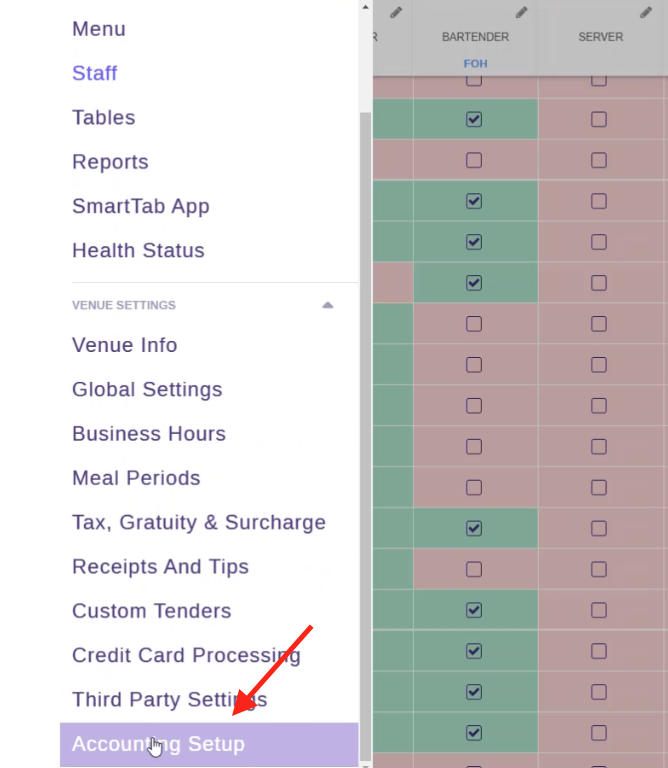
Scroll down to venue settings and select “Accounting Setup”
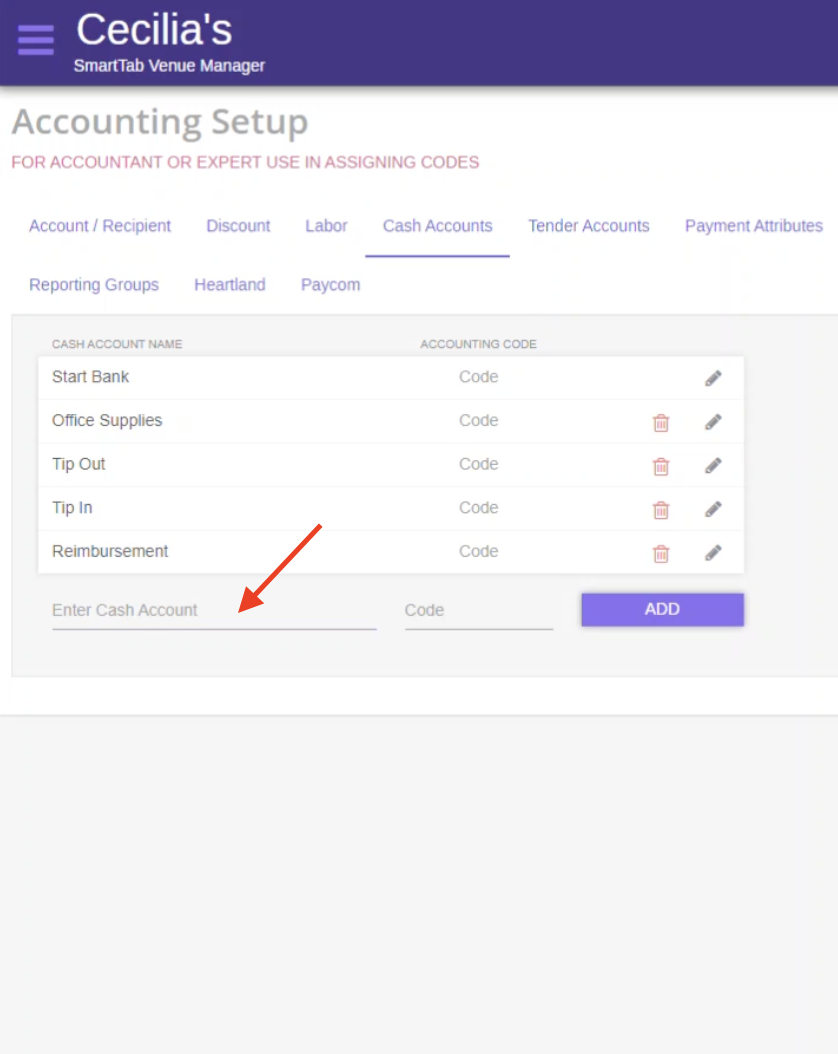
Step 3
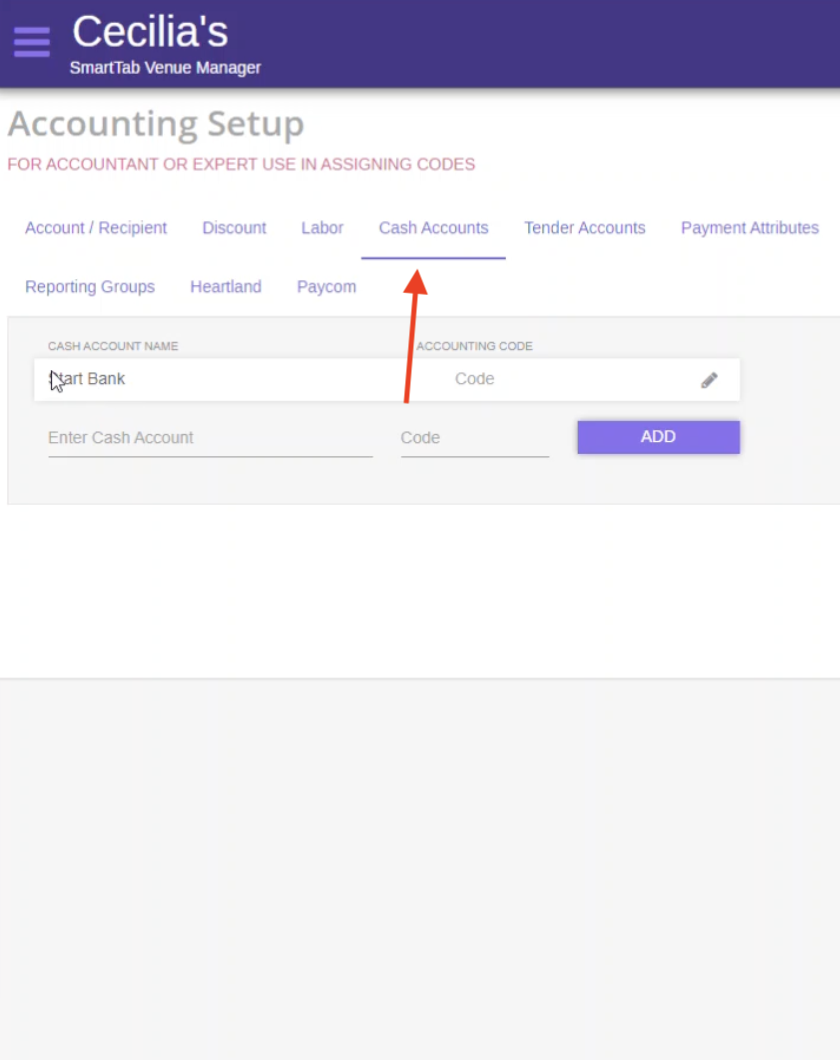
Navigate to “Cash Accounts” link
Step 4
Add reasons, as needed, under “enter cash account”
Step 5
Log back into your POS terminal and select the PAID IN/OUT button. All the reasons you entered on the back-end will now appear and are ready to be used