Pre-requisite: This function is completed from the back-end web URL
A user looking to change this setting will need the username and password to login into the back-end URL of their venue.
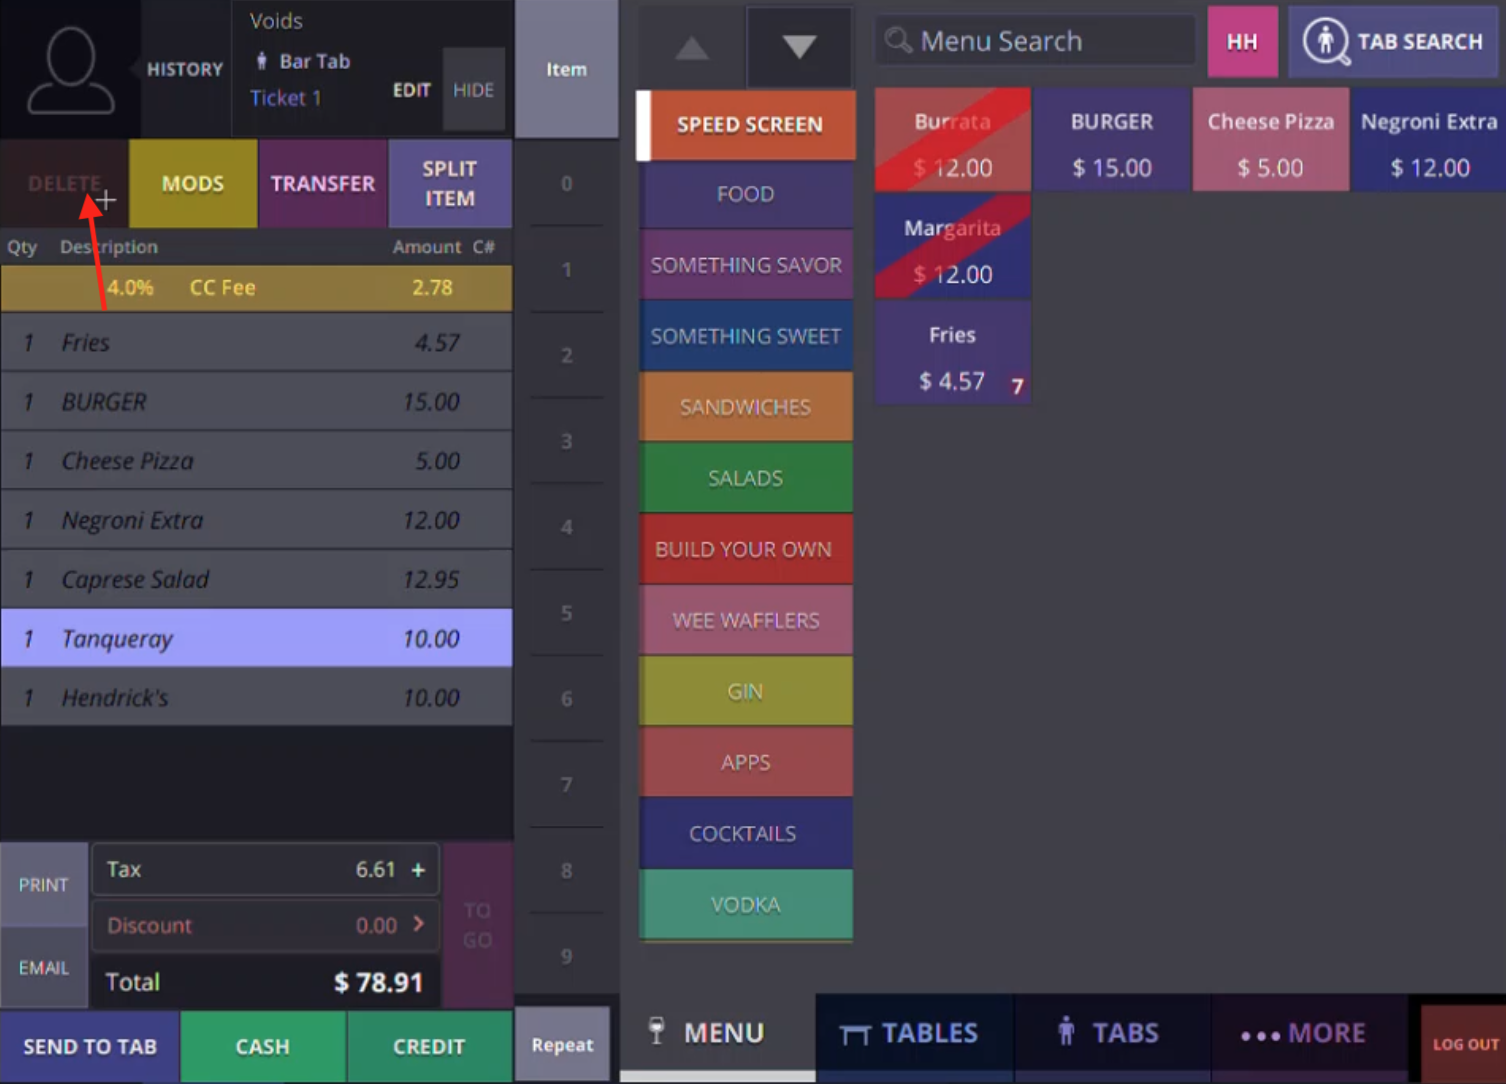
Note: you can identify if permission has not been given by selecting an item within a tab and checking to verify if the “Delete” button at the top left of tab is grayed out.
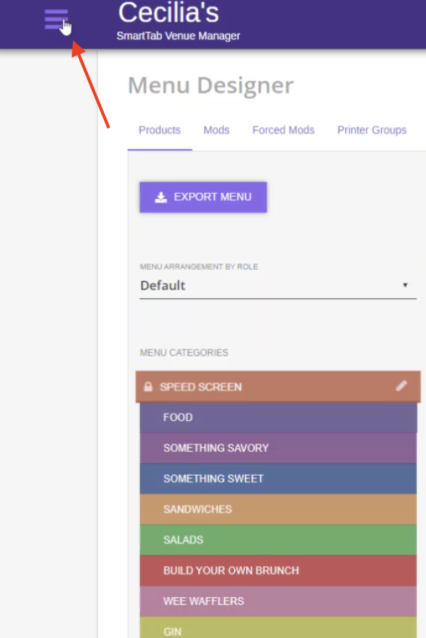
Step 1
Click on the Hamburger menu in the top left of your web browser
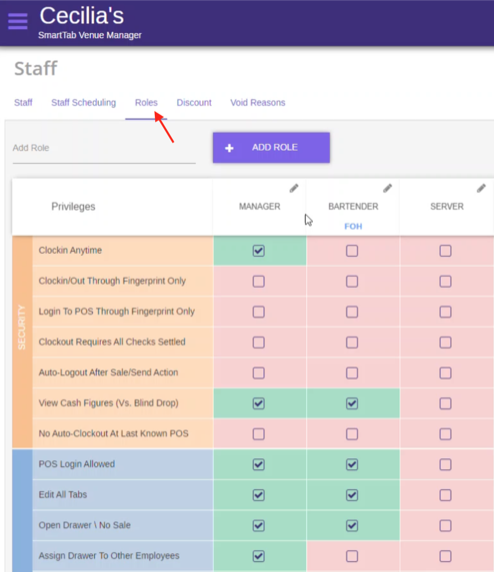
Step 2
Navigate to the STAFF link

Step 3
Select ROLES and navigate to the position name that matches the privilege permission that needs to be changed.
Step 4
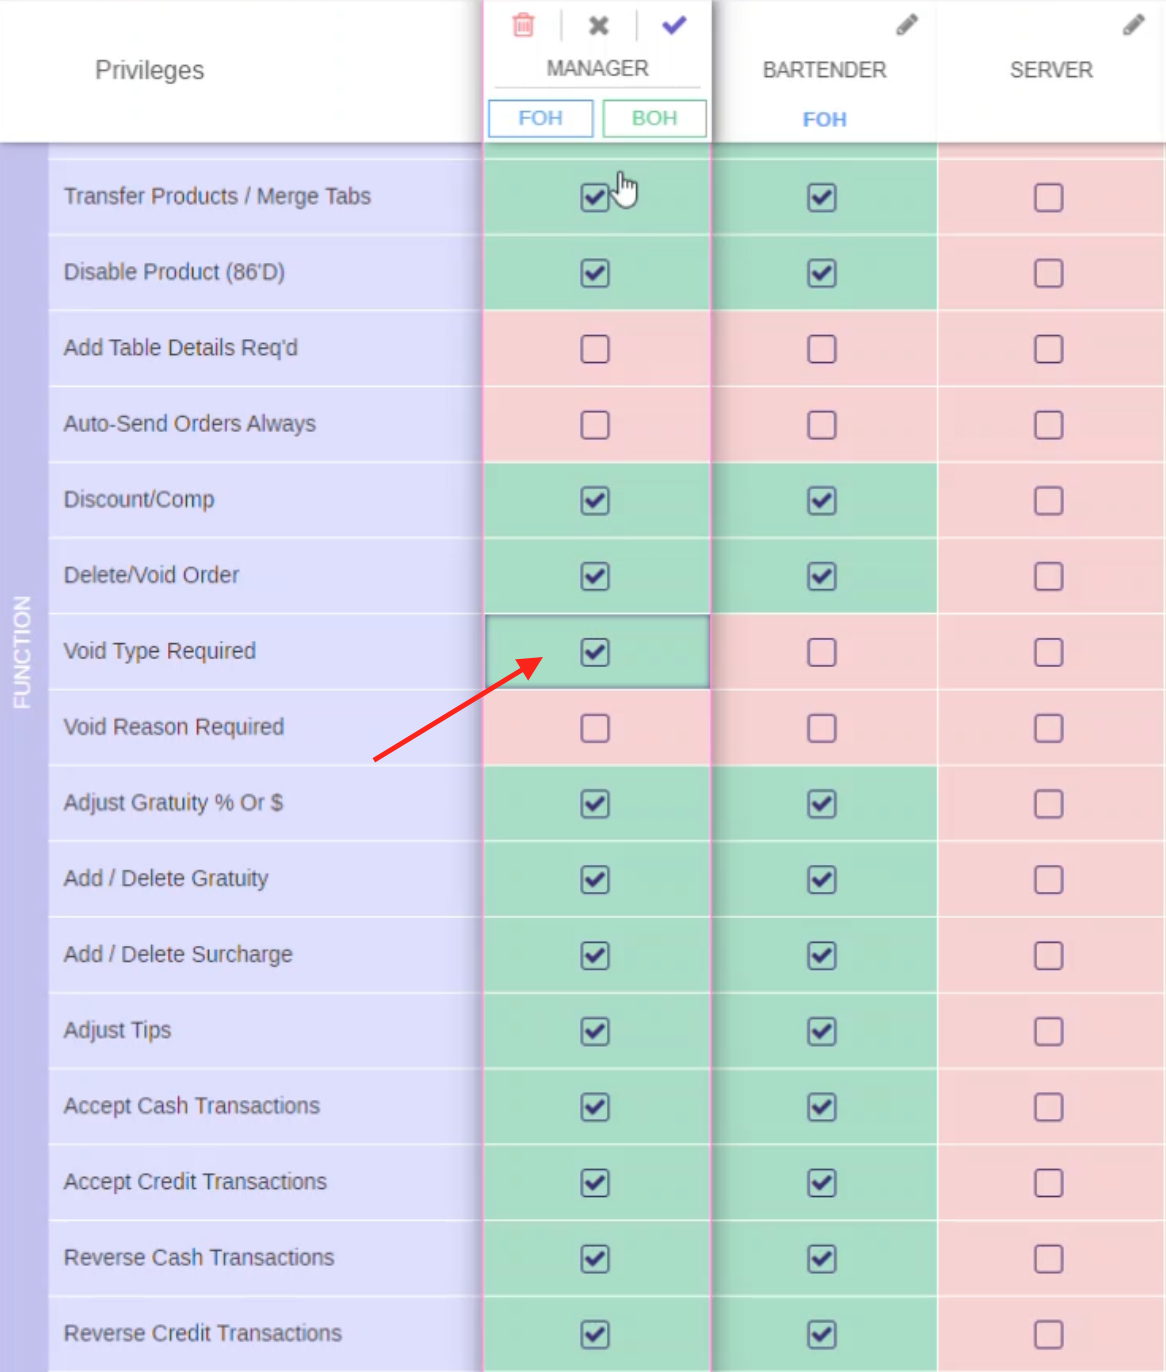
Scroll down to the FUNCTIONS section. There you will find a row labeled DELECT/VOID ORDER, make sure this is checked.

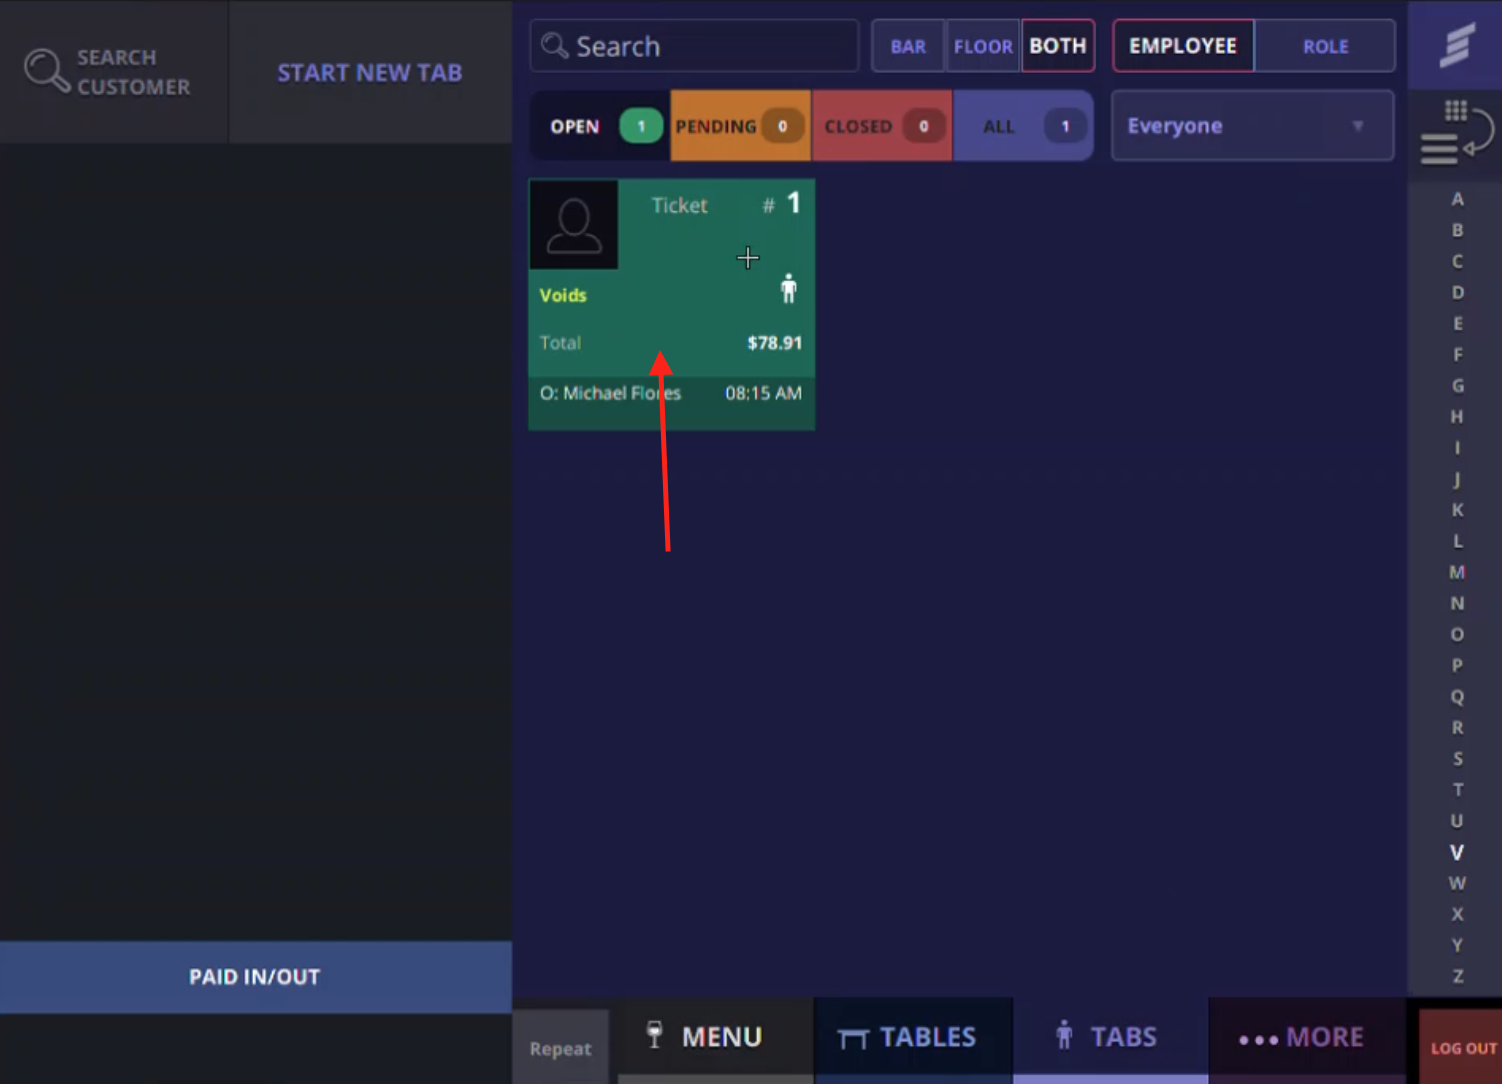
Step 5
To test the checked on privileges log in to the POS terminal and navigate to TABS at the bottom of the screen. Select the tab you wish to void an item on, find an item that needs to be voided, once selected hit the DELETE button at the top of the tab on the top left of the screen. This will successfully void an item from a tab


How to Require A Void Type?
Step 1
Go to the back-end for your venue. In the FUNCTIONS section under the ROLES link you will find a row labeled VOID TYPE REQUIRED, make sure this is checked.
Step 2
Navigate back to your POS terminal and select a tab to void an item from. Select the item you wish to void and hit DELETE, a pop-up will appear and prompt you to choose a void type. Note: make sure you log in and out to update permission changes.


Step 3
Once a void type has been selected hit DONE for the item to be voided.
How to Require A Void Reason?
Step 1
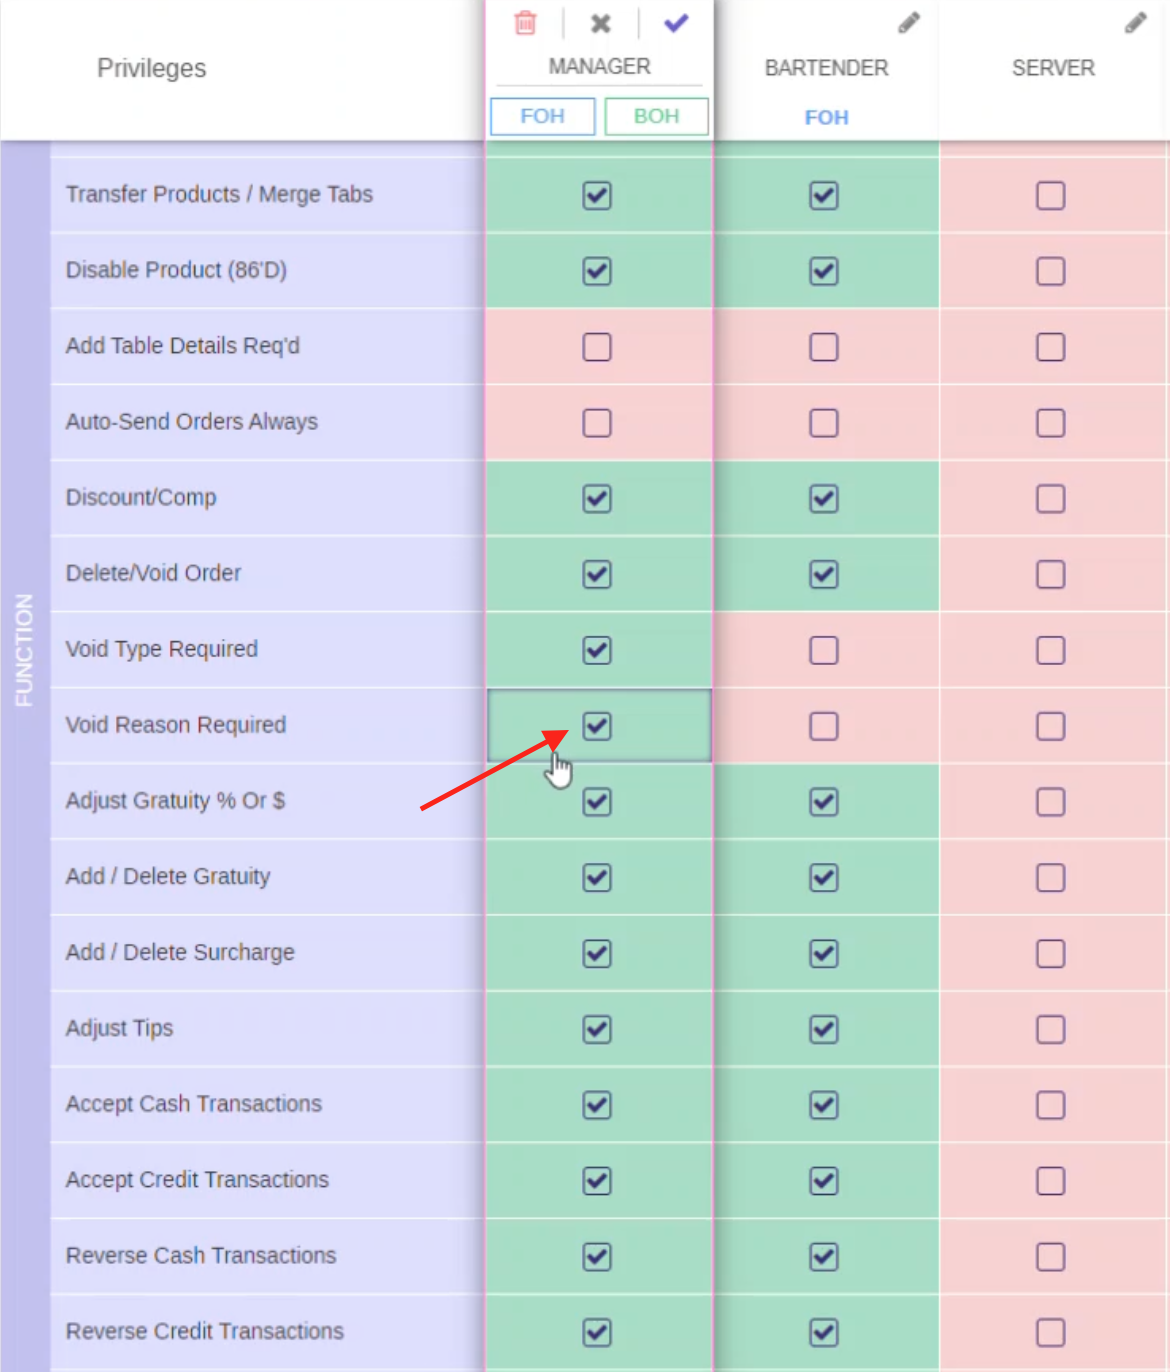
Go to the back-end for your venue. In the FUNCTIONS section under the ROLES link you will find a row labeled VOID REASON REQUIRED, make sure this is checked.
Step 2
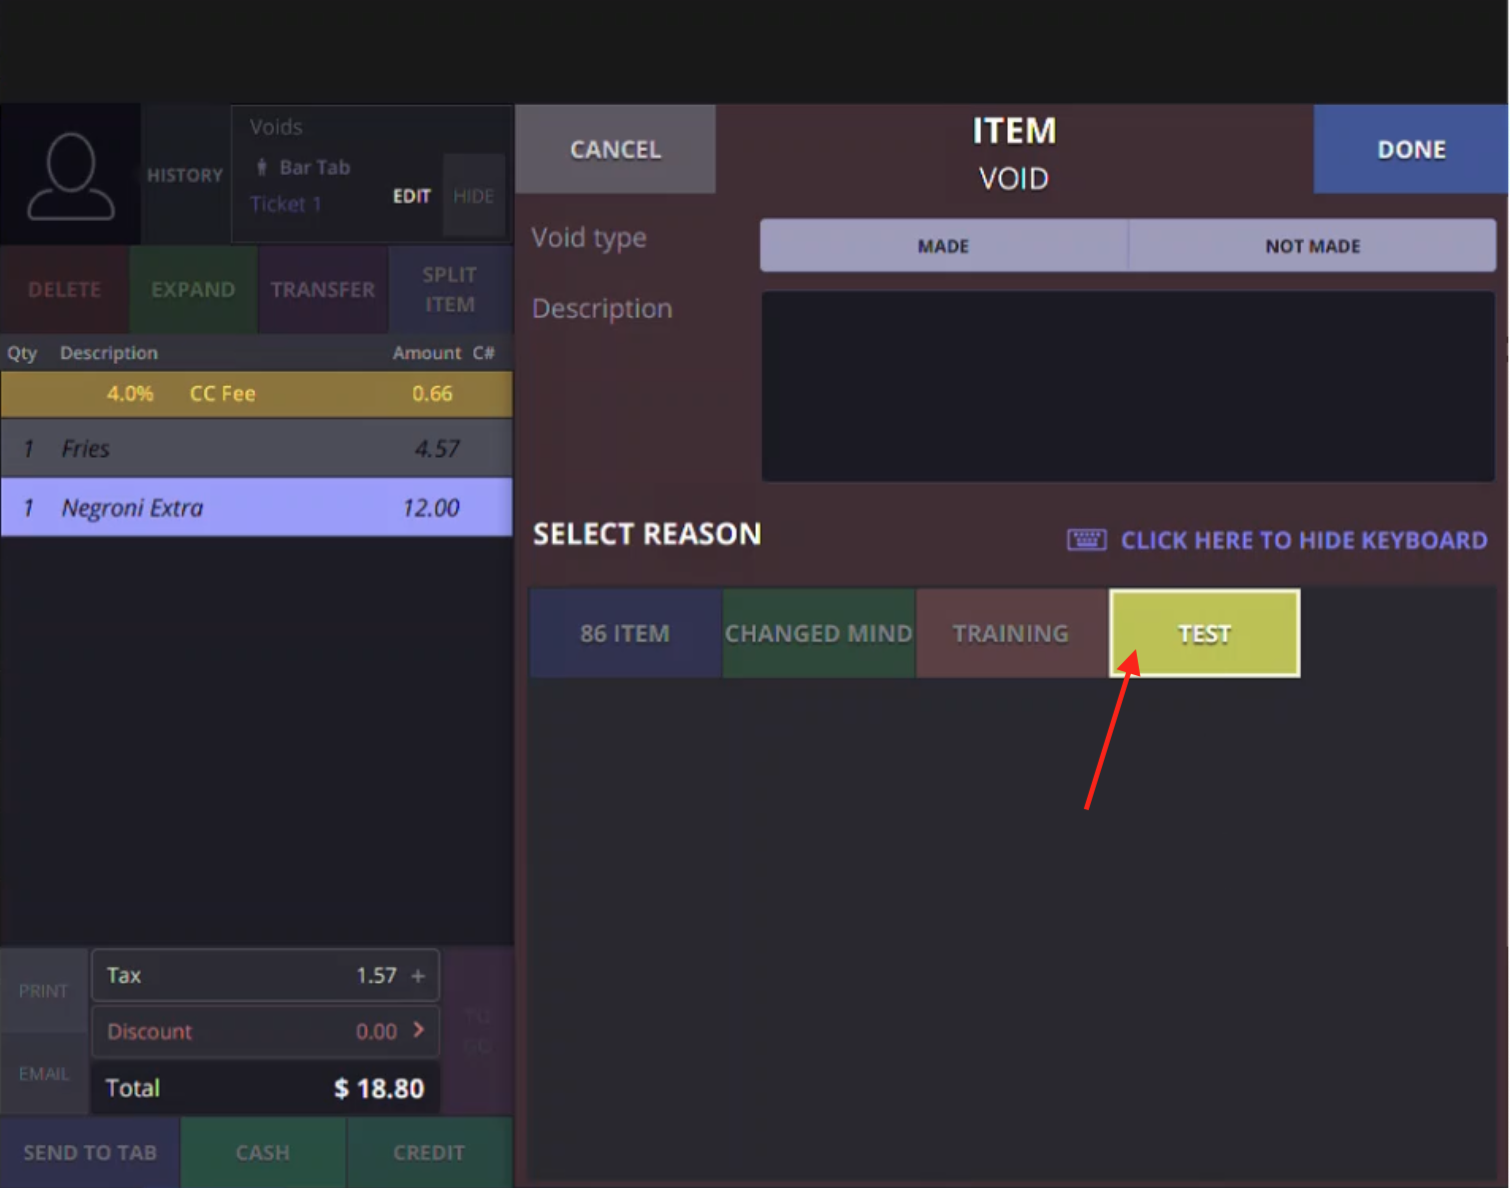
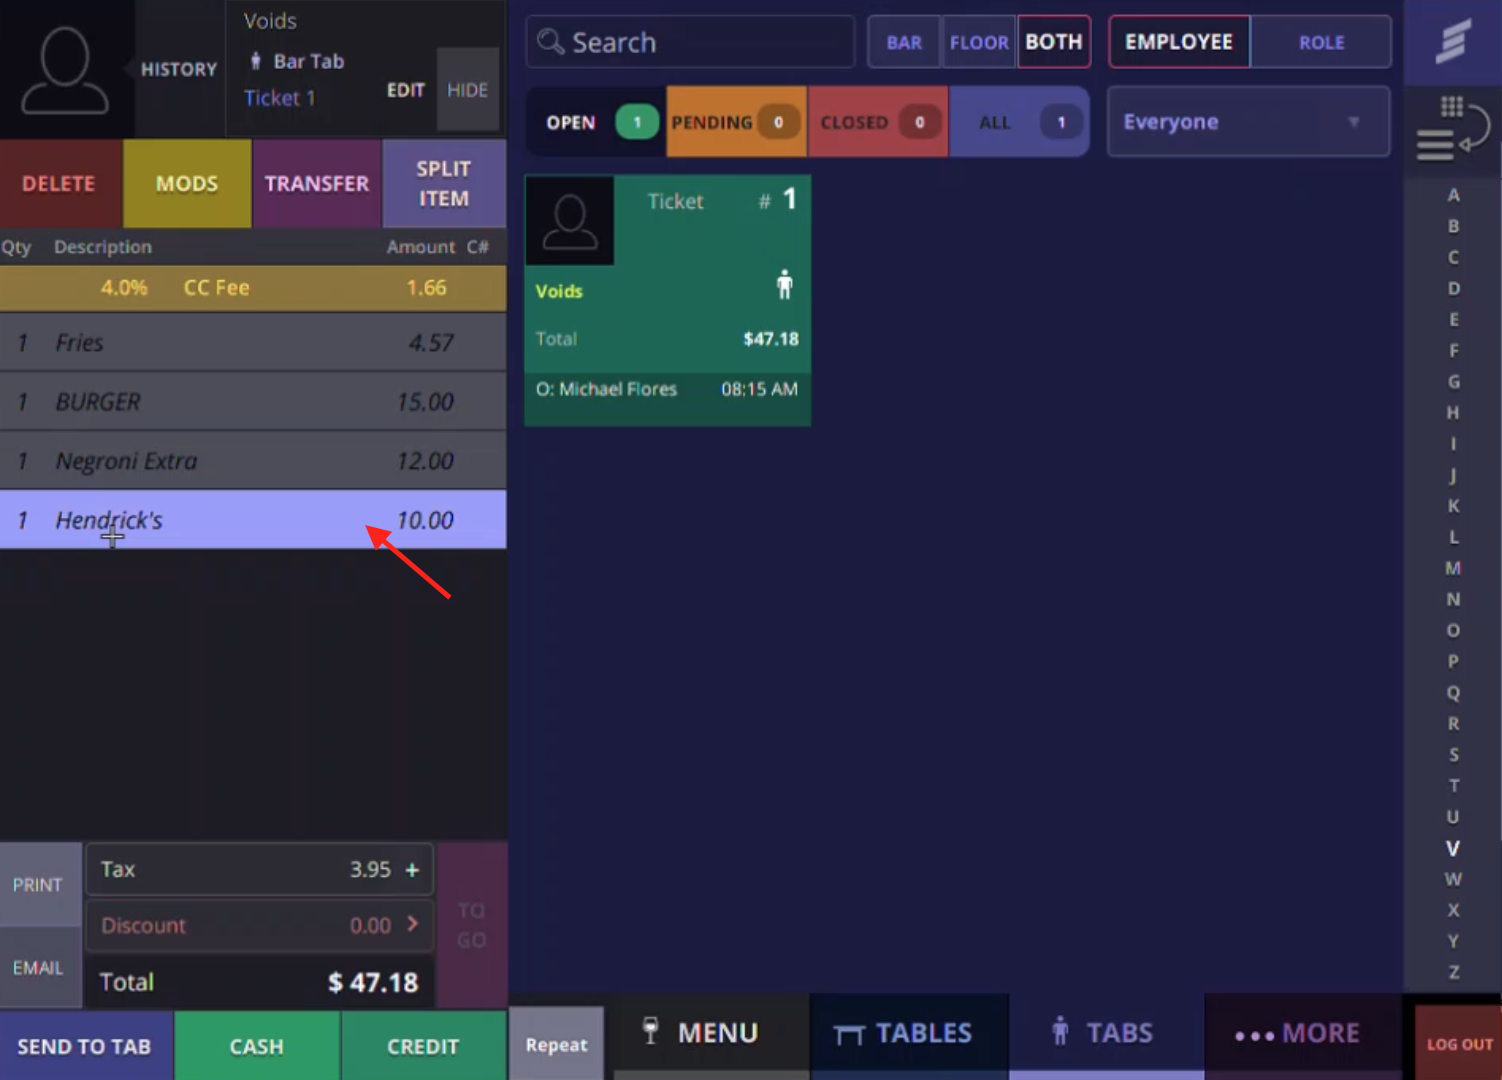
Navigate back to your POS terminal and select a tab to void an item from. Select the item you wish to void and hit DELETE, a pop-up will appear and prompt you to choose a void reason. Note: make sure you log in and out to update permission changes. If you have checked multiple void permissions you will be prompted to make a selection for each prior to completing the function

Step 3
Once a void reason has been selected hit DONE for the item to be voided.
Step 4
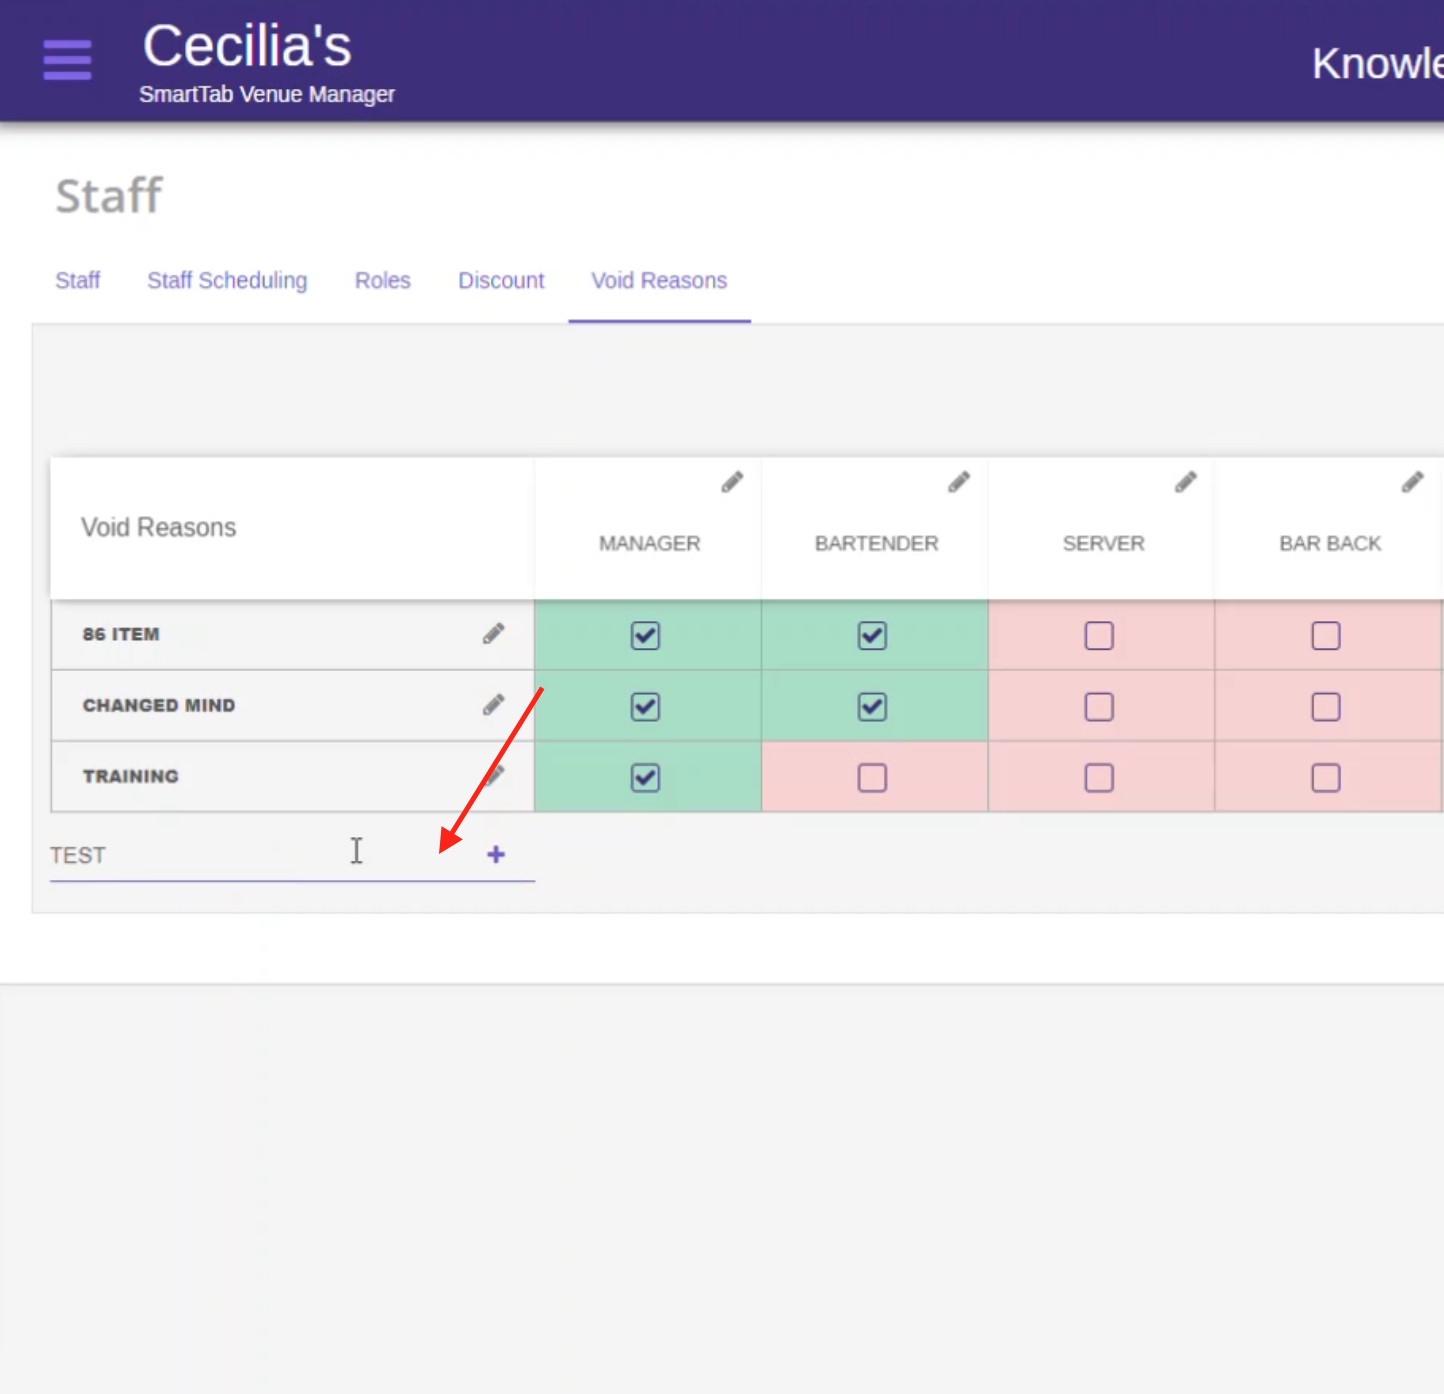
Go to the back-end for your venue and navigate to VOID REASONS link

Step 4
Add reason as needed and hit “+” to add reasons to list.
Step 6
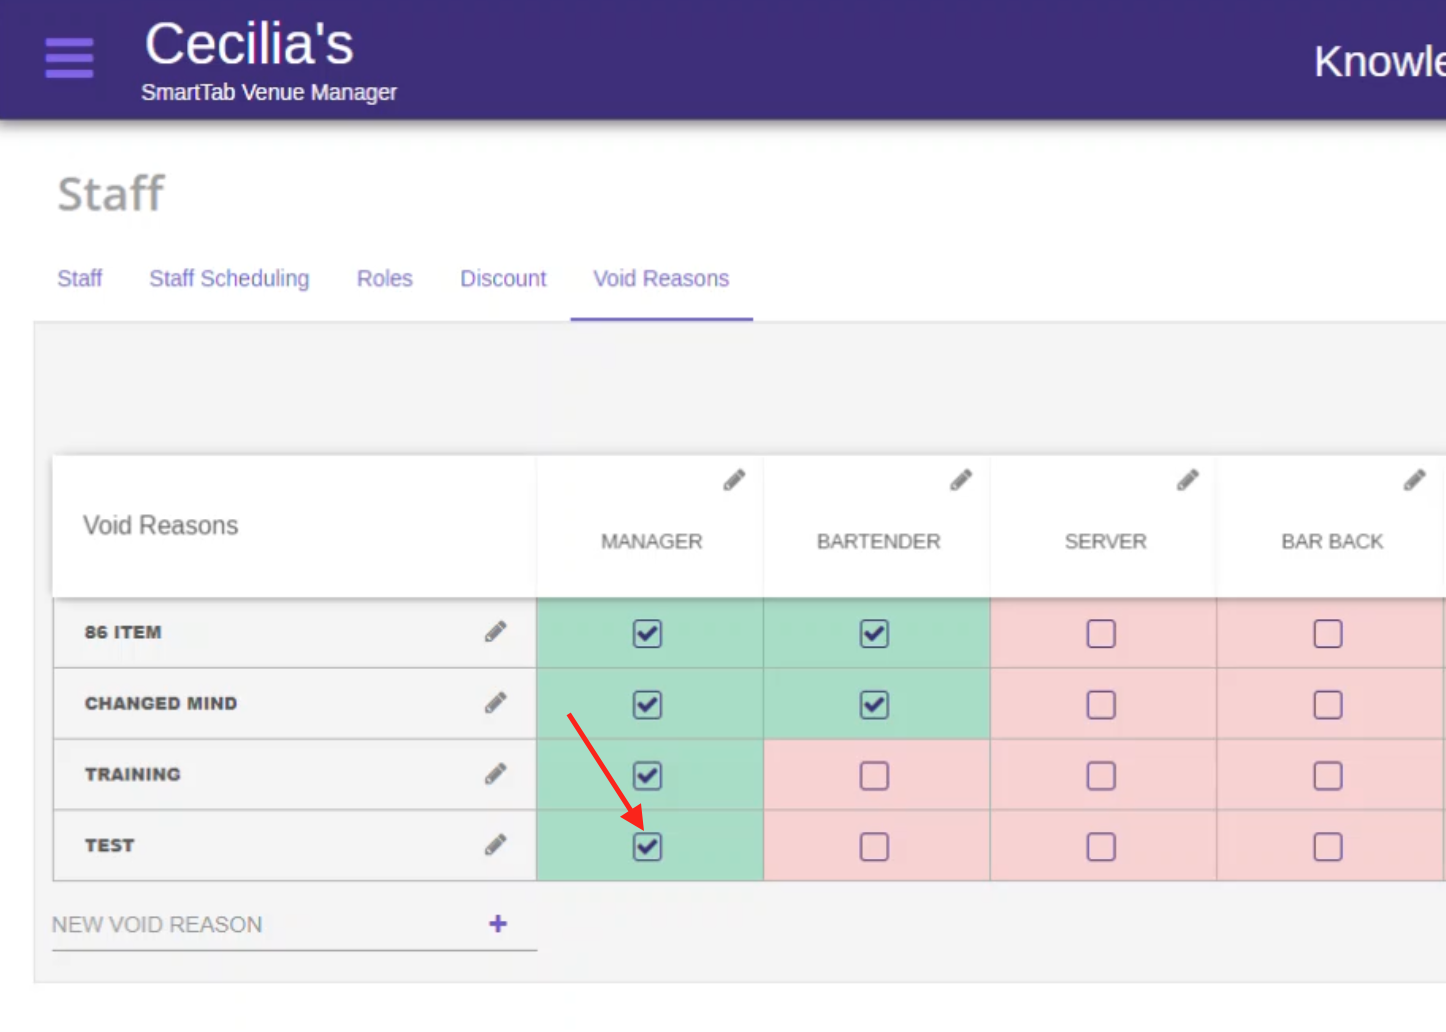
Make sure to check the box under the employee title that has permission to access specific void reasons on the POS terminal.
Step 7
Log out and into the POS terminal. Note: Newly added reasons will now show when attempting to void an item off a tab